


Once again I found myself with overripe bananas just begging to be used. No matter how long I tried to hide them in the refrigerator they just wouldn’t go away or stop yelling at me every time I opened the door.
Today however, I was finally able to silence them. I dug up an older coconut flour recipe that I had been meaning to improve for a while now. The results from the recipe were satisfactory and tasty, but it definitely could be made even better. For me, it has to be perfect. Well, pretty near that anyway. As I wrote earlier in my post about the Coconut Flour Cocoa Banana Muffins, coconut flour baked goods don’t have to be dense and heavy. With just a little of your time, the know-how, and a good recipe, you can make an excellent coconut flour pastry.
But what if you don’t have a good recipe? How do you improve it? Well first off, know what you don’t like about it, then break the recipe down. Take a good look at it. Here I’ll show you by letting you take a look at the original recipe ingredient list and then showing you my improvised version. Why only the ingredients? Because that’s where the problem is. Also, I only use Tropical Traditions’ coconut flour, and can’t guarantee that the recipes developed using our coconut flour would work with a different coconut flour, because they can vary in protein and fiber content. If the problem was in how the recipe was put together it’d be a different thing. So here it is:
- 1 cup organic coconut flour
- 6 eggs
- 2 ripe bananas (mashed)
- 2 tablespoons melted butter
- 2 tablespoons virgin coconut oil
- 2 tablespoons milk
- 3 tablespoons honey
- 1 teaspoon aluminum free baking powder
- 1/2 teaspoon vanilla
- 1/8 teaspoon Himalayan salt
So, we’re looking at a whole cup of coconut flour (which is a very thirsty flour by the way) and only 2 tablespoons of milk as the “thinning” liquid. The fat (butter and coconut oil in this case) are liquids here, but they act differently then water based liquids and don’t help out too much in saturating the flour. The first conclusion is that there isn’t enough liquid. That means the batter is too heavy to rise and “mushroom” over properly, and will therefore be very dense and heavy. It will be moist and pretty tasty though, since the fat amount is perfect.
Another red flag is the sweetener amount. Only 3 tablespoons for 12 muffins isn’t very much. While you don’t want a sickeningly sweet muffin you do want just enough sweetness to bring all the flavors together, instead of leaving it bland. Since we will be increasing the thinning liquid amount, the sweetener will grow blander and will therefore need to be increased as well.
I like my muffins to rise really well (since that is the main downfall of most coconut flour recipes), so I’ll add a bit of baking soda. The coconut flour is a heavy flour, so it usually needs more baking soda/powder to get it to rise. Baking powder has a more neutral taste then baking soda, which needs to be countered by the acidity of another ingredient (here it will be the honey). However, I’ve found that baking powder isn’t as potent as baking soda, so you usually have to use more of it, or add a bit of baking soda to help it out.
So that’s that. The eggs are fine. Leave them be please; every single one of them is needed to make up for the gluten – don’t find out the hard way! Everything else is fine also.
In the end, we get this:
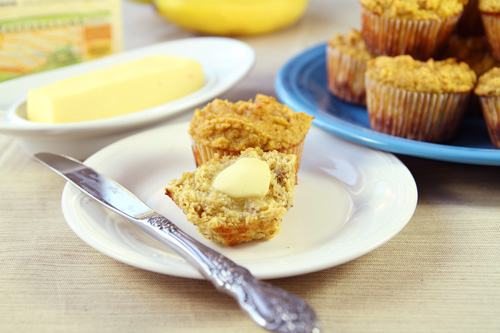 |
| Gluten Free Coconut Flour Banana Muffins |
| Prepared by Sarah Shilhavy, Photo by Jeremiah Shilhavy |
True, they aren’t the prettiest muffins you’ve ever seen, but looks aren’t as important as taste and texture. The tops are a bit irregular, but the muffins rose well and are light and fluffy on the inside, not to mention delicious!
Now take a minute to compare the before and after recipes, and then head off to the kitchen to whip up a batch for yourself. Talk about yum…
Banana Coconut Flour Muffins
Serves: 12 muffins
Preparation Time: 10 minutes
- 1 cup organic coconut flour
- 1/2 teaspoon baking soda
- 1 teaspoon aluminum free baking powder
- 1/8 teaspoon Himalayan salt
- 6 eggs
- 2 tablespoons melted butter
- 2 tablespoons virgin coconut oil
- 3/4 cup milk
- 3 tablespoons honey
- 1 tablespoon brown sugar
- 1/2 teaspoon vanilla extract
- 2 ripe bananas (mashed)
Preheat oven at 350 F degrees.
Sift the coconut flour, baking soda, baking powder and salt together into a small bowl. Set aside.
In a medium sized bowl beat eggs together. And add butter, coconut oil, milk, honey, sugar and vanilla. Whisk together to blend.
Whisk in coconut flour mixture and bananas until well blended. Batter will be thick. Divide batter among the muffin tins lined with paper liners.
Bake in preheated oven for 20 minutes or until toothpick inserted in center comes out clean.
That’s all for now…
Sarah

 (16 votes, average: 4.30 out of 5)


37 Comments