Brian - Admin

About Brian - Admin

Editor - Health Impact News

Mushroom & Red Pepper Mozzarella Omelet

Have you checked out Tropical Traditions’ newest product? It’s eggs, soy free eggs at that! Head on over to Grass Fed Traditions and check them out, just click here.

I know what you’re thinking.

Eggs? Seriously? But…won’t they all break during the shipping process?

Nope! We’ve tested (and then tested some more) and the eggs don’t break. The shells are thick and the eggs are very well packaged. But if some do break, Tropical Traditions will gladly refund or reship.

Have I mentioned how amazing these eggs taste?

I think “yum” and “delicious” don’t even begin to describe them.

When you cook them up into scrambled eggs or into an omelet for breakfast, you just can’t help but notice how rich the orange color of the yolks are, and what a bright, cheerful yellow they remain even when cooked. They won’t turn into a tired, pale white-ish yellow when cooked.

Honestly, I think the word that describes them best is flavorful. They’re not bland and on the tasteless side, making you want to load them with something like ketchup to give them some contrasting pizzazz.

With these you appreciate the subtle yet rich, almost delicate creamy flavor. All they really need is some salt and pepper and butter with a bit of coconut oil to bring out and accent the buttery flavor. But if you really like ketchup on your eggs, then be my guest. Drown them all you like. The tang will accent the creaminess even more.

To showcase these high quality eggs make the Mushroom & Red Pepper Mozzarella Omelet recipe below. It’s delicious, cheesy, fluffy and buttery. Enough said.

Mushroom & Red Pepper Mozzarella Omelet

Mushroom and Red Pepper Mozzarella Omelet photo recipe
Mushroom and Red Pepper Mozzarella Omelet
Prepared by Sarah Shilhavy, Photo by Jeremiah Shilhavy

Serves: 4-5
Preparation Time: 10 minutes

Heat the butter and 2 tablespoons of coconut oil over medium heat in a large skillet until butter begins to bubble. Sauté the mushrooms with a sprinkle of Italian seasoning and garlic powder until caramelized and browned. Remove to a bowl and set aside.

Meanwhile, whisk the eggs and egg yolks together and season to taste with salt and pepper. Add another tablespoon of oil to the pan if needed and heat to a high heat.

Pour egg mixture into the pan. Lift the edges up as it’s cooking and allow the uncooked egg mixture to flow underneath. Flip omelet over to cook on other side.

Spread the mushrooms, red pepper and cheese on half of the omelet, reserving a little bit of the pepper and cheese to garnish the top. Fold over in half and transfer to a serving plate. Garnish and eat.

Enjoy!

Sarah:)

Submit your recipe here!

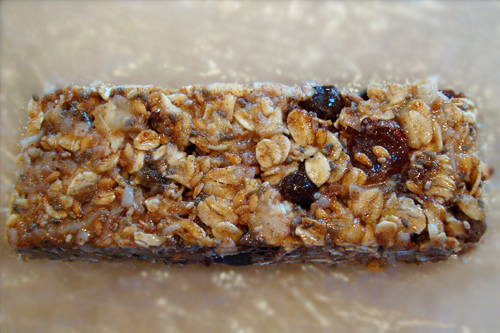
No-Bake Peanut Butter Chocolate Chip Coconut Oil Protein Bars

No-Bake Peanut Butter Chocolate Chip Coconut Oil Protein Bars recipe photo
No-Bake Peanut Butter Chocolate Chip Coconut Oil Protein Bars
Photo by recipe author

Servings: 12
Preparation Time: 5-10 minutes

The following ingredients are optional but I used them all:

Mash the banana with a fork, then add all the remaining ingredients, stir till combined.

Press the mixture into a plastic container with a lid or 8×8 Pan (or use whatever you want, even a cookie sheet with a raised edge will work) and freeze for a few hours.

Remove from freezer and slice into bars. Wrap individually for on the go snacks.

Recipe submitted by Averie, Phoenix, AZ

Submit your recipe here!

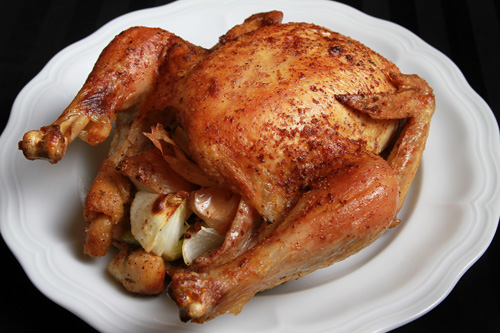
Roast Chicken with Coconut Oil

Roast Chicken with Coconut Oil recipe photo
Roast Chicken with Coconut Oil
Prepared by Sarah Shilhavy, Photo by Jeremiah Shilhavy

Roasting a chicken is easier then you think (if you’ve never made one before). The recipe I have for you today is simple, but it makes one really tasty chicken.

The key is in the basting and roasting. The recipe starts off on high heat, but after a few minutes it comes down to allow the chicken to roast slowly, locking the juices in and resulting in a moist, tender, juicy chicken. Depending on how large the chicken is this will take 1-2 hours to roast, or more. The oven will have something to say about it too.

Basting the bird during the roasting helps it stay moist throughout, especially in the white meat area, as that tends to cook quicker and dry out faster. At first you’ll only have the oil and butter to baste the chicken with, but after about 15-20 minutes or so the chicken will start oozing drippings, perfect for basting back on.

And about the oils, am I sure that’s not too much? YES! It’s not. I like it that way. You will too. The butter and oil infuses so much buttery flavor into the chicken, as well as making the skin turn a crisp, golden brown. Watch the video. You’ll see.

If you want to, cube a few potatoes and roast them with the chicken.

If you want to make gravy though, don’t add potatoes. Potatoes are extremely greedy and gulp all the drippings down. They won’t spare you very much in the way of drippings, if any at all.

So what are you waiting for? Check the video out for a step by step tutorial and make this for your next dinner, along with a side of rice, popovers, or potatoes. I’d do the popovers. They’re perfect for soaking up any extra gravy.

Enjoy!

Sarah:)

Roast Chicken with Coconut Oil

Preheat oven to 425 degrees F.

Remove the giblets and wash the chicken in warm to hot tap water and dry thoroughly. Liberally season the cavity with salt and pepper. Stuff with the onion, celery, and garlic.

Brush melted butter and coconut oil all over chicken and season with salt, pepper and garlic powder. Place in a roasting pan or a 9×13 glass baking pan.

Roast for 11 minutes at 425 degrees F. Reduce the heat to 350 degrees and baste the chicken. Roast for 1 hour or until juices run clear when pricked between the leg and thigh. Baste chicken with pan juices every 10-15 minutes or so, but stop basting around the last 10 minutes. You can increase the temperature to 375 degrees F during the last 1/2 hour or so if you need to “hurry” it up.

Pour pan juices into a small saucepan and add chicken stock or water. Adjust richness by adding more or less stock/water. Make a slurry by adding the corn starch to the water and whisk into the gravy to reach the desired consistency. Add more if needed. Add more stock if needed and whisk and boil until gravy has thickened. Serve with the roasted chicken.

Recipe courtesy Sarah Shilhavy

Submit your recipe here!

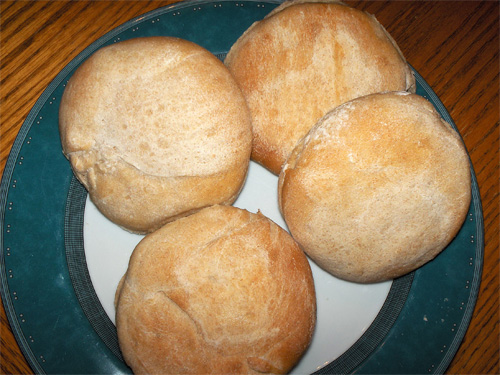
Coconut Oil Sandwich Buns

I make these in a bread machine set on the “dough” setting. They could easily be kneaded by hand, set to rise, punched down and rolled out, then cut.

Coconut Oil Sandwich Buns recipe photo
Coconut Oil Sandwich Buns
Photo by recipe author

Servings: 8-10
90 minutes preparation

1. If using bread machine, put ingredients (except for last 1 tablespoon coconut oil) into machine in the order listed. Select “Dough” setting.

2. When finished, turn out onto a floured board and roll out to 1/2″ – 3/4″ thickness. Cut into 3″ circles (I use a floured large mouth canning jar ring).

3. Place on lightly greased (coconut oil) baking sheet. Brush tops with the remaining 1T coconut oil. Cover and let rise about an hour in a warm, draft free place until doubled.

4. Bake at 350 degrees F for 10-15 minutes, until golden brown. Yield, 8-10 buns.

To make by hand: Mix all ingredients together in a large bowl until a dough forms. Turn out unto a lightly floured work surface and knead until smooth and elastic. Form dough into a ball and place into a lightly oiled bowl, turning once to coat. Cover bowl with a damp towel and place in a warm, draft free place and let rise until doubled (30 minutes to 1 hour). Proceed as recipe states from step 2.

Recipe submitted by Debby, New Milton, WV

Submit your recipe here!

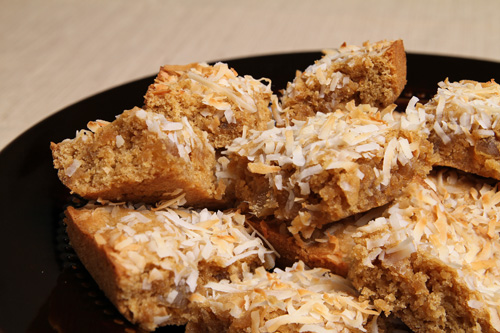
Toasted Coconut Ginger Blondies

Toasted Coconut Ginger Blondies recipe photo
Toasted Coconut Ginger Blondies
Prepared by Sarah Shilhavy, Photo by Jeremiah Shilhavy

Preheat oven to 350 degrees F (180 degrees C). Lightly grease an 8×8 baking pan with extra fat of choice.

Sift the sifted flour, salt, baking powder and baking soda together into a small bowl. Stir in the crystallized ginger.

Melt fat of choice gently over low heat in a medium sized saucepan. Whisk in brown sugar, mixing well. Let cool slightly if warm.

Whisk egg and vanilla extract into the sugar mixture. Mix in flour mixture in stages until well combined.

Spread batter into prepared pan and sprinkle flaked coconut on top. Bake for 15-25 minutes.

Recipe Submitted by Sarah Shilhavy

Submit your recipe here!

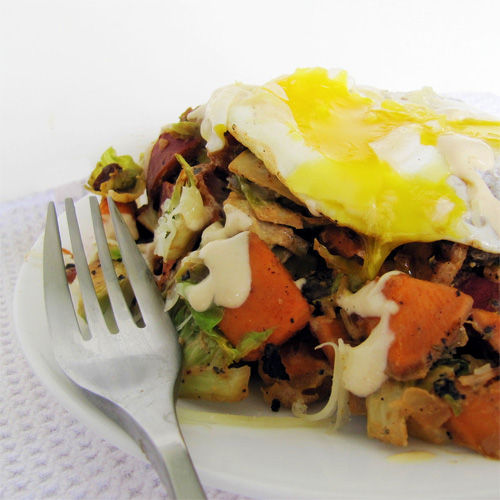
Coco-NUT-ty Sweet Potato & Brussels Hash

Coco-NUT-ty Sweet Potato & Brussels Hash recipe photo
Coco-NUT-ty Sweet Potato & Brussels Hash
Photo by recipe author

Servings: 1 hungry person
Preparation Time: 20 minutes

  • 1/2 cup Coconut Peanut Butter cottage cheese blend (recipe to follow)
  • 1 large sweet potato, cubed
  • 1 cup brussel sprouts, quartered
  • olive or coconut oil
  • 2 cloves garlic
  • 1/2 large onion, diced
  • 2-3 mushrooms, chopped
  • salt and black pepper
  • balsamic vinegar
  • handful dried berries (or raisins, or craisins)
  • 1 large egg
  • handful cheddar cheese

Coconut Peanut Butter cottage cheese blend:

1. First you have to make the CocoNUTty part of this dish. Just blend all the ingredients for the Coconut Peanut Butter cottage cheese blend together. I just gave ratios so you can make as little or as much as you want. I made a big batch, and stored it in an empty salsa jar.

2. I put a pot of water to boil and then threw the sweet potato cubes in there, and boiled it for about 4 minutes. Then I threw the brussel sprouts in and cooked it all for another 1-2 minutes. Drain, and set aside.

3. Next, heat oil in a large skillet. Cook the garlic, onions, and mushrooms together. Season lightly with salt and pepper. Increase the heat to high. Toss in the brussel sprouts and sweet potato and dried berries with a splash of balsamic vinegar, and cook over high heat.

4. In the meantime, in another skillet, fry up an egg to your desired doneness. When the brussel sprouts and sweet potato have a bit of sear to them, turn off the heat. Stir in a few dollops of the coconut PB cottage cheese blend; stir to coat.

5. Ladle the hash onto a serving dish. Top with runny egg, sprinkle with cheese, and drizzle more of that Coconut Peanut Butter blend on top.

Recipe submitted by Sophia, Los Angeles, CA

Submit your recipe here!

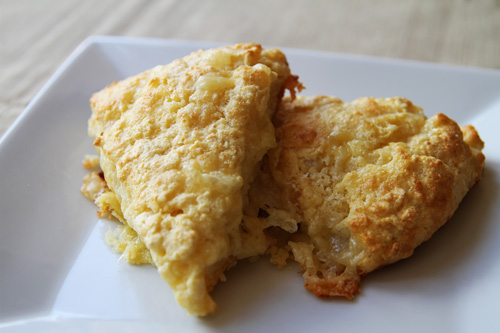
Savory Cheese Scones with Coconut Flour

Scones are such a delicious treat for breakfast or lunch…or dinner. It’s more of a breakfast pastry though, and can be either sweet or savory. I have a savory recipe for you today.

The key to keeping these scones fluffy, tender and moist is in minimal handling of the dough. Cut the very cold butter in just until it is in pea size-ish clumps, not until the flour looks like crumbs. Work the dough just until the excess flour is incorporated, adding a bit of milk if needed.

My scones are never dry. These scones are moist, tender, fluffy, and sooo cheesy! They’re delicious! The not-so-secret ingredient in this recipe is the sour cream. It keeps the scone just as described.

I’ve added coconut flour for extra flavor and fiber. You can use whole wheat pastry flour in place of the all purpose flour if you like. The best results I’ve had were when I used one cup of the whole wheat and a half cup of the all purpose. But it’s totally up to you: give or take. Just keep in mind that when you use whole wheat flour, you’ll have to increase the amount of milk, as it’s a pretty thirsty flour.

Oh, and a tip for getting the butter really cold? Stick it in the freezer for a few minutes. Do that first thing, even before you preheat the oven. By the time you’ve preheated the oven, assembled your ingredients, and whisked the dry stuff together, it’ll be perfectly cold.

Humm….am I making this sound complicated? Seriously, it’s not! Scones are actually pretty easy to make – like baking powder biscuits. Baking powder biscuits are easy to make, right?

Right.

Well, that’s all for now. Have a question? Something to say? Drop me a comment below!

Sarah:)

Savory Cheese Scones with Coconut Flour

Savory Cheese Scones with Coconut Flour recipe photo
Savory Cheese Scones with Coconut Flour
Prepared by Sarah Shilhavy, Photo by Jeremiah Shilhavy

Servings: 8 scones
Preparation Time: 15 minutes

  • 1 1/2 cups all-purpose flour*
  • 1/4 cup coconut flour
  • 1 tablespoon sugar
  • 4 1/2 teaspoons baking powder
  • 5 tablespoons salted butter, very cold
  • 5-6 ounces cheese, cut into tiny cubes
  • 1/2 cup plus 2 tablespoons milk
  • 1/3 cup sour cream
  • 1 egg
  • 1-2 tablespoons milk or water

Preheat the oven to 400 degrees F.

Whisk the flours, sugar, and baking powder in a medium sized bowl.

Cut butter in using a pastry blender or your hands just until it is in pea sized clumps (or a bit bigger, just don’t over-do it). Stir in the cheese cubes.

Mix the milk and sour cream together and pour into the dry ingredients all at once. Stir gently until blended. Add a bit more milk if needed. (You can knead the dough on a work surface instead of stirring in the bowl if desired. Either way, keep the handling of the dough to a minimum. Overworking the dough = yuck!)

Dump the dough unto a work surface while there is still a little un-absorbed flour left. Pat into a fat circle, flip over, and pat the circle out to 3/4-1/2 inch thickness. Cut into 8 wedges.

Arrange scones in a circle on an ungreased jelly roll pan, placing them fairly close together. Beat egg and milk/water together and brush over the scones. Let rest for 5-10 minutes.

Bake scones for 15-20 minutes, or until the tops and bottoms are a light golden brown. Enjoy while hot!

*You may use half or all whole wheat pastry flour for the all purpose. Add more milk as needed.

Recipe courtesy Sarah Shilhavy

Submit your recipe here!

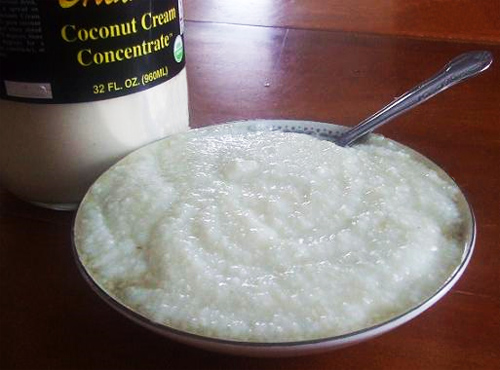
Coconutty Creamy Grits

Coconutty Creamy Grits recipe photo
Coconutty Creamy Grits
Photo by recipe author

Servings: 1 serving
Preparation Time: 15 minutes

In a small saucepan, add salt to water and dissolve. Heat water to boiling. When boiling, stir in coconut cream concentrate. Sprinkle grits over coconut cream ‘milk’, stirring with a whisk to make sure there are no clumps.

Cook for 3-4 minutes, until grits are soft and of a creamy consistency; remove from heat. Serve with coconut oil (or butter) and honey to taste.

For-The-Crowd Servings

For 4 servings – use 3 cups of water to 3/4 cup grits, and 1/4 teaspoon salt

For 6 servings – 4 cups of water to 1 cup of grits and 1/2 teaspoon salt.

Recipe submitted by Ra’chel, South Whitley, IN

Submit your recipe here!