Brian - Admin

About Brian - Admin

Editor - Health Impact News

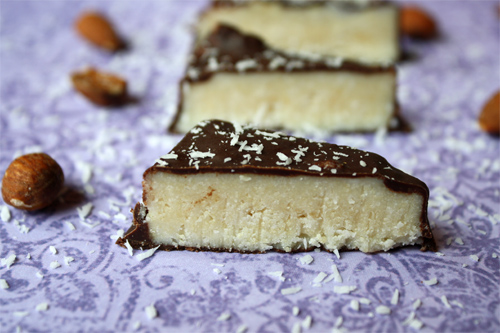
Healthy Mounds or Almond Joy Bars

Healthy Mounds or Almond Joy Bars photo
Healthy Mounds or Almond Joy Bars
photo by recipe author

Servings: 10 large bars
Preparation Time: 20 minutes

Coating:

In a food processor, put the filling ingredients and blend 1-2 minutes until well incorporated and smooth. Taste for sweetness, add more if you like. It is necessary the coconut oil be soft or melted so the mixture blends.

Line an 8 x 8 or similar sized pan with waxed paper or parchment. Pour the mixture in and spread around evenly. If you would like to use almonds, now is the time. Press them in! Place the pan in the fridge or freezer to speed the solidifying process.

Meanwhile, melt your chocolate with the coconut oil. Once solid, lift the whole chunk out by lifting the paper. Cut into desired shapes. Dip each piece in the chocolate, letting the excess drip back before laying it on a silpat, parchment, or waxed paper to solidify. Store in an airtight container on the counter or in the freezer. Unlike most coconut oil delicacies, these are solid at room temp and travel well out of refrigeration.

Recipe submitted by Tessa, Hillsboro, OR

Submit your recipe here!

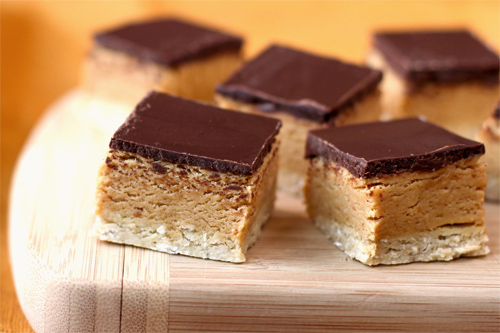
Peanut Butter & Dark Chocolate Shortbread Protein Bars

Peanut Butter and Dark Chocolate Shortbread Protein Bars photo
Peanut Butter and Dark Chocolate Shortbread Protein Bars
photo by recipe author

Servings: serves 9-16
Preparation Time: 1 hour, 10 minutes

Shortbread Crust:

  • 96g (1 cup) rolled oats (old-fashioned, gluten free if you like), blended to a flour
  • 48g (1 1/2 scoops) vanilla protein powder
  • 1/8 teaspoon salt
  • 105g (1/4 cup + 1 tablespoon) brown rice syrup, warmed
  • 28g (2 tablespoons) coconut oil
  • 1/4 teaspoon butter extract
  • 1/2 teaspoon hazelnut extract
  • 1/2 teaspoon stevia extract

Peanut Butter Filling:

  • 256g (1 cup) raw, natural peanut butter
  • 189g (1/2 cup + 1 tablespoon) honey
  • 1/2 teaspoon Stevia Extract
  • 96g (3 scoops) natural vanilla custard protein powder
  • pinch of salt

Chocolate-Peanut Ganache:

Directions (for the shortbread crust):

1. Line a square brownie pan with parchment paper both ways for easy removal later

2. Mix together the blended oats, protein powder and salt, then add in the brown rice syrup, coconut oil, butter/hazelnut/stevia extract. Stir until everything is incorporated and even (you can use a hand mixer and a large bowl if you like)

3. Press the mixture down into your brownie pan until every corner is even in height. This batter makes just enough to fit the bottom of the pan. Refrigerate for 20-30 minutes, or until firm and dry

Directions (for the peanut butter filling):

1. In a large bowl, add the peanut butter, honey and stevia extract and stir. Add in the protein powder and pinch of salt and stir until combined (you can use a hand mixer for this too). It should look like a big, soft blob of peanut butter play-doh

2. Press this onto the shortbread crust until even in height. I would suggest using a pastry roller if you have one, but I used a rubber spatula. Refrigerate for 20-30 minutes, or until firm

Directions (for the chocolate-peanut ganache):

1. Break up the chocolate into pieces, and melt.

2. Add the peanut butter and stir in until melted and incorporated

3. Add the stevia extract five drops at a time, stirring after every 5 drops (too much at a time or too much in general will seize the chocolate).

4. Pour the mixture over the peanut butter layer (if the chocolate is too hot, let it cool a little bit) and spread until even. Refrigerate until the chocolate has just barely hardened, then take it out and slice (this allows the chocolate so slice in nice lines rather than break, which happened to me because I refrigerated it overnight and then sliced them). Store in the refrigerator.

5. To serve, take out of the refrigerator to soften for 10 minutes, EAT!

Recipe submitted by Jessica, AZ

Submit your recipe here!

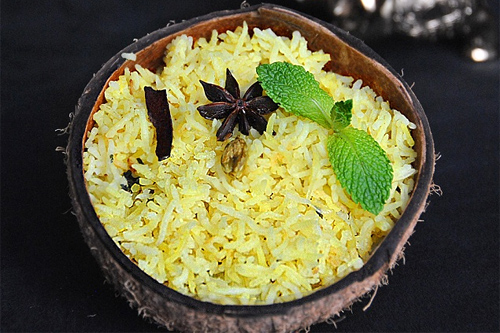
Coconut Pilau

Coconut Pilau photo
Coconut Pilau
photo by recipe author

Servings: 2-3
Preparation Time: 1 hour

  • 1 cup dried unsweetened shredded coconut
  • 2 cups warm water
  • 1 1/2 cups uncooked Basmati or long grain rice
  • 1 tablespoon virgin coconut oil
  • 1 2 inch cinnamon stick (Dalchini), broken
  • 3 clove buds (laung)
  • 4 green cardamom (choti elaichi), crushed
  • 1 star anise (Chakra phool/Anasphool)
  • 1 bay leaf (Tej patta)
  • 1/2 teaspoon cumin seeds (Jeera)
  • 1/2 teaspoon fennel seeds (Saunf)
  • 1/4 cup onions, thinly sliced
  • 2 green chilies, slit
  • 1 tablespoon ginger-garlic paste
  • 1/2 teaspoon turmeric powder
  • Salt to taste
  • 1/4 packed mint leaves (Pudina), roughly chopped
  • 1 tablespoon coconut flakes for garnish *optional
  • 1 tablespoon Golden raisins *optional
  • Fried shallots for garnish *optional

To make coconut milk – Blend warm water and dried coconut in a blender. Extract the milk in a bowl using a strainer or a cheesecloth. Add more water if needed and squeeze to make 3 cups of coconut milk. This milk can be made ahead and stored in the refrigerator for 3 days. Since there is no preservative or stabilizers added to the milk, the fat may separate on top of the liquid if left to sit. This is normal. Shake well and mix it back.

Stove top method

1. Wash uncooked rice under running water and keep aside.

2. In a deep sided pot, heat coconut oil over medium-high heat. Add whole spices (cinnamon, cloves, cardamoms, star anise, bay leaf, cumin seeds, fennel seeds). Sauté for a minute or till your kitchen wafts with the sweet aroma of the spice infused coconut oil.

3. Add sliced onions and slit green chillies. When the onions turn golden brown and translucent, add the ginger-garlic paste and sauté till the raw smell disappears. Add turmeric powder and salt as per preference.

4. Add uncooked basmati rice and mix gently. The oil should coat the rice grains. Take care not to break the rice grains while mixing the oil and the rice. Stir occasionally to keep the rice from sticking to the bottom of the pan.

5. Pour the freshly prepared coconut milk into the pot. Add mint leaves and bring the coconut milk to a gentle boil.

6. Stir once and cover pot tightly with a lid. Do not lift the lid to retain the steam inside the pot. Let simmer on medium heat for 15-20 minutes or till the liquid has been absorbed by the rice. Cooking time depends on the variety of rice. Check the rice container for instructions.

7. To check doneness, fluff rice with a fork. Each grain should be soft and should not be clumped. Coconut milk has oil in itself which acts as an emulsifier to prevent clumping of the rice.

8. Remove pot from heat, but keep the lid on till you serve. Remove whole spices before serving. Garnish with roasted cashewnuts and golden raisins and serve hot with your favorite curry.

Rice cooker method

1. Follow the above mentioned steps 1, 2, 3, 4 and 5. Place all in the rice cooker. Cover and set to cook.

2. Once the rice cooker switches to ‘warm’ mode, let it stand for another 8 minutes. Fluff the rice with a fork and keep it unclumped. Garnish and serve hot.

Coconut milk gives mild sweetness and fragrant aroma. Use of extra virgin coconut oil adds natural flavor with health benefits. Freshly made coconut milk and coconut oil is essential for this recipe. Try not to substitute any other oil in place of coconut oil.

Recipe submitted by Cheryl, Columbus, OH

Submit your recipe here!
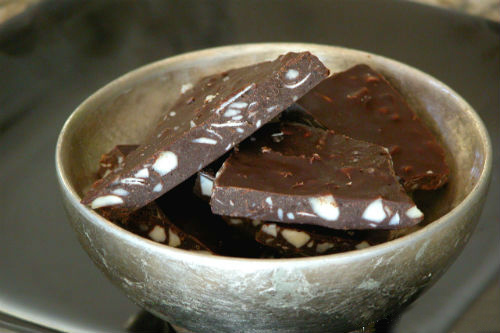
Chocolate Coconut Macadamia Nut Bark

Chocolate Coconut Macadamia Nut Bark photo
Chocolate Coconut Macadamia Nut Bark
photo by recipe author

Servings: 8
Preparation Time: 10 minutes

1. Place a glass mixing bowl over a saucepan of simmering water and add chocolate and coconut oil.

2. Once everything has melted, remove from heat and add in the nuts, coconut and sweetener.

3. Mix well and pour onto a parchment lined cookie sheet.

4. Place in the freezer to set. Once it has hardened, break into pieces.

Quick notes:

If you are using a dry sugar to sweeten, I would “powder” it in a coffee grinder or blender or it will be gritty

Variations:

You could use almonds instead of macadamia nuts.

Recipe submitted by Kate, Highlands Ranch, CO

Submit your recipe here!

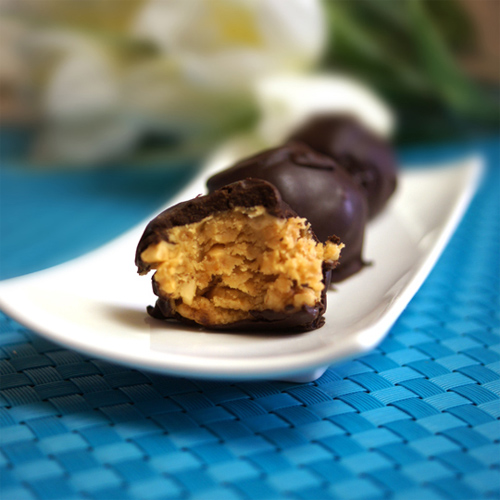
Healthier Peanut Butter Balls

Healthier Peanut Butter Balls photo
Healthier Peanut Butter Balls
photo by recipe author

Servings: 20 pieces
Preparation Time: 1 hour total

For peanut butter filling:

For chocolate coating:

In a medium bowl, mix together the peanut butter, honey and a pinch of sea salt. Add in the coconut flour gradually– starting first with a 1/4 cup, then adding it in a tablespoon at a time until a “dough” forms. I ended up using a 1/2 cup of coconut flour, but it may vary depending on the texture of your peanut butter.

Using a cookie scoop, drop the dough by rounded tablespoons onto a pan lined with parchment paper. (Roll with your hands to make them smooth, if you like.) Place them in the freezer to set for 30 minutes.

After 30 minutes, melt the chocolate together with the coconut oil. (I used an oven-safe bowl– 5 minutes at 400F– but any method works!)

Remove the peanut butter balls from the freezer, and dip each one into the melted chocolate mixture, coating each one thoroughly. Return the chocolate-covered balls to the parchment paper to set. There will inevitably be some areas that won’t get covered (where your fingers touched), so feel free to spoon some extra chocolate over the tops when they’ve all been dipped!

Return the balls to the freezer to set for another 30 minutes, then serve. They are delicious when served cold, or at room temperature!

I recommend storing them in the fridge or freezer for longer shelf-life.

Recipe submitted by Megan, Glendale, CA

Submit your recipe here!

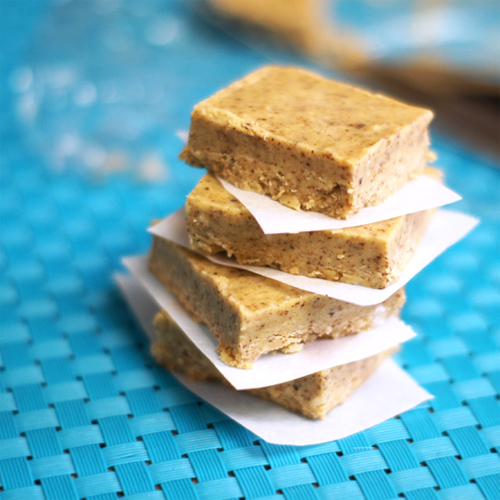
Almond Butter Freezer Fudge

Almond Butter Freezer Fudge photo
Almond Butter Freezer Fudge
photo by recipe author

Servings: Fills an 8″x8″ pan
Preparation Time: 10 minutes + 1 hour chill

  • 2 cups raw creamy almond butter (unsalted)
  • 1/2 cup coconut oil, softened
  • 3 tablespoons raw honey
  • 1 teaspoon fine sea salt

Simply mix all the ingredients together in a medium bowl, until smooth and creamy.

(Tip: It helps if all the ingredients are at room temperature, to keep the coconut oil soft!)

Transfer the mixture to a square baking dish, or container, lined with parchment or wax paper, then smooth with a spatula, and freeze until solid (about an hour). Remove the fudge by lifting the paper out of the pan, then cut into squares and serve immediately.

Due to the nature of coconut oil, this fudge will melt if left at room temperature for long. Store in the freezer for best results!

Recipe submitted by Megan, Glendale, CA

Submit your recipe here!

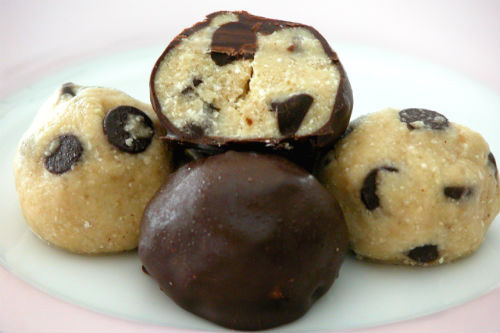
Chocolate Chip Cookie Dough Truffles

Chocolate Chip Cookie Dough Truffles photo
Chocolate Chip Cookie Dough Truffles
photo by recipe author
  • 1 cup almond flour*
  • 1/4 cup vanilla protein powder, or additional almond flour
  • 1/4 teaspoon salt
  • 1/4 cup powdered whole sugar or honey (adjust to taste)
  • 1/4 cup coconut oil, melted (refined for no flavor, virgin for coconut taste)
  • 1 tablespoon coconut milk** (omit if using honey or other liquid sweetener)
  • 1 1/2 teaspoons vanilla extract
  • 1/4 cup dark chocolate chips

Chocolate Coating:

1. Mix flour, protein powder, salt and sweetener in a bowl.

2. In a smaller bowl, mix all wet ingredients and pour into the dry and mix well.

3. Fold in the chocolate chips.

4. Roll into inch sized balls and place on a plate or lined cookie sheet.

5. Place in the freezer for 30 minutes.

Chocolate Coating (optional):

1. In a double boiler or saucepan placed over simmering water, melt the chips and coconut oil.

2. Once melted, remove from heat and dip each ball into the chocolate with a spoon and return to plate or cookie sheet.

3. Place the balls back into the freezer for the chocolate to harden, and store in the fridge or freezer.

*You can grind your own almond flour by placing whole almonds in a blender/food processor and blending until you get a fine meal.

* For the freshest coconut milk make homemade coconut milk. (See video at this link.)

Recipe submitted by Kate, Highlands Ranch, CO

Submit your recipe here!

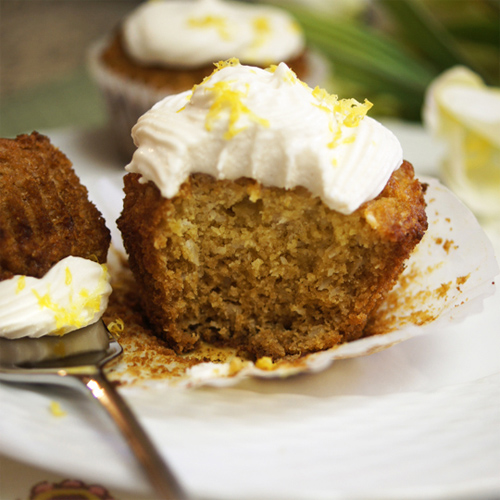
Lemon Coconut Frosting

Lemon Coconut Frosting photo
Lemon Coconut Frosting
photo by recipe author

Servings: 1 cup
Preparation Time: 10 minutes + 6 hrs chill

Combine all ingredients in a blender and blend until thick and creamy, about 1-2 minutes. Transfer to a bowl, and allow to set in the fridge for 6 hours. It will thicken up with chilling!

Note: Measure your coconut flour by scooping the measuring spoon into the bag, then leveling off each tablespoon using a knife. Coconut flour is very absorbent, so you want to make sure you measure it correctly!

Also, don’t be tempted to skip the blender. I’ve tried whisking this mixture together by hand, and it will NOT work.

Spread onto your favorite cakes, or cookies, and enjoy!

Recipe submitted by Megan, Glendale, CA

Submit your recipe here!