Brian - Admin

About Brian - Admin

Editor - Health Impact News

No Cook Chocolate Coconut Bites

This is such an easy treat. You just throw everything into a blender and blend! How much easier can it get? (It can’t).

I have a few tips though.

#1: If you like your sweets really sweet, up the amount of dates to taste.

#2: Increase/decrease cocoa powder as you like it.

#3. Leave the vanillas be or else it’ll be awful.

Kidding. You can use all vanilla extract if you want but I highly recommend using vanilla powder. You’ll love it, trust me.

Now I know some of you are going to want cup measurements. Frankly, I can’t give you exact volume measurements because it’s pretty much impossible to find it. But roughly there’s: 1 1/2 cup dates and 3/4 cup nuts. Roughly being the key word here.

One more thing: these are addictive. Doesn’t matter if you like neither dates or nuts. Just try one.

Comments? Questions? Let me know!

Enjoy!

Sarah

No Cook Chocolate Coconut Bites
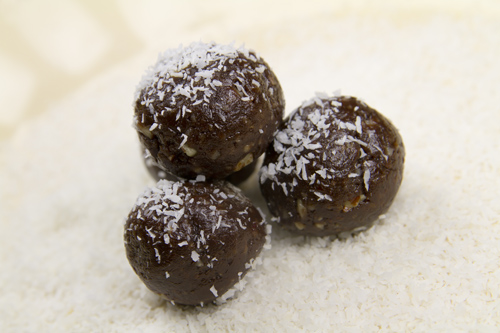
No Cook Chocolate Coconut Bites photo
No Cook Chocolate Coconut Bites
Prepared by Sarah Shilhavy, Photo by Jeremiah Shilhavy

Servings: 4
Preparation Time: 3 minutes

Place all ingredients into a blender/food processor and blend until mixture forms into a dough like consistency. There will still be little chunks of nuts. Scrape down edges of blender/food processor as needed.

Roll into little balls and chill. Eat!

Recipe courtesy Sarah Shilhavy


Submit your recipe here!

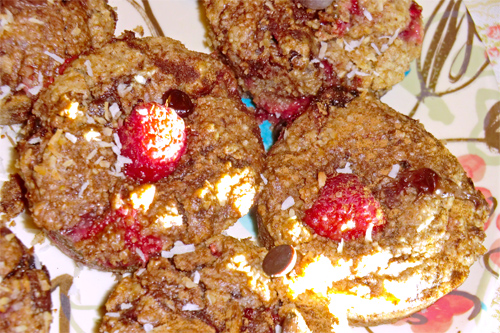
Raspberry Chocolate Coconut Steel Cut Oat Muffins

Raspberry Chocolate Coconut Steel Cut Oat Muffins photo
Raspberry Chocolate Coconut Steel Cut Oat Muffins
photo by recipe author

Servings: 11-12 muffins
Preparation Time: 18-20 minutes

  • 1 1/2 cups ground steel cut oat flour (or Scottish oats)*
  • 2 teaspoons baking powder
  • 1/2 teaspoon sea salt
  • 1 teaspoon cinnamon
  • 1/4 cup stevia baking blend or unrefined sugar
  • 1 flax “egg” (1 tablespoon flax meal mixed with 3 tablespoons warm water and whisked)*
  • 1/3 cup coconut oil, melted
  • 1/2 teaspoon vanilla extract
  • 1/2 teaspoon almond extract
  • 1/2 cup almond milk (or other milk of choice)
  • 1/2 cup shredded coconut
  • 1/2 cup dark chocolate chips
  • 1 pint organic raspberries (fresh or frozen)

1. Pre-heat oven to 400 degrees. Grease muffin tins with non- stick cooking spray and set aside.

2. Combine flax egg and set aside.

3. In a large bowl, combine all dry ingredients except coconut, raspberries and chocolate chips.

4. Meanwhile, in another medium- sized bowl, combine all wet ingredients except flax egg.

5. Add wet ingredients to dry ingredients as well as flax egg and mix well till combined evenly.

6. Fold in raspberries, chocolate chips, and shredded coconut (don’t over- stir!)

7. Bake for 18-20 minutes, in a lined or well- greased muffin tin, till golden brown.

Recipe submitted by Emilia, Aptos, CA

Submit your recipe here!

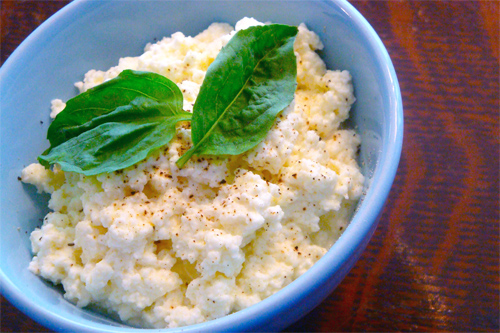
Homemade Coconut Vinegar Ricotta

Homemade Coconut Vinegar Ricotta photo
Homemade Coconut Vinegar Ricotta
photo by recipe author

Much simpler than most imagine, homemade ricotta just can’t be beat for flavor – especially when made with coconut vinegar which adds a most delicious depth of flavor. You may never use that bland, store-bought stuff again! Spread on bruschetta, add it to your eggs, use in your favorite lasagna recipe or just sneak it plain – very hard to stop once you start, especially with the WONDERFUL fragrance that will fill your kitchen when you make this!

Servings: Makes approx. 2 cups
Preparation Time: 20 min

  • 4 cups organic raw or gently pasteurized whole milk
  • 2 cups organic raw or gently pasteurized heavy cream
  • 1 teaspoon salt
  • 3 tablespoons raw coconut water vinegar

In a large heavy pot (such as a heavy stainless steel stockpot or enamel coated cast iron pot) add the milk, cream and salt.

Over medium heat bring the mixture to a full boil, stirring occasionally. Place several layers of damp cheesecloth in a pasta strainer and place over a large bowl.

When mixture reaches a boil, turn off the heat and stir in the vinegar. Allow to sit for one minute as the mixture separates into curds and whey.

Carefully pour into the cheesecloth covered strainer and allow to drain for 10-25 minutes, depending on desired moisture content. Reserve the liquid whey as a delicious addition to baked goods.

Enjoy! It will keep for a few days tightly covered in the fridge, but I can’t say it’s ever lasted that long around here!

Recipe submitted by Lydia, Salem, VA

Submit your recipe here!

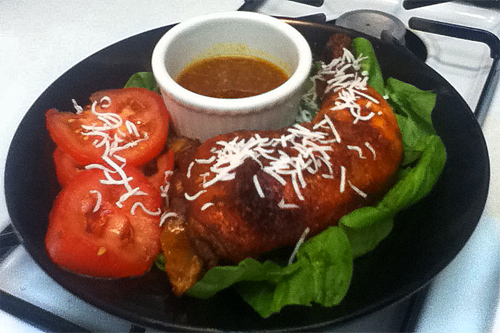
Slow Baked Curry Coconut Chicken

Slow Baked Curry Coconut Chicken photo
Slow Baked Curry Coconut Chicken
photo by recipe author

Servings: 2
Preparation Time: 25 minutes (plus cook time)

Defrost the chicken overnight in fridge then you can either leave it in tact or cut in pieces. If you have a larger family you can cook 1 lb chicken to feed family of 4.

Spread the coconut oil all over the skin of the chicken, then sprinkle on the salt, pepper, saffron and red paprika. Place in a baking dish and set aside. If you do choose to use honey, also gently drizzle over the chicken skin. It will give it a nice browning texture and sweetness to the skin.

Sauce:

Place remaining ingredients as well as additional salt and pepper to taste in a blender. Blend all together until well mixed, but still a little chunky.

Gently pour sauce in baking dish and some on top of the chicken. Cover the chicken dish and cook slowly on oven temperature of 275 degrees for 2-3 hours or until fully cooked. The last 1/2 hour, remove cover and cook uncovered to brown.

It is best cooked slowly so it is more tender and delicious. Remember to check it every 1/2 hour.

Recipe submitted by Lisa, Orange, CA

Submit your recipe here!

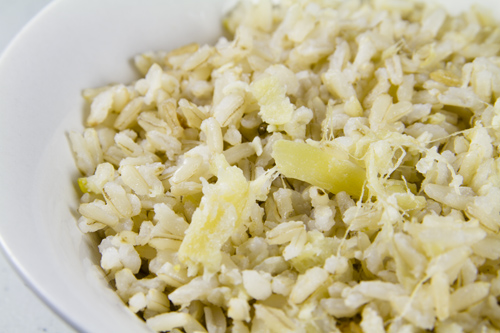
Garlic Ginger Coconut Rice

Garlic Ginger Coconut Rice photo
Garlic Ginger Coconut Rice
Prepared by Sarah Shilhavy, Photo by Jeremiah Shilhavy

Servings: 8 to 10 side dish servings
Preparation Time: 25-30 minutes

  • 2 tablespoons coconut oil
  • 4 cloves garlic, crushed
  • 1 tablespoon grated fresh ginger
  • 2 cups soft or brown Jasmine Rice, rinsed
  • 3/4 cup coconut milk*
  • 2 1/2 cups water (adjust as needed)
  • Salt to taste

Sauté garlic and ginger in oil briefly. Add rice, stir well. Add coconut milk, water and salt.

Bring to a boil, stir quickly, reduce heat and simmer covered for 15 minutes. Remove from heat and let sit covered for 5 minutes or more.

Note: Very good with chicken breast added to it while simmering. Makes great leftovers. Yum!

* For the freshest coconut milk make homemade coconut milk. (See video at this link.)

Recipe submitted by RuthAnn, Key Largo, FL

Submit your recipe here!

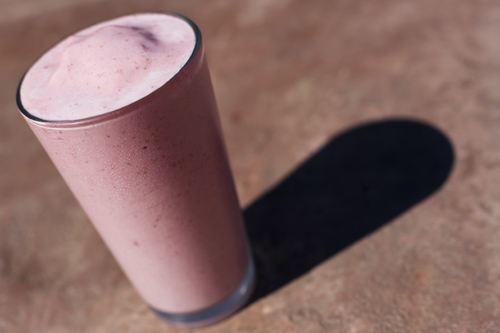
Strawberries & Coconut Cream Protein Shake

Strawberries and Coconut Cream Protein Shake recipe photo
Strawberries and Coconut Cream Protein Shake recipe
Prepared by Sarah Shilhavy, Photo by Jeremiah Shilhavy

Servings: 1
Preparation Time: 3 minutes

  • 1 cup whole raw milk or coconut milk*
  • 1 cup frozen strawberries (or to taste)
  • 1/2 teaspoon vanilla extract or powder
  • 1 scoop vanilla ice cream or coconut ice cream (optional)
  • 1-2 scoops protein powder
  • 1-2 tablespoons coconut oil, melted

Place all ingredients except coconut oil into a blender and blend until smooth. Pour coconut oil into blender in a steady stream while blending.

Pour into a tall glass and enjoy!

* For the freshest coconut milk make homemade coconut milk. (See video at this link.)

Recipe courtesy Sarah Shilhavy
Submit your recipe here!

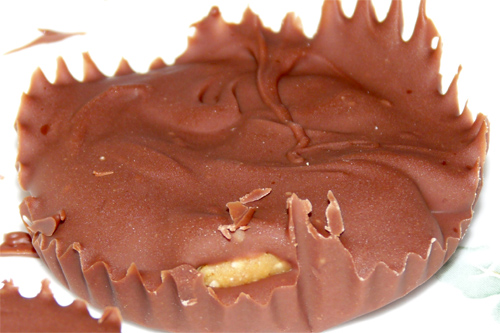
Homemade Peanut Butter Cups

Homemade Peanut Butter Cups photo
Homemade Peanut Butter Cups
photo by recipe author

Servings: 25
Preparation Time: 5 minutes

Line a cupcake pan with cupcake liners

Mix peanut butter, honey, oat flour and coconut flour until it forms a dough-like consistency. Add more peanut butter or flour to get the right consistency. Roll into balls and then flatten them out to put in the middle of your chocolate later.

Melt chocolate with coconut oil.

Once chocolate is melted place enough chocolate in the bottom of the cupcake liner and then place your flattened peanut butter mixture and then top with chocolate. Continue doing this until all flattened peanut butter is gone. Makes about 25 cups.

Store these in the freezer and then when you are ready to eat pull them out and let come to room temperature or eat frozen like our family does.

Recipe submitted by Melissa, Mitchell, SD

Submit your recipe here!

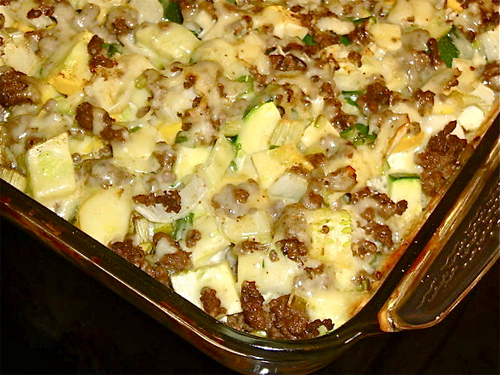
Mexican Beef & Summer Squash Casserole

Mexican Beef and Summer Squash Casserole photo
Mexican Beef and Summer Squash Casserole
photo by recipe author

This is one of our favorites – nourishing and satisfying without being heavy, lots of good protein and loads of veggies. Perfect way to use that wonderful abundance of summer squash. Comforting, delicious and full of flavor, even picky children have been reported to love it. YUM!

Servings: 8
Preparation Time: 20 prep, 30 bake

Preheat a cast iron skillet to med high heat.

Sauté onions and peppers with half the coconut oil and salt and pepper to taste (sauté in a splash of white wine for added flavor) until soft, set aside. Brown ground beef using the rest of the coconut oil, until just cooked and tender.

While beef is browning, begin slicing yellow and zucchini squash. Dice squash. Drain any extra fat from beef and add the seasoning.

Grease a 9×13″ glass dish. Place half of the squash, peppers and onion in dish. Cover with half of the beef mixture and half of the shredded cheese. Spread yogurt over cheese. Add in the rest of the squash, peppers and onion and cover with the rest of the beef mixture, topping with the rest of the cheese and some fresh cracked pepper.

Bake at 350 for 30 minutes or until the top is starting to brown. If cheese starts to brown too soon, cover with foil. Allow to cool slightly before serving. Enjoy!

Recipe submitted by Lydia, Salem, VA

Submit your recipe here!