Brian - Admin

About Brian - Admin

Editor - Health Impact News

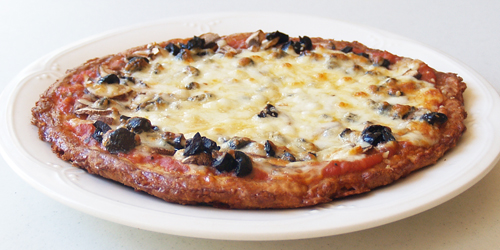
Making a Gluten Free Pizza Crust
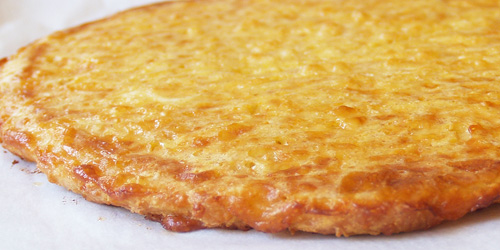
Gluten Free Pizza Crust Recipe Photo
Gluten Free Pizza
Crust – no toppings

Gluten Free Pizza with Gluten Free Pizza crust
Gluten Free Pizza
using the Gluten Free Crust
Prepared by Sarah
Shilhavy
Photos by Jeremiah Shilhavy

This pizza crust is really, really good. Even if you’re not gluten intolerant but love pizza, you’ll want to try it.

Just let me warn you: you can’t change any of the ingredients. That means every bit of cheese has to stay in as will the rest of the stuff. Why all the cheese? It’s the binder; the “flour” if you will. But don’t let the amount of cheese in the crust take anything away from the toppings. You’ll still need the same amount on top as you would any other pizza.

It’ll be easier if you use parchment paper in the recipe, but if you don’t have any on hand, that’s okay. Just brush or spray on a generous amount of the non-stick spray recipe I have below.

All that’s left is to watch the video below for a step by step tutorial and make this for an easy lunch or dinner today!

Have fun!

Sarah

Gluten Free Pizza Crust

Makes 2-4 servings

  • 2 cups whole milk organic mozzarella cheese, shredded
  • 2 large organic eggs
  • 2 tablespoons flax meal
  • 2 tablespoons coconut flour
  • 1/2 teaspoon baking powder

Preparation:

Preheat oven to 350 degrees F. Cut 2 pieces of parchment paper out for baking sheet.*

Mix cheese, eggs, flax, coconut flour, and baking powder together until a sticky wet dough is formed. Spread with a spatula to 1/4 inch thickness on a baking sheet lined with one piece of parchment paper.

Bake for 30 minutes in preheated oven. Halfway through the baking process, flip crust over by sliding it off the baking sheet with the parchment paper, placing the second piece on the sheet, and turning the crust over unto the new sheet and peeling the old paper off. Return to oven until done baking.

Remove from oven, slide off of parchment paper, and flip over again for cooling. Once crust is cooled, top with sauce, pre-cooked veggies or meats, and cheese. Set crust with toppings under the broiler on high for a minute or two until cheese is melted and bubbly. Slice and serve.

Recipe submitted by Lauren, Fort Myers, FL

*If you don’t have any parchment paper on hand mix together 1 cup minus 2 tablespoons of water and add 2 tablespoons of olive oil. Pour into a spray bottle and shake vigorously. Spray or brush unto baking sheet to coat generously.

Submit your recipe here!

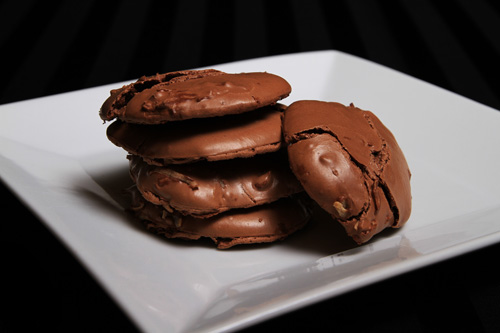
Gluten Free Chocolate Coconut Chewies

These cookies are naturally gluten free. Think flourless chocolate cake in a meringue cookie form.

Now that I’ve gotten your attention, you’ve probably already scrolled down and taken a look at the recipe, and are perhaps surprised by the amount of sugar. But before you leave, let me assure you that that is the correct amount of sugar.

Think about it.

We’re using pure, unsweetened, cocoa in this recipe, and over half a cup at that! That’s a lot of concentrated, bitter stuff you know. The amount of powdered sugar used is just enough to make it a bittersweet type chocolate flavor, since we’re not using pre-sweetened chocolate. If we were using a block of bittersweet chocolate chances are that’ll be the only sweetener used, but we’re not using that.

Also, keep in mind that powdered sugar will about double in volume when ground into a powder. So technically, 1 cup of granulated sugar will make about 2 cups of powdered.

Make sense?

Sure it does.

So don’t try to decrease the sugar amount and expect the cookies to turn out the same. They won’t. I’ve already tried. They came out soggy and flat as a pancake. No lie. Not to mention they were bitter. One work: Yuck.

With the correct amounts of each ingredient, these cookies bake up like a meringue on the outside with a wonderfully chewy, fudgy, rich, deep chocolate inside.

Hungry yet?

Enjoy!

Sarah

Gluten Free Chocolate Coconut Chewies

Gluten Free Chocolate Coconut Chewies recipe photo
Gluten Free Chocolate Coconut Chewies
Prepared by Sarah Shilhavy, Photo by Jeremiah Shilhavy

Preheat oven to 350 degrees F. Grease cookie sheets with palm shortening or line with parchment paper.

Stir dry ingredients (except coconut) together in a stand mixer fitted with a whisk attachment.

On low speed and add egg whites one at a time. Add vanilla extract and turn mixer on high for about 2 minutes, until the batter has thickened.

Gently and briefly fold the coconut in. Don’t mix it in completely.

Drop batter (about the side of a rounded measuring tablespoon) onto a prepared cookie sheet. Bake for 13-15 minutes. Cookie should be puffed and cracked. You can let the cookies cool on the cookie sheet or remove them and let cool on a wire rack.

Recipe courtesy Sarah Shilhavy

Submit your recipe here!

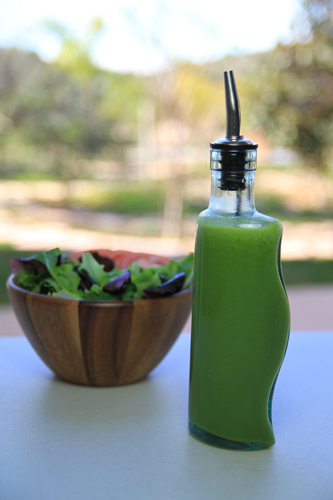
Spicy Coconut Cilantro Dressing

Spicy Coconut Cilantro Dressing recipe photo
Spicy Coconut Cilantro Dressing
Prepared by Sarah Shilhavy
Photo by Jeremiah Shilhavy

Servings: 15
Preparation Time: 12 minutes

  • 1 cup cilantro leaves
  • 1/3 cup coconut milk*
  • 2 tablespoons lemon juice
  • 1 whole jalapeño, ends trimmed
  • 1 whole garlic clove, peeled
  • 1 inch ginger, peeled
  • 1/4 teaspoon salt
  • 1/2 teaspoon honey

Place all ingredients in high-powered blender. Blend until smooth.

Store in glass container in the refrigerator.

Very easy and delicious. Use it in salads or soups.

* For the freshest coconut milk make homemade coconut milk. (See video at this link.)

Recipe submitted by Tamara, Salida, CO

Submit your recipe here!

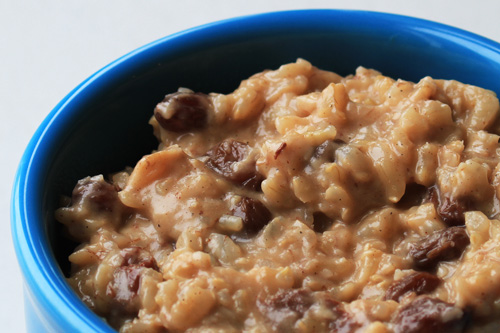
Coconut Banana Ginger Brown Rice Pudding with Raisins

Coconut Banana Ginger Brown Rice Pudding with Raisins recipe photo
Coconut Banana Ginger Brown Rice Pudding with Raisins
Prepared by Sarah Shilhavy, Photo by Jeremiah Shilhavy

Servings: 6
Preparation Time: 10 minutes

This Brown Rice pudding is sweetened with banana, crystallized ginger, and raisins. Perfect for breakfast or dessert!

Place cooked rice in a pot. Add water, cardamom, vanilla, cinnamon, raisins, ginger, and shredded coconut. Turn heat to medium, make sure to stir constantly.

Once the mixture has come to a simmer, add in the bananas and stir so they become liquefied in the mixture. Keep stirring! Add in the coconut oil.

Once the mixture has absorbed all or most of the water, add the milk. Keep stirring! When the rice has become mushy and absorbed a lot of the coconut milk and has a pudding like thickness to it, your rice pudding is done! Add more milk if/as needed to adjust texture and consistency. Delicious!

Recipe submitted by Emily, Philadelphia, PA

*Use 1 teaspoon of coconut cream concentrate for every 6-8 oz of water for coconut cream milk. Mix together and use as directed or make homemade coconut milk.

Submit your recipe here!

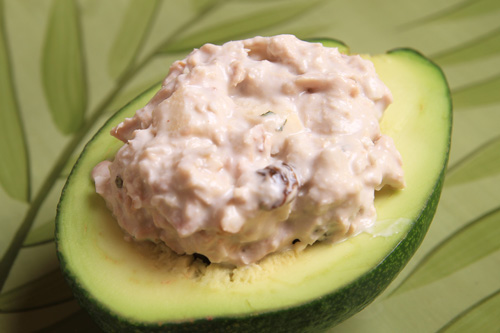
Coconut-Tuna Walnut Salad

Coconut-Tuna Walnut Salad recipe photo
Coconut-Tuna Walnut Salad
Prepared by Sarah Shilhavy, Photo by Jeremiah Shilhavy

Remember a good cook doesn’t always follow a recipe perfectly. Creativity plays a big part. I was using a traditional recipe for years and decided to TRY something different with ingredients I had available. Hope you enjoy this one and I dare you to try a new spice.

  • 1 – 2 (7 oz) cans tuna
  • 1/2 cup roasted walnuts, chopped (Roast for 10 minutes on cookie sheet at 350. Cool, then chop.)
  • 1/2 cup coconut flakes
  • 1/2 teaspoon fresh peppermint – finely chopped
  • 1 apple – peeled and diced small
  • Salt to taste
  • 1/2 cup raisins
  • 1/2 to 1 cup Plain Yogurt
  • 1/2 cup mayonnaise*

Mix all ingredients. Serve immediately or chill, then serve over spring mix, romaine, or in 1/2 avocado. Delicious, fresh, different.

Recipe submitted by EdieJane, Hurst, TX

*To make your own mayonnaise with coconut oil and olive oil see our video here.

Submit your recipe here!

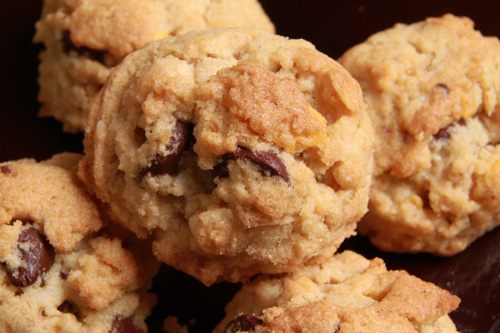
Gluten Free Coconut Dishpan Cookies

Gluten Free Coconut Dishpan Cookies recipe photo
Gluten Free Coconut Dishpan Cookies
Prepared by Sarah Shilhavy, Photo by Jeremiah Shilhavy

Preheat oven to 375 degrees F.

Beat butter and sugars until light and fluffy with an electric mixer fitted with paddle attachment. Slowly add oil and mix until oil is well incorporated. Beat vanilla extract and eggs in until well incorporated.

Mix flour and baking soda together and stir into butter mixture just until combined. Combine remaining ingredients and add to dough, mixing just until incorporated.

Using a small cookie scoop drop tablespoonful sized cookie dough balls onto an ungreased cookie sheet spacing about 1 inch apart (they won’t spread much). Bake in preheated oven for 7-12 minutes, just until lightly browned.

You can also freeze individual balls of cookie dough and freeze for later baking. To bake simply place frozen cookie dough onto sheet (there’s no need to defrost) and bake as directed (adding a few minutes to cook time).

*Gluten Free Flour Mix

Mix together until very well blended and use as directed.

Submitted by Sarah Shilhavy

Submit your recipe here!

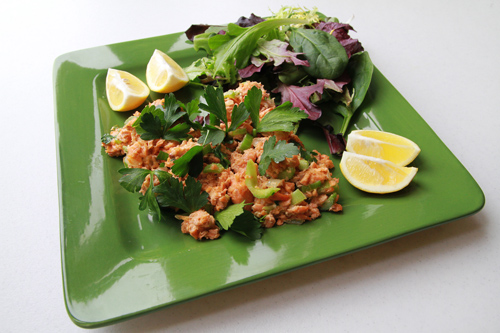
Salmon Coconut Mayonnaise Salad

Salmon Coconut Mayonnaise Salad recipe photo
Salmon Coconut Mayonnaise Salad
Prepared by Marianita Shilhavy, Photo by Jeremiah Shilhavy

Preparation Time: 10 minutes
Servings: 4-5

Heat coconut oil in a pan. Sauté onion until opaque and add salmon, celery, pepper and salt. Sauté for 2 minutes. Stir in mayonnaise.

Transfer to a serving dish and garnish with Italian parsley and lemon juice. Serve with salad, rice, as a sandwich filling, etc.

Enjoy

Recipe courtesy Marianita Shilhavy

Submit your recipe here!

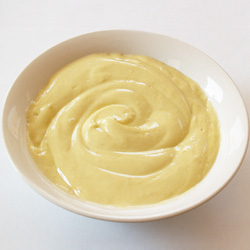
Coconut Mayonnaise

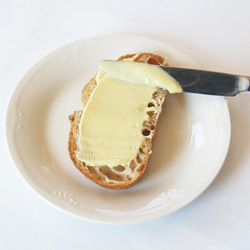
Coconut Mayonnaise Coconut Mayonnaise spread on bread
Prepared by Sarah Shilhavy, Photos by Jeremiah Shilhavy

Mayonnaise is very easy to make once you know what you’re supposed to be doing. If you don’t, then most likely you’ll just end up with an oily mess. If you’ve never made mayonnaise before but want to, then read on. Even if you don’t want to you should still read on. Homemade mayo tastes so much better than store bought, and it is much healthier because there are no trans-fats. In our video we use organic Virgin Coconut Oil, and organic Extra Virgin Olive Oil. Try finding a mayo like that in the stores!

The key to a successful batch of mayo is the oils. Actually, patience is the real key here. The adding-the-oils process can take up to five minutes, so be prepared. Your arm may get tired. Don’t say I didn’t warn you.

After placing the first six ingredients in the blender, blend it very briefly. All you want to do is mix the stuff together, so don’t overdo it. Next, pour the two oils together into a liquid measuring cup with a spout and with the blender running on a low speed, start adding the oils into the blender in drops. Shall I emphasize that? Seriously, it needs to be drops. Tiny drops.

After about a minute or so, gradually start working the oils up to a stream. Again, a TINY stream. Like the size of a needle. And it needs to be steady. Not a stop-and-go type of stream. Just a tiny, steady, stream. Once you’ve worked up to a stream you can increase the blender speed to about medium. You be the judge.

When you’ve got only about 1/4 of a cup left you can increase the stream just a bit, but never, ever just dump the oil in. If you add the oils too quickly the mayo will turn into a curdled, oily mixture instead of whipping up into a thick, creamy spread. And it’ll stay that way. You won’t be able to save it.

You can use any type of mustard you like for this recipe. The classic is Dijon. Same thing for the pepper. Any type you like. White pepper is the one to go to if you don’t want black specks in your mayo but go ahead with the black if you don’t mind the looks so much.

So that’s that! Making your own mayonnaise is really very easy. Just be patient with adding the oils and it’ll turn out perfect. Be sure to watch the video for a step by step tutorial.

Have fun and fee free to drop me a line if you have any questions. 🙂

Sarah

Coconut Mayonnaise

Servings: 1 1/2 cups
Preparation Time: 5 minutes

Place the eggs, mustard, lemon juice, salt, and pepper into a food processor or blender. Blend briefly for a few seconds.

With the processor or blender running on low speed, start adding your oils very slowly. Start out with drops and then work up to about a 1/16-inch stream. This will take a few minutes.

Continue blending until all the oil is used up and there is no free standing oil.