Coconut Desserts & Sweets Recipes

Flourless Chocolate Chip Cookies

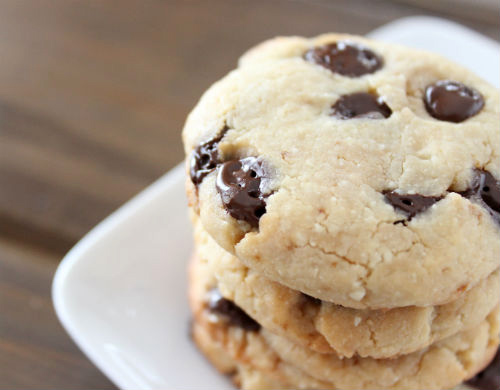
Flourless Chocolate Chip Cookies Recipe photo
Flourless Chocolate Chip Cookies Recipe
photo by recipe author

Servings: 12-15
Preparation Time: 10 minutes

Preheat oven to 350 degrees ºF.

Whisk the egg and vanilla in a mixing bowl. Add in the cashew butter, coconut creme, sweetener, and salt, combine. Fold in the chocolate chips. Roll the dough into balls in desired size cookie and place on a parchment lined cookie sheet. Press each ball down with your palm or with the bottom of a glass. The cookies really don’t spread, so size accordingly

Bake in preheated oven for about 12 minutes or until edges begin to brown.

Remove and place on a cooling rack and allow cookies to cool and harden up. Store in an airtight container, I prefer glass jars

Quick notes

*The top layer of coconut cream concentrate is coconut oil, so you may need to scrape that off to get to the cream, but save the oil for another use. I soften it by placing the jar in a small saucepan of simmering water.

Variations

You can use any nut butter, but cashew is neutral and tends to be a tad bit sweeter.

Kate from Highlands Ranch, CO just won $50 for this recipe and photo!
Submit yours here.

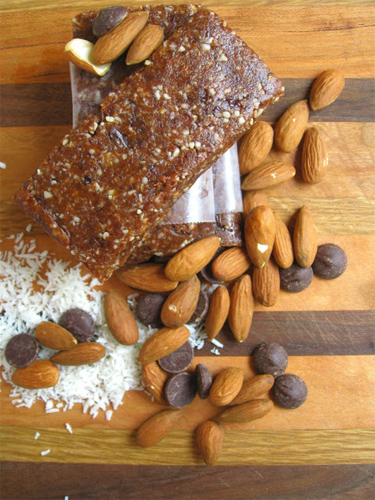
No Bake Coconut Almond Bars

No Bake Coconut Almond Bars Recipe photo
No Bake Coconut Almond Bars Recipe
photo by recipe author

Servings: 8-10
Preparation Time: 10 minutes

Remove stem fragments from the end of your dates if they’re still attached and then pull the dates in half using your fingers to remove the pit from the middle. In a large food processor fitted with the metal blade, add almonds, pitted dates, and coconut oil. Process until almonds are finely chopped. This is a semi-violent process, so hold on to your processor!

Continue to add each ingredient, one by one, thoroughly mixing with your processor after each addition. If you mix after the addition of each ingredient, your mixture will slowly begin to come together.

After the addition of chocolate chips, continue to pulse until the mixture begins to stick together in large clumps. It should stay together when you pinch it between your fingers. If it’s still crumbly, continue to process and/or add additional coconut oil, a tablespoon at a time until you have the correct consistency.

Line an 8×8-inch pan with parchment or wax paper and press mixture evenly into the pan. They are ready to eat as is, straight out of the pan. If you prefer, remove from the pan using your parchment paper and cut into individual portions and store them in an airtight container in the refrigerator.

Loretta from Waukesha, WI just won $50 for this recipe and photo!
Submit yours here.

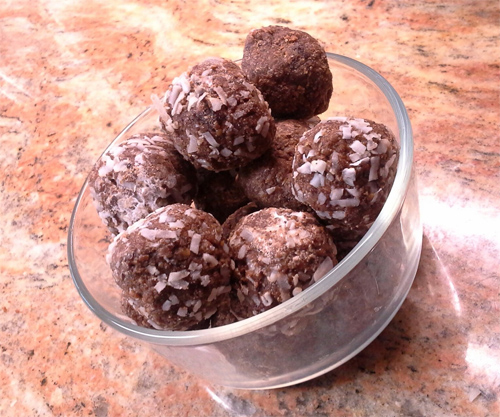
No Bake Chocolaty Coconut Flax Chia Power Balls

No Bake Chocolaty Coconut Flax Chia Power Balls Recipe photo
No Bake Chocolaty Coconut Flax Chia Power Balls Recipe
photo by recipe author

Servings: 25
Preparation Time: 30 minutes

  • 2 cups ground, soaked and dried organic raw almonds
  • 1/2 cup raw organic cashews
  • 1/4 cup
    Coconut Cream Concentrate
  • 1/3 – 1/2 cup organic virgin
    coconut oil
  • 2 tablespoons
    honey (add more if you need)
  • 1/4 cup organic raw
    cacao powder
  • 1/2 cup organic
    coconut flakes
  • 1/2 cup organic raisins
  • 1/4 cup ground organic flax seeds (I use my coffee grinder to make the job easy)
  • 1/8 cup ground organic chia seeds
  • Optional: more coconut flakes to roll balls in.

In a food processor, process almonds until similar to coarse flour. Add cashews and process some more. Add coconut cream, coconut oil, cacao powder, coconut flakes, raisins, ground flax and chia seeds and honey.

Process until completely mixed and add more coconut oil if it is not moist enough. Form into balls and roll in coconut if desired. Store in refrigerator.

Kimberley from Gersham, OR just won $50 for this recipe and photo!
Submit yours here.

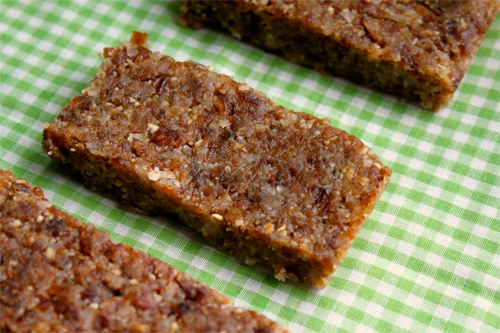
Coconut Bars

 Coconut Bars photo
Coconut Bars
photo by recipe author

Servings: 10-12 (depending on how you cut them)
Preparation Time: 10 minutes

  • 2 cups nuts
  • 20 pitted dates (you’ll find these in the dried fruit section of your grocery store)
  • 3/4 cup dried,
    unsweetened coconut
  • 2-3 teaspoons
    coconut oil

Place your nuts in a food processor and run it until you get a pretty fine texture. It’ll take about a minute. Add your dates, coconut, and 2 teaspoons of the coconut oil and pulse until combined. You want it to be a consistency that will stick together, so if you think you need more “glue” add the 3rd teaspoon of coconut oil.

Dump the mixture out into an 8×8 pan and spread it out evenly. Place it in the fridge to harden up a little and then cut into bars or squares. Store in the fridge and enjoy as a nice healthy snack!

Recipe submitted by Jenny, Bellefonte, PA

Submit your recipe here!

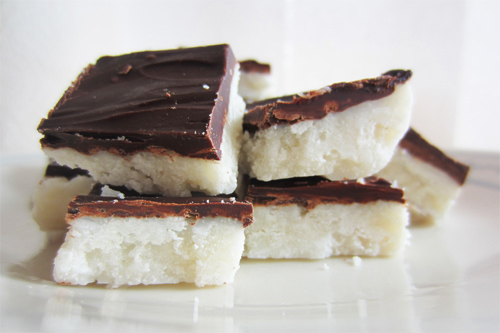
Chocolate Coconut Bars

 Banana Pancake Perfection a Sage photo
Chocolate Coconut Bars
photo by recipe author

Servings: 8
Preparation Time: 30 minutes

Warm coconut oil until it is liquid. Place everything except the chocolate chips in a blender and blend on high until smooth. (This will take about 5 minutes or so).

Spread into a 9×5 plastic container. Freeze for about 15 minutes. While coconut mixture is freezing, melt chocolate chips. Spread melted chocolate over frozen coconut and stick in the freezer again until chocolate is hardened. Pop out of container and chop into pieces. Consume. 🙂

Store leftovers in the fridge.

Recipe submitted by Raia, Ladson, SC

Submit your recipe here!

Gluten Free Brownie Pudding

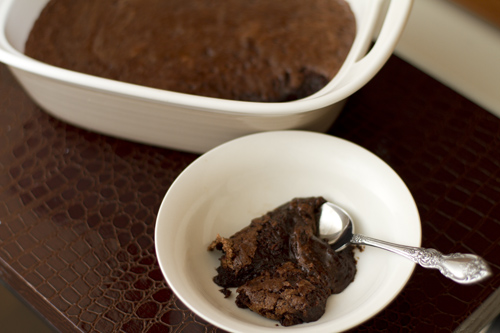
 Gluten Free Brownie Pudding Recipe photo

This brownie pudding took me a few tries to get just right. The first time it turned out to be more of a soft, and very fudgy brownie that had a little too much butter. Not bad, but not at all what I wanted. It was gone by morning. I’m still not entirely sure what precisely went wrong (probably more than one thing) but I blame the water. Basically, the water for the water bath was too hot, and the dessert baked faster than it should have.

I debated on what to do on the next attempt, besides reduce the heat of the water. It was indeed insanely rich…but was it too rich? The fact that it was so easily over-baked past the pudding stage means it’s pretty finicky, and finicky, equals many failed first-time attempts, and many failed attempts means many grumpy people. No one wants that. With that in mind, I made the decision to incorporate the technique used to make pudding cake: boiling water on top of the batter. This would ensure that there would definitely be pudding, and less chance of over-baking the dessert into brownies (not exactly a bad result, but not what we want). The only potential con was that it wouldn’t be as rich.

Nix that idea. What resulted was a strange pudding layer that didn’t stay in pudding form very long. Plus, the brownie part wasn’t as fudgy and smooth. I didn’t like it, and it did take longer than the first to disappear.

Finally at the third try, I decided what the batter needed was more of a reason to stay custard-y, much like a flourless chocolate cake. That meant more egg. So, with one extra egg added, baking time watched closely, and the water at the heat of half a tiny volcano, I gave it a third go. It was perfect. However, I attribute the success more to the water and the baking time; the egg is merely a luxury addition that acts as a safety net for the pudding texture. In order for this recipe to turn out, you must use the amount of eggs called for in the recipe.

Enjoy everyone!
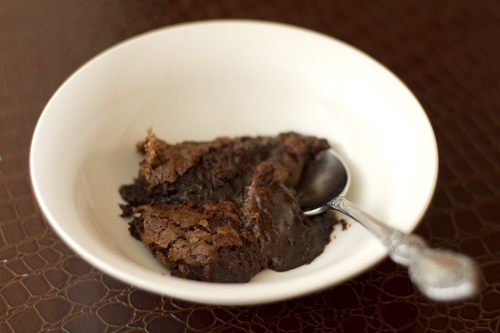
 Gluten Free Brownie Pudding Recipe photo
Gluten Free Brownie Pudding Recipe
Prepared by Sarah Shilhavy
Photo by Jeremiah Shilhavy

Servings: 8
Preparation Time: 10 minutes

Preheat oven to 350 degrees ºF. Grease a 2 quart baking dish with coconut oil.

Melt butter over low heat. Set aside to cool. Mix flours together.

Beat eggs and sugar with an electric mixer on medium speed until thick and slightly lighter in color – 1-2 minutes. Add cocoa, vanilla and flour mix. Mix well. Slowly pour butter in while mixing at low speed until well combined.

Pour mixture into prepared dish, place into a 9×13 inch pan and fill pan with hot tap water to come about half way up the sides of the quart dish. Bake in preheated oven for 30-40 minutes. Edges should be firm but middle should jiggle and look very underbaked.

Cool and serve with freshly whipped cream, ice cream or as is.

Recipe courtesy Sarah Shilhavy

Submit your recipe here!
Coconut Cacao Almond Butter Cups

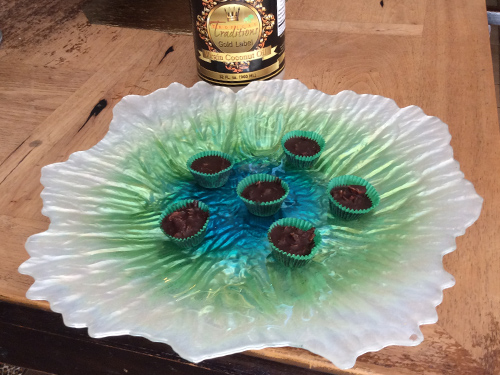
Coconut Cacao Almond Butter Cups Recipe photo
Coconut Cacao Almond Butter Cups Recipe
photo by recipe author

Preparation Time: 20 minutes
Servings: 8

Slowly melt cacao chips, oil and butter. Add cacao, honey, salt and vanilla, stirring vigorously to temper the mixture. Add nuts and coconut.

Place small candy cups on a sheet tray. You may use larger ones but won’t have as many. Pour in chocolate mixture to cover bottom. Place 1/4-1/2 teaspoon almond butter on top of chocolate mixture. Cover with remaining chocolate mixture. Freeze for 15 minutes or longer. Keep in cool place such as refrigerator.

Recipe submitted by Cheryl, OKC, OK

Submit your recipe here!
Faux Baked Cinnamon Apples

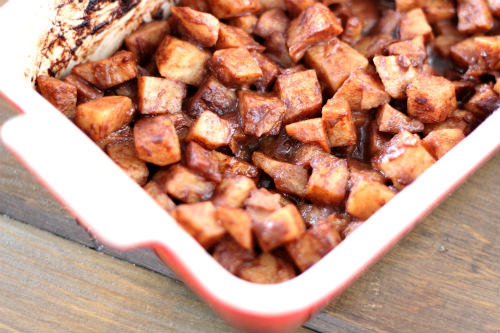
Faux Baked Cinnamon Apples Recipe photo
Faux Baked Cinnamon Apples Recipe
photo by recipe author

Servings: 3-4
Preparation Time: 15 minutes

  • 3 cups jicama, cubed and boiled* (1 small jicama)
  • 2 tablespoons coconut oil
  • 1-2 teaspoons cinnamon (I like them with 2 teaspoons)
  • sweetener of choice, to taste
  • dash of salt

Heat the oven to 350 degrees ºF.

Cut the coconut oil and place the jicama in a casserole dish. Sprinkle with cinnamon, sweetener and salt.

Bake covered for 30-40 minutes or until soft, stir after 20 minutes. I removed the lid for the last 10 minutes to remove the moisture.

Serve hot with some Dairy Free Vanilla Ice Cream.

Quick notes

To boil the cubed jicama, cover it with water and boil for 30-45 minutes (depends on size of cubes) until soft. This can be done ahead of time, store in an airtight container in the refrigerator.

Variations

You could combine some almond flour, pieces of butter or coconut oil and sweetener to make a topping. I’d add the topping once you have removed the lid to finish cooking. You could turn on the broiler for a few seconds to brown the topping too!

Recipe submitted by Kate, Highlands Ranch, CO

Submit your recipe here!