Coconut Desserts & Sweets Recipes

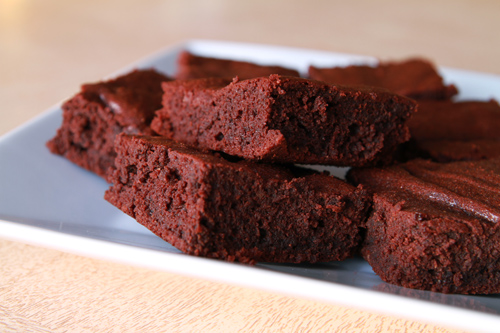
Gluten Free Chocolate Brownies

Gluten Free Chocolate Brownies recipe photo
Gluten Free Chocolate Brownies
Prepared by Sarah Shilhavy, Photo by Jeremiah Shilhavy

Servings: 24 brownies
Preparation Time: 15 minutes

Preheat oven to 350 degrees F. Grease a 9×13 inch pan with coconut oil.

Melt chocolate and butter together over very low heat, stirring occasionally until melted and smooth. Remove from heat.

In a small bowl, mix flours and xanthan gum together.

Whisk eggs, sugars, and vanilla extract together. Slowly whisk in the chocolate mixture until well blended.

Using a rubber spatula, stir the flour mixture into the chocolate mixture until well blended and smooth.

Pour batter into prepared pan and bake in preheated oven for 15-20 minutes, or until center is firm. Let cool for a couple minutes then cut and serve.

Recipe submitted by Sarah Shilhavy

Submit your recipe here!

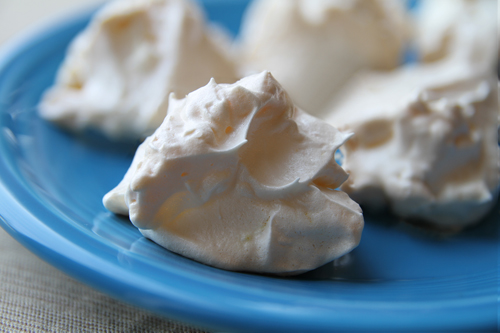
Lemon Coconut Meringues

Lemon Coconut Meringues recipe photo
Lemon Coconut Meringues
Prepared by Sarah Shilhavy, Photos by Jeremiah Shilhavy

Servings: 24 meringues
Preparation Time: 20 minutes

Preheat oven to 250 degrees F. Line two cookie sheets with parchment paper.

In large bowl with mixer at high speed, beat egg whites and cream of tartar until soft peaks form.

Gradually sprinkle in sugar 2 tablespoons at a time at high speed. After all the sugar has been added you may beat in the vanilla extract and lemon zest or gently fold in later. Beat until meringue stands in stiff, glossy peaks. Add vanilla and lemon zest now if you didn’t add it earlier.

Drop meringue by rounded spoonfuls onto prepared cookie sheets about 1 inch apart. Sprinkle with a bit of shredded coconut.

Bake for 50-60 minutes or until dry to the touch. Remove to rack to cool.

Recipe courtesy Sarah Shilhavy

Submit your recipe here!

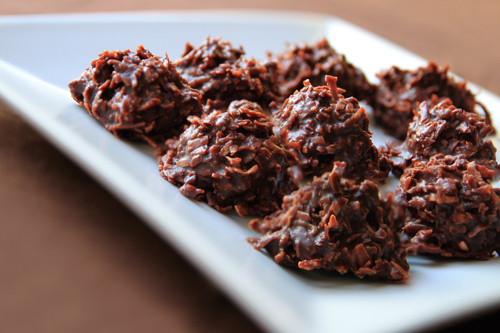
Coconut Chocolate No-bake Macaroons

These macaroons are one of the easiest and most delicious quick sweet treats I’ve made in a while. The ingredient list doesn’t make them look like anything special, but believe me, they are.

The secret to the fudgy texture is the almond flour. The stuff just melts right into all that chocolaty goodness and turns the whole thing into a fudgy batter just begging to be eaten. I ate this stuff before it even made it to the refrigerator. And I ate some more once it came out of the refrigerator!

Feel free to cut back a little on the maple syrup if you don’t like it too sweet. And just a tip for grinding your own almond flour: stop as soon as it turns into a powder. Scrape the corners of the canister down and shake the big bits into the center as well. Too much grinding and you’ll end up with almond butter. Not cool. Not for this recipe anyway.

Enjoy!

Sarah 🙂

Coconut Chocolate No-bake Macaroons

Coconut Chocolate No-bake Macaroons recipe photo
Coconut Chocolate No-bake Macaroons
Prepared by Sarah Shilhavy, photo by Jeremiah Shilhavy

Servings: yields about 40 macaroons
Preparation Time: 15 minutes

Mix all ingredients together well. Form into small balls using a spoon or cookie scoop and refrigerate until firm.

Recipe submitted by Stephanie, Goodyear, AZ

*You can grind your own almond flour by placing whole almonds in a blender/food processor and blending until a fine meal.

Submit your recipe here!

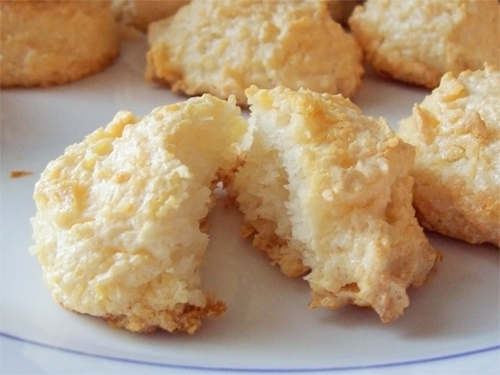
Healthy Simple Coconut Macaroons

Healthy Simple Coconut Macaroons recipe photo
Healthy Simple Coconut Macaroons
Photo by recipe author

Servings: 12

  • 6 egg whites (save the yokes to add to scrambled eggs)
  • Pinch salt
  • 2/3 cup honey (run your honey under some hot water if it has crystallized, it needs to be liquid)
  • 2 1/2 cups shredded coconut

Preheat oven to 250 degrees F. Grease cookie sheets with coconut oil.

Beat egg whites until almost stiff peaks form. Add salt. Slowly pour in honey while whipping the eggs.

Fold in the shredded coconut with a spatula until it’s thoroughly mixed. Be gentle, you don’t want to deflate the eggs.

Using a large cookie scoop or tablespoon, scoop the mixture onto the prepared cookie sheets spacing about 1 inch apart.

Time will vary depending on how big your cookies are. These took about 50 minutes. Allow to cool briefly on the cookie sheet. Remove with a thin spatula and cool completely. They will continue to harden and dry as they cool.

Recipe submitted by Cara, Billings, MT

Submit your recipe here!

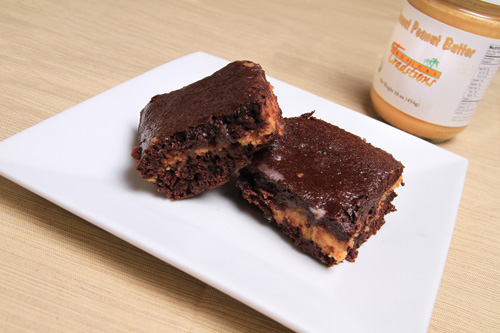
Coconut Peanut Butter Whole Wheat Brownies

Coconut Peanut Butter Whole Wheat Brownies recipe photo
Coconut Peanut Butter Whole Wheat Brownies
Prepared by Sarah Shilhavy, Photo by Jeremiah Shilhavy

Most of the time I make this recipe with peanut butter but I love it best when I use my homemade cashew butter – which, of course, I make with a tiny dab of coconut oil.

When I make these chewy, they stay nice and moist without needing a glaze or frosting but if you want to glaze the top you can make another 1/2 recipe of the nut butter/milk recipe to go on top. For those with a sweet tooth, a little sugar can be added but I don’t ever do that.

Servings: 16
Preparation Time: 15 minutes

  • 1/2 cup coconut oil
  • 1 – 1 1/4 cups cocoa powder (the more cocoa powder you use, the darker they will be. I like a darker chocolate so I use the higher amount)
  • 3/4 cup whole organic sugar – if you like them sweeter, you can use up to 1 3/4 cups but I prefer a more bittersweet chocolate
  • 3 eggs
  • about 1/4 cup yogurt or sour cream (1 additional egg)
  • 1 teaspoon vanilla extract
  • 1 cup whole wheat flour
  • 1/2 teaspoon salt
  • 1/4 teaspoon baking powder
  • 1 cup chopped nuts (optional)

Filling:

Preheat oven to 325.

Mix coconut oil with cocoa powder. Add sugar, 3 eggs, yogurt/sour cream (if not using yogurt or sour cream, add 1 egg) and vanilla until well mixed.

Mix flour, salt, and baking powder together, add to above mix and stir until well blended.

Filling: Add enough milk to your nut butter to make a consistency similar to that of the brownie mix.

In well greased 9×9 or 8×8 inch square pan, pour 1/2 of brownie mixture in bottom of pan. Spread nut butter mix then spread second half of brownie mix over nut butter.

Bake about 25-35 minutes.

I like mine to be soft and chewy so I take them out before the toothpick comes out clean. The brownies will be cakey if baked until a toothpick inserted in the center comes out clean.

Best after completely cooled and allowed to set for at least an hour or so but it’s hard to wait that long! You can refrigerate and/or freeze the brownies if desired.

Recipe submitted by Jenny, Enid, OK

Submit your recipe here!

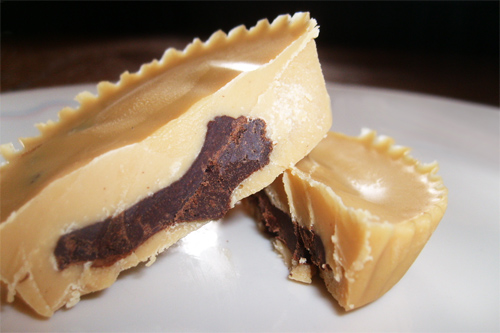
Inside-Out Coconut Peanut Butter Cups

Inside-Out Coconut Peanut Butter Cups recipe photo
Inside-Out Coconut Peanut Butter Cups
Photo by recipe author

Servings: 12
Preparation Time: 15 minutes

Chop a wedge off of a 1 lb bar of chocolate (about a fifth?).

Place the chocolate in a double boiler to melt, stir occasionally until smooth and completely melted. Remove bowl from heat and stir in vanilla extract and honey (if needed).

If your coconut peanut butter is solid, just place the jar in a bowl filled with hot water so it will become a runny consistency. Pour coconut peanut butter into a muffin pan lined with paper cups, just enough to make a bottom layer.

Spoon the chocolate into each paper cup (it’s the middle of your inside-out ‘coconut’ peanut butter cup).

Drizzle more coconut peanut butter over the top to seal the sweet deal on your “Inside-Out Coconut Peanut Butter Cups” and pop the pan into the freezer for just a few minutes so they can harden.

Peel the paper off, admire its beauty, and enjoy!

Notes: If you want a milk chocolate taste, use a different chocolate or experiment with your filling ingredients.

You may or may not have to sweeten the chocolate depending on what type you use (example: semisweet chocolate will not have to be sweetened, and neither will bittersweet if you like a darker taste).

Recipe submitted by Michelle, Diggins, MO

Submit your recipe here!

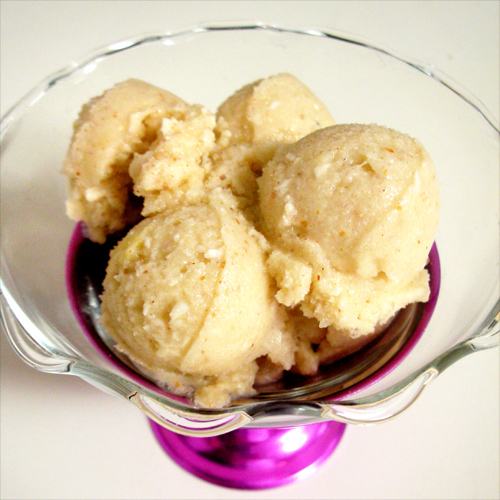
Coconut Ice

Coconut Ice recipe photo
Coconut Ice
Photo by Recipe Author

Preparation time: 10 minutes plus the ice cream maker time
Servings: 2

Almond Milk:

Ice:

Blend almonds and coconut milk in a high-speed blender until smooth.

Add other ingredients and blend until smooth. Freeze in an ice cream maker according to the manufacturer’s instructions.

* For the freshest coconut milk make homemade coconut milk. (See video at this link.)

Recipe submitted by Kelly, Grandview, MO

Submit your recipe here!

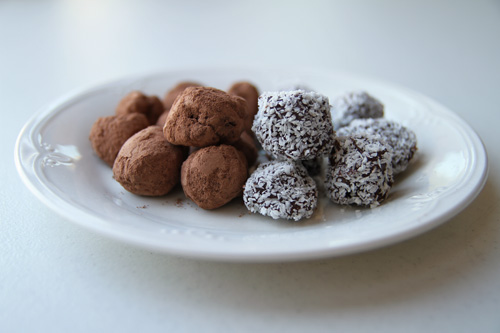
Chocolate Balsamic Truffles

Vinegar in chocolate?? I scratched my head at the idea, but this is a fantastic combination. The unique, tart-ish flavor with the silky smooth and creamy chocolate was just meant to be. You’ll love it.

Truffles are pretty simple and easy to make. It’s all in the ingredients. Use high quality everything in this recipe as every single ingredient stands out. Use a nice tasting, high quality dark chocolate and a rich, dark, high quality balsamic vinegar especially. This is one recipe that you really don’t want to skimp on.

Another fun thing about truffles is that you can coat/dip them in so many different things! Nuts, chocolate shavings, dip in different melted chocolates, etc. Let the imagination run wild.

The next important thing is the chilling. The mixture has to be at the perfect temperature to roll into balls as well as for eating. You don’t want to eat a truffle straight out of the refrigerator when it’s all hard. Let them come to room temperature first. Then enjoy the tiny little melt-in-your-mouth candies all you like.

Enjoy!

Sarah

Chocolate Balsamic Truffles
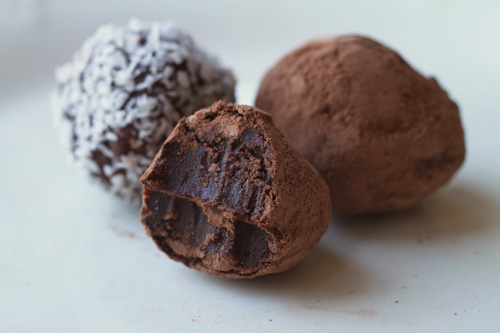
Chocolate Balsamic Truffles with middle shown recipe photo
Chocolate Balsamic Truffles recipe photo
Chocolate Balsamic Truffles
Prepared by Sarah Shilhavy, Photo by Jeremiah Shilhavy

Servings: approx. 45 truffles
Preparation Time: 10 minutes

Pour the heavy cream into a glass bowl set over a pot of simmering water. Turn heat off as soon as you place the bowl on top. Stir in the chocolate and coconut oil in with a rubber spatula.

Once the chocolate has melted, remove bowl from the pot and stir in the balsamic vinegar. Refrigerate the chocolate for 1 hour. Remove from the refrigerator and let sit at room temperature for 1-2 hours, until firm but moldable.

Place coatings of choice into shallow bowls, starting out with about 1/4 cup. Using a teaspoon scoop out measuring teaspoon sized balls of the chocolate. Use your hands to form into tiny balls. Drop the balls into the coatings of choice and roll until coated.

If the truffles are too soft after forming refrigerate for about 15 minutes, or until a littler firmer.

To store, refrigerate overnight and store at room temperature. The truffles will keep for about 1 day at room temp.

Submitted by Sarah Shilhavy

Submit your recipe here!