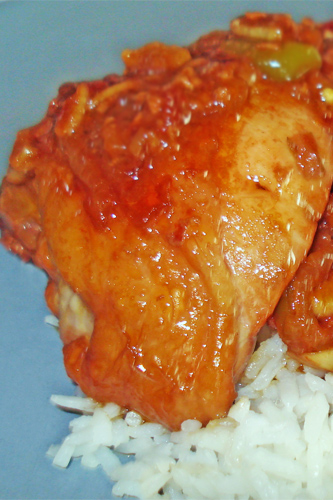
Heat coconut oil in a large pot and sauté onion, tomato, and garlic until translucent. Add chicken thighs and cook until browned on the outside. Add water, vinegar, coconut aminos (or fermented soy sauce), green chili’s, bay leaves, annatto powder (optional) and salt and pepper to taste then let boil and reduce until only about 1/4 or less of the liquid remains.
Add coconut milk and continue to reduce until it will no longer evaporate. The chicken should be moist and falling off the bone. Serve with rice.
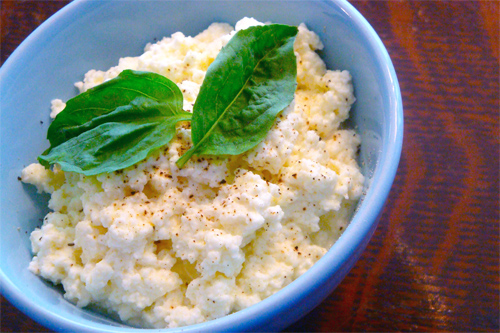
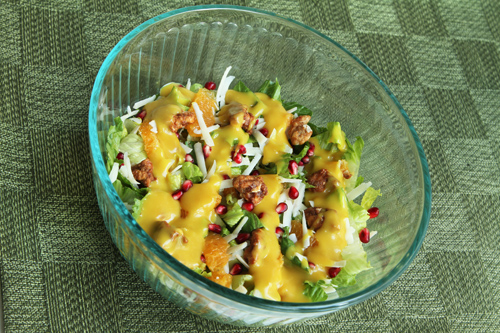
Much simpler than most imagine, homemade ricotta just can’t be beat for flavor – especially when made with coconut vinegar which adds a most delicious depth of flavor. You may never use that bland, store-bought stuff again! Spread on bruschetta, add it to your eggs, use in your favorite lasagna recipe or just sneak it plain – very hard to stop once you start, especially with the WONDERFUL fragrance that will fill your kitchen when you make this!
Servings: Makes approx. 2 cups
Preparation Time: 20 min
4 cups organic raw or gently pasteurized whole milk
2 cups organic raw or gently pasteurized heavy cream
In a large heavy pot (such as a heavy stainless steel stockpot or enamel coated cast iron pot) add the milk, cream and salt.
Over medium heat bring the mixture to a full boil, stirring occasionally. Place several layers of damp cheesecloth in a pasta strainer and place over a large bowl.
When mixture reaches a boil, turn off the heat and stir in the vinegar. Allow to sit for one minute as the mixture separates into curds and whey.
Carefully pour into the cheesecloth covered strainer and allow to drain for 10-25 minutes, depending on desired moisture content. Reserve the liquid whey as a delicious addition to baked goods.
Enjoy! It will keep for a few days tightly covered in the fridge, but I can’t say it’s ever lasted that long around here!
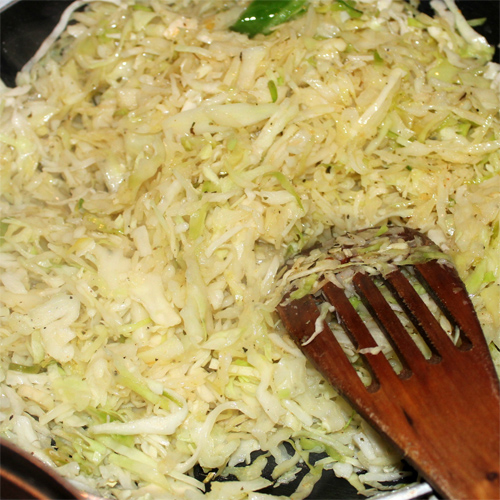
Melt coconut oil in a large saucepan and add onion and garlic. Sauté lightly for about 20 seconds. Turn heat off and stir in remaining ingredients.
Simmer over medium low to low heat until ketchup becomes thick and reduces by half, approximately 2-4 hours. Stir every once in awhile as needed.
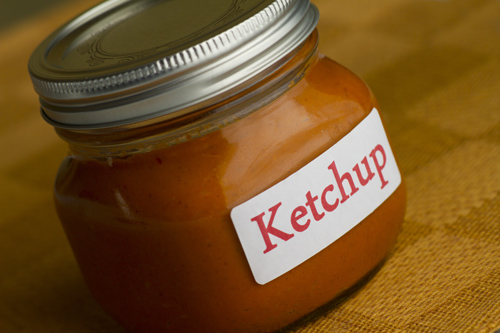
Purée ketchup in a blender, and then strain through a mesh strainer. If you wish, adjust seasoning to taste and if the ketchup isn’t at the thickness you want, return to the saucepan and simmer until it’s just the way you want it.
Cool, and then store in the refrigerator.
Don’t let the long ingredient list fool you. This recipe is actually very easy to make. I just got a little carried away with the spices.
But really? Allspice? Cloves? Are we making pumpkin pie? No, we’re not. Trust me, they all work together. It doesn’t taste like ketchup made with pumpkin pie spice mix. It’s really, really yummy.
You can give and take on the spices, if you want. But if you have all the ingredients on hand, make it just as is first and see if you like it. There isn’t much of each spice, so they all work together to create that ketchup flavor. If you think you can make it better to suit your taste buds, go right ahead! Then let me know what spices you did or didn’t use, and how you liked it.
The aroma of the sauce as it simmered on the stove was amazing, I kept coming back to taste it…and add salt. I’m not sure how much salt I ended up using (I kept adding a little more at a time) but just go by taste.
Since this uses all fresh tomatoes, it’s a great way to use up your summer crop if you’re growing a garden this year. And like I said, it’s easy. Really. For real. It’s one of those recipes that pretty much does it’s own thing and fills your house with nice smells in the process.
Oh, and another cool thing about this recipe? It uses honey as the sweetener (I used raw honey). I kid you not, my jaw literally dropped to the floor when I saw how much sugar some of these homemade ketchup recipes use. It really doesn’t need that much. Just a small amount of honey gave it a nice, sweet (but not too sweet!) flavor. Yum.
And for all you visual (and non visual) learners, we have a video for you today that will take you through the recipe step by step.
Prepared by Sarah Shilhavy, Photo by Jeremiah Shilhavy
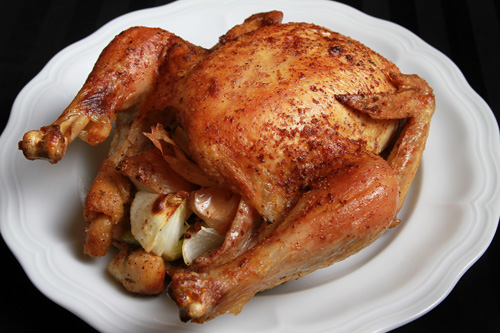
Roasting a chicken is easier then you think (if you’ve never made one before). The recipe I have for you today is simple, but it makes one really tasty chicken.
The key is in the basting and roasting. The recipe starts off on high heat, but after a few minutes it comes down to allow the chicken to roast slowly, locking the juices in and resulting in a moist, tender, juicy chicken. Depending on how large the chicken is this will take 1-2 hours to roast, or more. The oven will have something to say about it too.
Basting the bird during the roasting helps it stay moist throughout, especially in the white meat area, as that tends to cook quicker and dry out faster. At first you’ll only have the oil and butter to baste the chicken with, but after about 15-20 minutes or so the chicken will start oozing drippings, perfect for basting back on.
And about the oils, am I sure that’s not too much? YES! It’s not. I like it that way. You will too. The butter and oil infuses so much buttery flavor into the chicken, as well as making the skin turn a crisp, golden brown. Watch the video. You’ll see.
If you want to, cube a few potatoes and roast them with the chicken.
If you want to make gravy though, don’t add potatoes. Potatoes are extremely greedy and gulp all the drippings down. They won’t spare you very much in the way of drippings, if any at all.
So what are you waiting for? Check the video out for a step by step tutorial and make this for your next dinner, along with a side of rice, popovers, or potatoes. I’d do the popovers. They’re perfect for soaking up any extra gravy.
Remove the giblets and wash the chicken in warm to hot tap water and dry thoroughly. Liberally season the cavity with salt and pepper. Stuff with the onion, celery, and garlic.
Brush melted butter and coconut oil all over chicken and season with salt, pepper and garlic powder. Place in a roasting pan or a 9×13 glass baking pan.
Roast for 11 minutes at 425 degrees F. Reduce the heat to 350 degrees and baste the chicken. Roast for 1 hour or until juices run clear when pricked between the leg and thigh. Baste chicken with pan juices every 10-15 minutes or so, but stop basting around the last 10 minutes. You can increase the temperature to 375 degrees F during the last 1/2 hour or so if you need to “hurry” it up.
Pour pan juices into a small saucepan and add chicken stock or water. Adjust richness by adding more or less stock/water. Make a slurry by adding the corn starch to the water and whisk into the gravy to reach the desired consistency. Add more if needed. Add more stock if needed and whisk and boil until gravy has thickened. Serve with the roasted chicken.
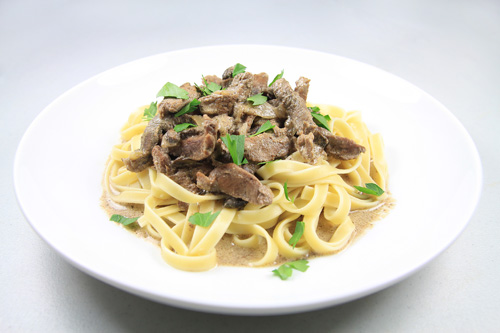
Coconut Grass-fed Beef Stroganoff served with fettuccini pasta and parsley
Prepared by Marianita Shilhavy, Photo by Jeremiah Shilhavy
This version of the classic Russian dish can be divided into half for 2 meals. This recipe is good when you have company or when you want to make more than 1 meal at a time to save time.
The coconut flour is a great addition to the recipe for extra fiber. Coconut water vinegar adds flavor and tenderizes the meat, giving it a nice texture.
Grease the bottom of the slow cooker pot with extra coconut oil. Set aside.
In a medium skillet heat the 3 tablespoons of coconut oil and sauté garlic and onion until browned and aromatic. About 1-2 minutes.
Place the beef strips in the slow cooker, season with salt and pepper to taste. Place onion and garlic on top of beef, then add mushrooms and dill weed. In a small bowl mix together red wine, stock, coconut water vinegar, Worcestershire sauce, tapioca and coconut flour. Pour over the beef. You can add more stock during cook time if desired.
Cover, and cook on high for 2 hours, then cook on low for 1 1/2 hours. During the last hour stir in sour cream and parsley, continue cooking until beef is tender and cooked through (each slow cooker will vary on cooking time). (You can also cook this on low for about double the time).
Serve over egg noodle or fettuccini pasta (use gluten-free if needed) with extra sour cream and topped with extra parsley if desired. Enjoy!