Coconut Peanut Butter Cup Hot Cocoa

When the weather outside is cold, make hot cocoa. Coconut Peanut Butter Cup Hot Cocoa, that is.

Never heard of it? Well good, ’cause as far as I know I’m the first one to come up with it (the coconut part, not the peanut butter part). There are lots of peanut butter hot chocolate/hot cocoa recipes out there, but Coconut Peanut Butter? Nope. Not until now!

I’m sure you’ve all at some point or another had a cup of hot cocoa or chocolate, but have you ever tried it with peanut butter? Or Coconut Peanut Butter? If you haven’t you should. It’s a fantastic combination. Think of it as a peanut butter cup. How could you not like peanut butter cups?

So I have here a recipe for Coconut Peanut Butter Cup Hot Cocoa. I love the addition of the Coconut Peanut Butter; it adds richness and creaminess to the drink without overpowering the chocolate flavor.

This is hot cocoa by the way, not hot chocolate. What’s the difference? Simple. Hot cocoa is made with cocoa powder and hot chocolate is made with chocolate. See? I told you it was simple. So don’t get the two confused.

No hot cocoa is complete without whipped cream, so go ahead, dollop it on. Use whipped cream, not whipped topping. The difference? Whipped topping isn’t the real stuff made from real heavy cream; it’s fake, usually made from hydrogenated vegetable oils. Whipped cream is just was it says it is: whipped heavy cream sweetened with a bit of sugar and flavored with vanilla extract. Delish.

So if you love hot cocoa but are a little bored of just the same thing, do give this recipe a try. I love adding a few tablespoons of coconut oil to the recipe to drink before a workout for an energy boost. It’s rich (but not too rich), creamy, peanutbuttery, coconutty, chocolaty, and tastes a lot like a peanut butter cup with a twist. Not only that, but it’s also WAY better then the packaged stuff. One sip of this and you’ll never buy hot cocoa mix again. If you don’t already have a jar of Coconut Peanut Butter in your possession you’ll want to get some just to make this. What are you waiting for?

Enjoy the recipe below!

Sarah

Coconut Peanut Butter Cup Hot Cocoa
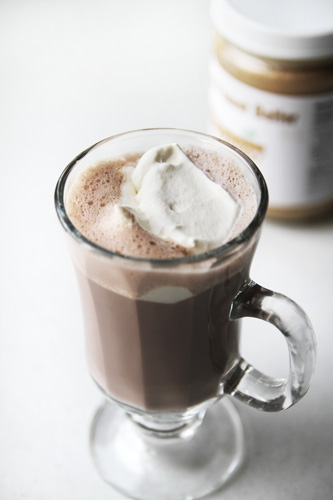
Coconut Peanut Butter Cup Hot Cocoa recipe photo
Coconut Peanut Butter Cup Hot Cocoa
Prepared by Sarah Shilhavy, Photo by Jeremiah Shilhavy

4 – 5 servings
Preparation Time: 3 minutes

Combine dry ingredients in a medium saucepan and whisk in water over medium heat. Bring to a boil, whisking constantly. Boil for 2 minutes. Whisk in Coconut Peanut Butter.

Add milk and whisk and heat until hot, but do not boil. Remove from heat and whisk in vanilla extract. Serve topping with whipped cream.

*If using honey, use less then you would for sugar. Brown sugar may be used.

Recipe courtesy Sarah Shilhavy

Submit your recipe here!

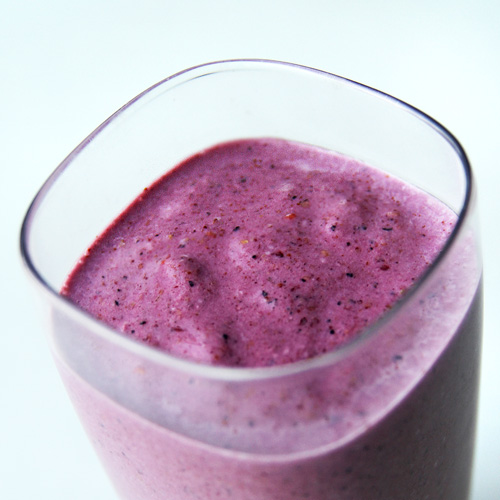
Coconut Fruit Smoothie

Coconut Fruit Smoothie recipe photo
Coconut Fruit Smoothie
Prepared by Sarah Shilhavy, Photo by Jeremiah Shilhavy

Servings: 1
Preparation Time: 10 minutes

  • 1 cup coconut milk or regular whole milk
  • 1/2-1 whole banana
  • 1/4 cup frozen fruit: berries, peaches, etc.
  • 2 tablespoons fresh ground flax seeds
  • 2 tablespoons fresh ground nuts: almonds, pecans, etc
  • 1 tablespoon dry coconut (flakes, etc.)
  • 1 tablespoon coconut oil, melted

Place all ingredients except coconut oil in blender and blend. Slowly pour coconut oil into blender while blending. Blend until smooth and serve.

Recipe submitted by Jean, Melrose, NM

Submit your recipe here!

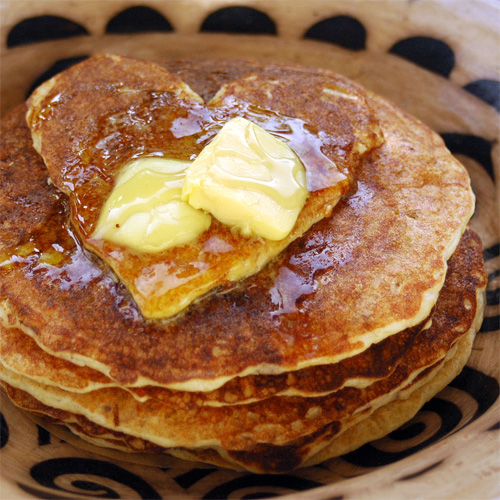
Oatmeal Cinnamon Raisin Pancakes

Oatmeal Cinnamon Raisin Pancakes recipe photo
Oatmeal Cinnamon Raisin Pancakes
Photo by recipe author

Preparation Time: 15 minutes
Servings: about 12-24 pancakes

The day before:

The next day add:

The day before:

Put oats and flour into a large bowl, add the buttermilk. Let them soak in the buttermilk overnight or up to 24 hours.

The next day:

Mix in the eggs, baking powder, salt, cinnamon, nutmeg, coconut oil, honey and raisins.

Heat a flat iron surface – griddle or large pan – to medium high heat. Oil the pan with coconut oil… make sure to turn down the heat if it gets too hot. Ladle the pancake batter onto the griddle to the size you want. When air bubbles start to bubble up to the surface at the center of the pancakes (about 2-3 minutes), flip them over. Take a peek under them for doneness in a minute or so. When golden or darker golden brown, they are done.

Remember that cooking the second side takes shorter time then the first side and the second side doesn’t brown as evenly as the first side. Serve immediately or keep warm in the oven until ready to serve.

Dress up your pancakes with butter, maple syrup or honey and your choice of fruit if desired.

Recipe submitted by Marillyn, Bloomingdale, IL

Submit your recipe here!

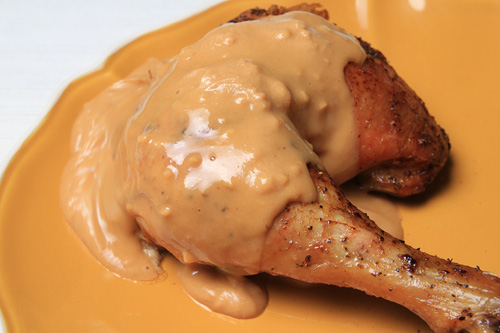
Roast Chicken with Coconut Peanut Butter Sauce

Roast Chicken with Coconut Peanut Butter Sauce recipe photo
Roast Chicken with Coconut Peanut Butter Sauce
Prepared by Sarah Shilhavy, Photo by Jeremiah Shilhavy

Servings: 8
Preparation Time: 20 minutes

Roast Chicken:

  • 1 whole chicken
  • Salt & pepper
  • 1 bunch fresh rosemary
  • 4 lemons, 2 halved, 2 quartered
  • 3 heads garlic, cut in half crosswise
  • 6 tablespoons butter, melted (you can also use part or all coconut oil)

Preheat oven to 425 degrees F.

Remove packet of chicken giblets and rinse chicken inside and out. Place chicken in a roasting pan or 9×13 glass baking pan and pat all over with paper towel to dry.

Generously salt and pepper inside of chicken. Stuff with a few sprigs of the rosemary, the 2 lemon halves, and 2 garlic halves. Brush outside all over with melted butter. Season with salt and pepper to taste. Place the lemon quarters and remaining garlic halves around the chicken.

Roast chicken for approximately 1 1/2 hours, basting with pan juices every now and then once it is halfway through cooking.

Serve chicken with the roasted garlic and coconut peanut butter sauce.

While the chicken is roasting, prepare the sauce.

Coconut Peanut Butter Sauce:

Place coconut peanut butter and hot water in a small bowl. Whisk until well combined. Whisk in remaining ingredients. Cover and let sit at room temperature for at least an hour to allow flavors to develop.

Recipe courtesy Sarah Shilhavy
Submit your recipe here!

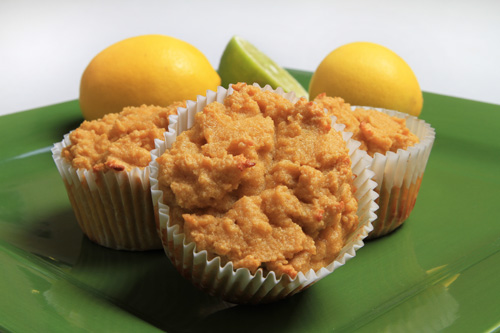
Lemon-Lime Coconut Flour Muffins


Gluten Free Lemon Lime Coconut Flour Muffins Recipe Photo
Gluten Free Lemon Lime Coconut Flour Muffins
Prepared by Marianita Shilhavy, Photo by Jeremiah Shilhavy

Servings: 9 muffins
Preparation Time: 15 minutes

Procedure:

Pre-heat oven at 350 degrees F.

Mix coconut flour and baking powder, and then set aside.

In a mixing bowl, beat the eggs and gradually add sugar, milk, butter,
coconut oil, lemon juice, lime juice, lemon zest, lime zest, and salt. Beat
until well blended.

Gradually add the coconut flour with baking powder to egg mixture. Blend
well. Spoon batter into 8 muffin tins lined with paper liners.

Bake at 350 degrees F for 20 minutes or until toothpick inserted into center
comes out clean.

*If using salted butter salt is not needed.

Recipe by Marianita Shilhavy

Submit your recipe here!

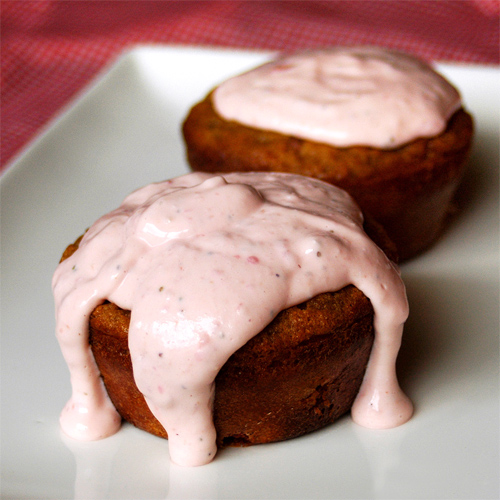
Gluten Free Strawberry Coconut Muffins

Gluten Free Strawberry Coconut Muffins recipe photo
Gluten Free Strawberry Coconut Muffins
Photo by recipe author

Servings: 6-12 muffins
Preparation Time: 10 minutes

Muffins:

Cream Cheese Topping:

  • 1 cup homemade or store bought cream cheese, softened
  • 1 cup chopped strawberries, fresh or frozen
  • 1 – 3 tablespoons raw honey

For the muffins:

Preheat oven to 350 degrees F.

In a small bowl, combine coconut flour, salt and baking soda.

In a large bowl mix the eggs, honey, coconut oil and vanilla until well blended. Mix dry ingredients into the wet, blending with a hand mixer or by hand. Gently fold in strawberries.

Place batter in paper lined muffin tins OR oil small individual glass bowls and pour batter in about 1/2 – 3/4 full.

Bake in preheated oven for 20-25 minutes. Take them out and let them cool and serve topped with Strawberry Cream Cheese.

Cream Cheese:

Place everything in a blender or food processor and blend till smooth. Store in an airtight container in the fridge. When muffins are ready, generously top each muffin and enjoy!

Recipe submitted by Marillyn, Bloomingdale, IL

Submit your recipe here!

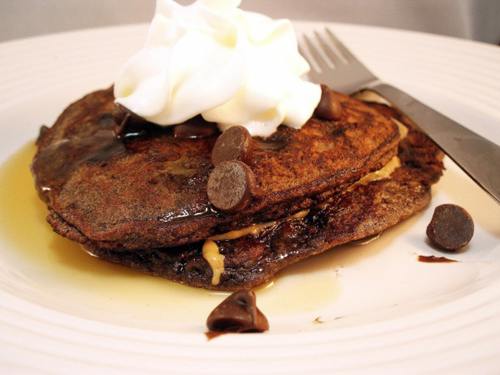
Gluten Free Chocolate Chocolate Chip Pancakes

Gluten Free Chocolate Chocolate Chip Pancakes recipe photo
Gluten Free Chocolate Chocolate Chip Pancakes
Photo by recipe author

Servings: 4
Preparation Time: 20 minutes

Beat egg whites until soft peaks form. Separately, beat egg yolks until foamy. Fold together, along with melted butter, milk, honey, salt, and vanilla. Whisk in coconut flour, cocoa powder and baking powder. Stir in chocolate chips.

Heat a pan coated with needed amount of palm shortening or coconut oil. Spoon 1/4 cup of batter onto the pan. Allow to cook for 3 minutes or so and carefully flip. Allow to cook for 2-3 minutes more or until cooked through. Repeat with remaining batter.

Serve with toppings such as peanut butter, maple syrup, and whipped cream, and top with additional chocolate chips. Makes about 9 pancakes.

Recipe submitted by Alta, Dallas, TX

Submit your recipe here!

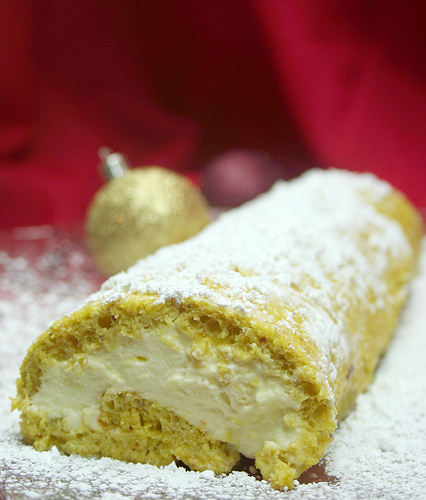
Gluten Free Lemon Roulade

Gluten Free Lemon Roulade made with coconut flour recipe photo
Gluten Free Lemon Roulade made with coconut flour
Photo by recipe author

This recipe is done in 3 parts. Making the Lemon Curd can be done up to a week in advance.

Servings: 8
Preparation Time: 45 minutes

Lemon Curd:

  • grated zest and juice of 3 lemons
  • 1/4 cup raw honey
  • 1 tablespoon arrowroot powder (or other starch)
  • 1 tablespoon water
  • 2 egg yolks
  • 4 tablespoons butter

Lemon Roulade Sponge Cake:

Lemon Cream Filling:

  • 1 cup heavy cream
  • 4 tablespoons lemon curd

Part 1: Making the Lemon Curd

Put the grated zest and juice into a pan honey. Bring to a boil, stirring until the honey has mixed in with the lemon juice.

Mix the arrowroot and water to a paste and add to the lemon/honey mixture. Remove pan from heat and beat in egg yolks.

Return to low heat and mix for about 2 minutes and then remove from the heat again. Gradually beat in butter. Pour into a mason jar, or other sterilized jar, cover and seal. Let the curd cool, then chill.

Part 2 – Making the Lemon Roulade Cake

Preheat the oven to 375F. Grease a 13 x 9-inch jelly roll pan and line with parchment paper.

In a large bowl, beat the egg yolks with 1 oz (1/8 cup) raw honey until light and foamy. Beat in the lemon zest and vanilla extract, then lightly fold in the ground almonds and coconut flour using a rubber spatula or large metal spoon.

Beat the egg whites in a clean bowl until they form stiff, glossy peaks. Gradually beat in the remaining 1oz (1/8 cup) of raw honey to form a stiff meringue. Fold in 1/3 of the meringue at a time into the egg yolk mixture. Do not over-fold, just enough to incorporate.

Pour into the prepared pan, level the surface, and bake for 10 minutes, or until risen and spongy to the touch. Cover loosely with parchment paper and a damp dish towel. Let the cake cool in the pan.

Part 3 – Making the Lemon Cream Filling

Whip the cream in a stand mixer just until medium peaks form. Lightly fold in 4 tablespoons of the lemon curd.

Assembly:

Sift the confectioners sugar onto a piece of parchment paper and turn the sponge onto it. Peel off the lining paper and spread the lemon curd cream over the surface of the sponge, leaving a border around the edge. Using the paper underneath as a guide, roll up the sponge from one of the long sides.

Place on a serving platter with the seam underneath and serve.

Recipe submitted by Diana, Des Moines, IA

Submit your recipe here!