Making A Foolproof Gluten Free Cake

Life without gluten can be full of obstacles and variations, but that shouldn’t mean you have to settle for something less.

Take cake for an example. Gluten-free cakes will never be as good as the wheat ones, right? WRONG! I myself am not gluten intolerant, but I do know what it’s like to have to give something up because it’s not healthy and try to find an alternative. I don’t like to settle for something less; for me taste is a very close second to healthy.

My biggest goal in producing gluten-free recipes is “foolproof-ness.” Cake was a big one, and I was eager to try it. This was right about the time that I was really getting into my little coconut flour frenzy and trying to come up with as many recipes as possible for the product. Cake was something I hadn’t tried yet, but I was ready to start experimenting.

The first thing was ideas. I wanted to do a yellow and chocolate cake, but decided on the chocolate first. I found a chocolate cake recipe I liked, and began the long process of taking it apart, adding, taking away, testing, testing, testing. By the time I was done it was a totally different recipe. It was by far the longest time I ever spent developing a recipe; even longer then my Coconut Flour Brownies. I tried, and tried again. Each time there always seemed to be something wrong with it. The biggest issue was the dryness. It always seemed too dry. The more I experimented, the more the amount of eggs grew. Soon they had reached a rather alarming amount, but by that time I finally had the perfect gluten free chocolate cake.

It was moist, fluffy, chocolaty, and perfectly foolproof. Many times I’ve made them for company dessert (many with little kids by the way) and unless I told them they were gluten free they would’ve never known or suspected and would’ve just kept on happily wolfing it down.

No, no, seriously. It’s really that good. If you make it, follow the recipe exactly and please don’t change a thing and then tell me it doesn’t work. It really does work. The eggs are the most important part, and they definitely cannot be changed.

While you’re mixing the eggs and butter together, don’t panic if the butter separates into little sesame seed shapes. That’s normal, and doesn’t bother anything at all. I also recommend having the butter still just a tad bit cold, not near melting point.

This recipe can be made as a 2, 8 inch layer cake, a 9 inch layer cake, or cupcakes. I like to use a buttercream frosting for this cake but pretty much anything that goes with chocolate will be good on this.

If any of you try the recipe, please feel free to let me know how you liked it. 🙂
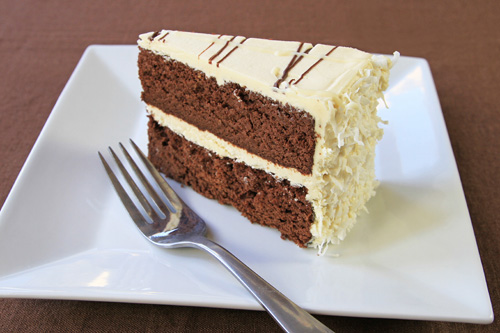
Gluten Free Coconut Flour Chocolate Cake recipe photo
Gluten Free Coconut Flour Chocolate Cake
Prepared by Sarah Shilhavy, Photo by Jeremiah Shilhavy

Coconut Flour Chocolate Cake

Pre-heat oven to 350 degrees. Grease two 9 inch or 8 inch layer pans with coconut oil and dust with cocoa powder.

In an electric mixer fitted with the paddle attachment, combine butter and sugar, and beat together for about 2 minutes. Add eggs in one at a time and beat high speed for about 3 minutes. Add in the vanilla while beating the eggs and butter mixture. In a separate bowl, combine the dry ingredients together and add alternately with the milk to the butter mixture. Beat batter for about five minutes on high speed. Spoon batter into the two prepared cake pans and smoothen out tops.

Bake in preheated oven for 30-35 minutes, or until toothpick inserted into the center of cake comes out clean. Place pans on wire rack and cool for 10 minutes before removing from pans. Cool cakes completely before frosting. Use your favorite frosting to frost the cake.

Peppermint Chocolate cake variation: add 1 teaspoon peppermint extract to batter before pouring into pans and mix well. Frost cake with peppermint frosting or frosting of your choice.

Cupcakes: Make recipe as directed but spoon batter into muffin cups and bake for about 26-30 minutes. Frost after cupcakes have cooled completely. Makes about 24 cupcakes.

Enjoy everyone!

Sarah Shilhavy

Submit your recipe here!

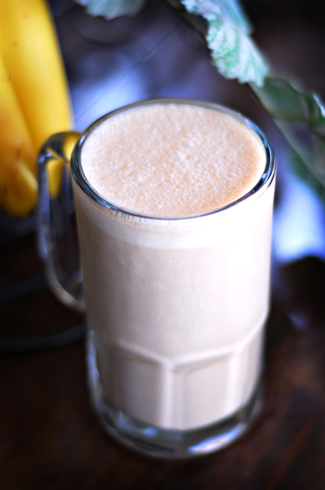
Peanut Butter/Banana Kefir Smoothie

Peanut Butter Banana Kefir Smoothie recipe photo
Peanut Butter Banana Kefir Smoothie
Photo by recipe author

Servings: 8 cups, 3 servings
Preparation Time: 5 minutes

  • 1 1/4 cups organic whole raw milk
  • 4 tablespoons quick oatmeal (or cooked rolled oats)
  • ice cubes
  • 2 tablespoons peanut butter (or your favorite nut butter)
  • 2 medium bananas (frozen or fresh)
  • 1 cup kefir
  • 1 – 2 tablespoons coconut flour
  • 1 – 2 tablespoons chocolate syrup/hot fudge sauce
  • 1/4 cup raw honey (start off with 2 tablespoons, then add more if needed)

Soak the oatmeal in milk for a few minutes, or until the oatmeal softens. Mix it together with the other ingredients in a blender.

Blend in 5-8 iced cubes depending on how cold you like your smoothie. Adjust ingredients to your taste and/or thickness.

Recipe submitted by Jocelyn, Casa Grande, AZ

Submit your recipe here!

Making a Light & Fluffy Gluten-Free Coconut Flour Muffin

Once again I found myself with overripe bananas just begging to be used. No matter how long I tried to hide them in the refrigerator they just wouldn’t go away or stop yelling at me every time I opened the door.

Today however, I was finally able to silence them. I dug up an older coconut flour recipe that I had been meaning to improve for a while now. The results from the recipe were satisfactory and tasty, but it definitely could be made even better. For me, it has to be perfect. Well, pretty near that anyway. As I wrote earlier in my post about the Coconut Flour Cocoa Banana Muffins, coconut flour baked goods don’t have to be dense and heavy. With just a little of your time, the know-how, and a good recipe, you can make an excellent coconut flour pastry.

But what if you don’t have a good recipe? How do you improve it? Well first off, know what you don’t like about it, then break the recipe down. Take a good look at it. Here I’ll show you by letting you take a look at the original recipe ingredient list and then showing you my improvised version. Why only the ingredients? Because that’s where the problem is. Also, I only use Tropical Traditions’ coconut flour, and can’t guarantee that the recipes developed using our coconut flour would work with a different coconut flour, because they can vary in protein and fiber content. If the problem was in how the recipe was put together it’d be a different thing. So here it is:

So, we’re looking at a whole cup of coconut flour (which is a very thirsty flour by the way) and only 2 tablespoons of milk as the “thinning” liquid. The fat (butter and coconut oil in this case) are liquids here, but they act differently then water based liquids and don’t help out too much in saturating the flour. The first conclusion is that there isn’t enough liquid. That means the batter is too heavy to rise and “mushroom” over properly, and will therefore be very dense and heavy. It will be moist and pretty tasty though, since the fat amount is perfect.

Another red flag is the sweetener amount. Only 3 tablespoons for 12 muffins isn’t very much. While you don’t want a sickeningly sweet muffin you do want just enough sweetness to bring all the flavors together, instead of leaving it bland. Since we will be increasing the thinning liquid amount, the sweetener will grow blander and will therefore need to be increased as well.

I like my muffins to rise really well (since that is the main downfall of most coconut flour recipes), so I’ll add a bit of baking soda. The coconut flour is a heavy flour, so it usually needs more baking soda/powder to get it to rise. Baking powder has a more neutral taste then baking soda, which needs to be countered by the acidity of another ingredient (here it will be the honey). However, I’ve found that baking powder isn’t as potent as baking soda, so you usually have to use more of it, or add a bit of baking soda to help it out.

So that’s that. The eggs are fine. Leave them be please; every single one of them is needed to make up for the gluten – don’t find out the hard way! Everything else is fine also.

In the end, we get this:

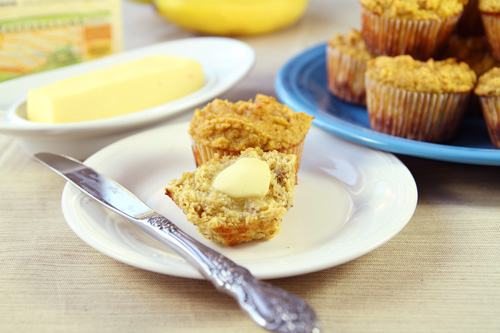
Gluten Free Coconut Flour Banana Muffins recipe photo
Gluten Free Coconut Flour Banana Muffins
Prepared by Sarah Shilhavy, Photo by Jeremiah Shilhavy

True, they aren’t the prettiest muffins you’ve ever seen, but looks aren’t as important as taste and texture. The tops are a bit irregular, but the muffins rose well and are light and fluffy on the inside, not to mention delicious!

Now take a minute to compare the before and after recipes, and then head off to the kitchen to whip up a batch for yourself. Talk about yum…

Banana Coconut Flour Muffins

Serves: 12 muffins
Preparation Time: 10 minutes

Preheat oven at 350 F degrees.

Sift the coconut flour, baking soda, baking powder and salt together into a small bowl. Set aside.

In a medium sized bowl beat eggs together. And add butter, coconut oil, milk, honey, sugar and vanilla. Whisk together to blend.

Whisk in coconut flour mixture and bananas until well blended. Batter will be thick. Divide batter among the muffin tins lined with paper liners.

Bake in preheated oven for 20 minutes or until toothpick inserted in center comes out clean.

That’s all for now…

Sarah

Submit your recipe here!

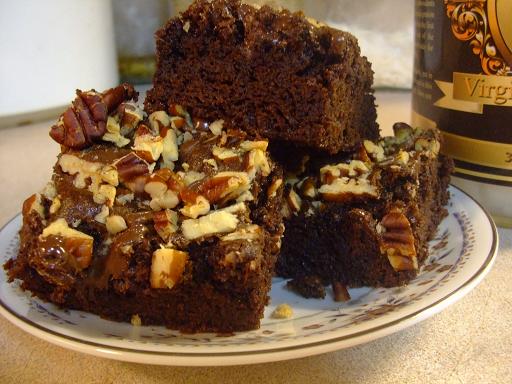
Coconut Cocoa Pecan Chocolate Chip Brownies

Coconut Cocoa Pecan Chocolate Chip Brownies recipe photo
Coconut Cocoa Pecan Chocolate Chip Brownies
Photo by recipe author

Servings: 24 brownies
Preparation Time: 10 minutes

Heat oven to 350 degrees F. Grease the bottom and sides of a 9×13 inch baking pan.

Mix sugars, coconut oil, vanilla and eggs in medium bowl. Mix flour, cocoa, baking powder and salt in separate bowl. Add the flour mixture in gradually, mixing until smooth after each addition. Spread batter in pan, and sprinkle with chopped pecans and chocolate chips.

Bake 30-35 minutes or until toothpick or cake-tester inserted in center comes out clean. Serve with cold milk after they’ve cooled.

Variations –

Melt caramel, adding about 1 tablespoon of milk to thin it and drizzle it over brownies.

You can also substitute walnuts for pecans.

Dark chocolate chunks can be chopped up and put on instead of the chocolate chips.

Mix half of the chocolate chips in the batter before putting it in the pan.

Recipe submitted by Rachel, South Whitley, IN

Submit your recipe here!

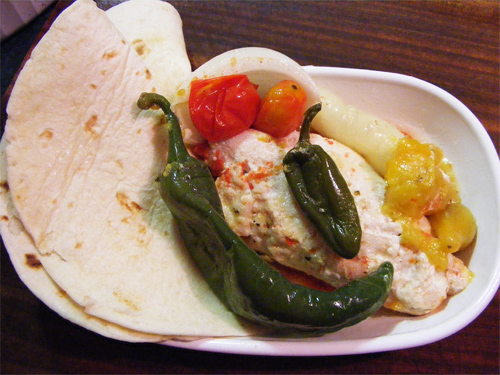
Mexican Style Pepper Chicken

Mexican Style Pepper Chicken recipe photo
Mexican Style Pepper Chicken
Photo by recipe author

Servings: 4
Preparation time: 12 minutes

  • 2-3 tablespoons organic coconut oil
  • 3-4 organic frozen chicken breasts
  • 1/2 -1 cup whole frozen peppers (jalapenos, green chili, Anaheim or banana peppers)
  • 1-2 cups whole frozen small garden tomatoes (cherry, Roma, yellow pear or other tomatoes)
  • 1/2 large onion, cut into chunks
  • Sea salt, pepper and other seasonings to taste
  • Grated organic mozzarella cheese or queso fresco (optional)
  • Tortillas (optional)

Melt coconut oil in a large skillet on medium heat. Add frozen chicken. Cover chicken with vegetables and seasoning, if desired. Spread peppers, tomatoes and onions evenly.

When chicken is done on one side (approximately 20-30 min), turn breast pieces over. Cook another 20-30 minutes until thoroughly done. Vegetables will be very soft.

Serve Mexican style with toasted tortillas. Top with grated cheese, if desired.

Recipe submitted by Dakotah, Winfield, KS

Submit your recipe here!

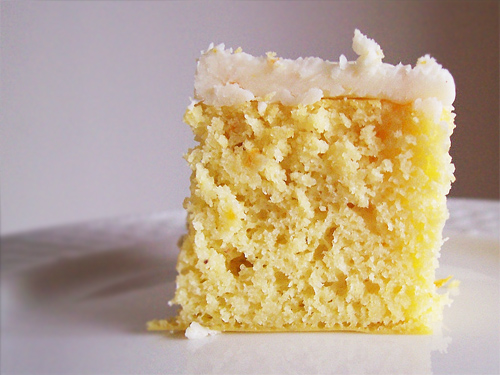
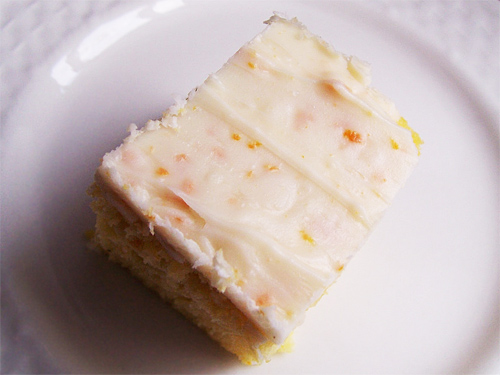
Gluten Free Coconut Flour Orange Cake with Coconut Oil Frosting

Gluten Free Coconut Flour Organic Cake recipe photo
Gluten Free Coconut Flour Organic Cake Frosting recipe photo
Gluten Free Coconut Flour Organic Cake
Photos by recipe author

Preparation time: 15 minutes
Servings: 5-8

I give you a method for melting the coconut oil while greasing the pan, saving you a dish. You can certainly melt the coconut oil in one pan and grease the pan separately. Also, I add the coconut oil last just in case it is still pretty warm. The eggs already mixed with the other ingredients provides a bit of a buffer in case the oil is still too warm. Scrambled egg cake is not what we’re after here.

Preheat the oven to 350 degrees. Measure out coconut oil and place in an 8″x8″ pan. Place the pan in the oven to melt the coconut oil.

While the coconut oil is melting, whisk the eggs, coconut milk, honey, vanilla and orange zest together.

Once the coconut oil is melted (probably around five minutes or less), remove the pan from the oven and let it cool while you mix in the rest of your ingredients. Combine coconut flour, baking powder and salt. Stir the dry ingredients into the wet.

Once your pan is cooled enough to handle, carefully swirl your coconut oil around your pan in order to grease all sides. Then pour the coconut oil into the batter and mix until all lumps are gone.

Pour the batter into your greased pan and place on the middle rack of the oven. Bake for 35-40 minutes, until browned on top and a toothpick comes out clean. Place the cake on a cooling rack.

After the cake has cooled a bit, but is still warm, poke holes all over the top with a fork. Juice the orange half right over the whole cake, making sure to evenly distribute the juice.

Orange Coconut Oil Frosting

Be sure to melt your coconut oil in a glass bowl. I do this by putting the bowl over a small pan of simmering water.

  • 1/2 cup coconut oil, melted in a glass bowl
  • 9 drops of liquid stevia (alternatively, you could use a couple of teaspoons of raw honey
  • 1 packed teaspoon orange zest
  • 1/2 teaspoon vanilla extract
  • pinch of salt

Mix all ingredients into warm coconut oil. You are now going to place the bowl into the freezer in order to cool it down. It is very important to check on it every couple of minutes to catch it before it gets too cold. You want to take it out of the freezer right when it starts to get cloudy.

At this point the cold bowl (and your cool kitchen) will continue to turn the liquid oil into a solid. Continue to whisk the frosting as it gets cloudier and cloudier and eventually turns into a whipped butter consistency. The idea is to get a bit of air into it.

Once it is to a whipped (very soft) butter consistency plop it onto your cooled cake. Frost it very quickly before the coconut oil hardens. It will seem like a pretty thin frosting, but it is just enough.

*Use 1 teaspoon of coconut cream concentrate for every 6-8 oz of water for coconut cream milk. Mix together and use as directed or make homemade coconut milk.

Recipe submitted by Shannon, Dexter, MI

Submit your recipe here!

Gluten Free Chocolate Coconut Protein Bars

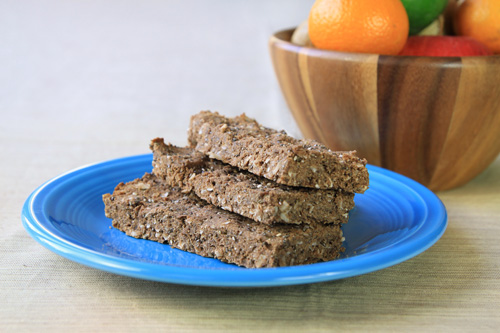
Gluten Free Chocolate Coconut Protein Bars recipe photo
Gluten Free Chocolate Coconut Protein Bars
Prepared by Sarah Shilhavy, Photo by Jeremiah Shilhavy

I recently made these Chocolate Coconut Protein Bars, and they were pretty good! The triple amount of coconut provides the energy element, and the protein powder gives you the protein. It’s the best of both worlds; energy and protein rolled into one bar. Why make both a protein and energy bar when you can have them both in one?

The bars were pretty delicate. If you want them moister you could add another egg or more oil if you wanted a higher oil serving. Either way, this recipe is pretty forgiving so feel free to play around with it a bit until you get the desired texture and results. I made a half batch and pressed it into a greased square glass pan and then cut it into bars. That way it comes out looking more like a bar instead of a cookie or something.

The bars are very filling; you can only eat so much. The chia seeds expand in your stomach and give you that “full” feeling pretty quickly, which is a good thing.

Be sure to check the recipe out, and comment if you have any questions or comments of your own.

Enjoy everyone!

Sarah

Chocolate Coconut Gluten Free Protein Bar

Preheat oven to 375. Grease cookie sheet(s) with extra coconut oil.

Melt oil if needed and in a large bowl stir in remaining ingredients with the oil until well blended. Place spoon sized mounds unto prepared cookie sheets and pat down slightly into bars.

Bake in preheated oven for 14-15 minutes. Don’t overcook.

Recipe submitted by Virginia, Circle, MT

Submit your recipe here!

Coconut Pumpkin Custard

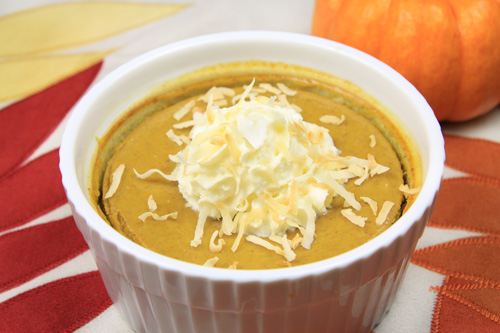
Coconut Pumpkin Custard recipe photo
Coconut Pumpkin Custard
Prepared by Sarah Shilhavy, Photo by Jeremiah Shilhavy

Servings: 5
Preparation Time: 8 minutes

Preheat oven to 350 degrees F. Lightly grease 5 8 oz custard cups/ramekins with coconut oil.

Whip the eggs with a whisk or a blender until smooth. Add remaining ingredients and whisk/blend until smooth and well mixed.

Divide batter between the 5 prepared ramekins. Set the cups into a large baking pan. Fill with 1/2 inch of water.

Bake for 40 minutes (or until knife inserted in middle comes out clean).

Cover each with foil and refrigerate until completely cooled. Top with whipped cream and toasted coconut to serve.

*Use 1 teaspoon of coconut cream concentrate for every 6-8 oz of water for coconut cream milk. Mix together and use as directed or make homemade coconut milk.

Recipe submitted by Carole, Lakewood, CO

Submit your recipe here!