Coconut Oil

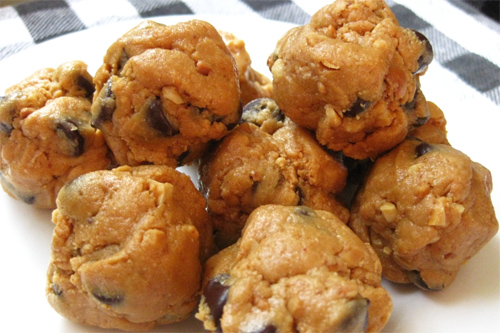
No-Bake Chocolate Chip Peanut Butter Balls

 No-Bake Chocolate Chip Peanut Butter Balls recipe photo
No-Bake Chocolate Chip Peanut Butter Balls
Photo by recipe author

Servings: Approx. 16, or more depending on size
Preparation Time: 10 minutes

Thoroughly mix all ingredients together in a bowl. If the mixture is too sticky, add more coconut flour; if it’s too dry, add more peanut butter.

Roll into peanut butter mixture into small balls using your hands or a cookie scoop. Store in the refrigerator.

Recipe submitted by Lindsey, Denver, CO

Submit your recipe here!

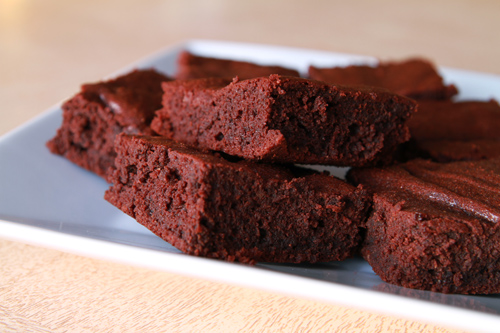
Gluten Free Chocolate Brownies

Gluten Free Chocolate Brownies recipe photo
Gluten Free Chocolate Brownies
Prepared by Sarah Shilhavy, Photo by Jeremiah Shilhavy

Servings: 24 brownies
Preparation Time: 15 minutes

Preheat oven to 350 degrees F. Grease a 9×13 inch pan with coconut oil.

Melt chocolate and butter together over very low heat, stirring occasionally until melted and smooth. Remove from heat.

In a small bowl, mix flours and xanthan gum together.

Whisk eggs, sugars, and vanilla extract together. Slowly whisk in the chocolate mixture until well blended.

Using a rubber spatula, stir the flour mixture into the chocolate mixture until well blended and smooth.

Pour batter into prepared pan and bake in preheated oven for 15-20 minutes, or until center is firm. Let cool for a couple minutes then cut and serve.

Recipe submitted by Sarah Shilhavy

Submit your recipe here!

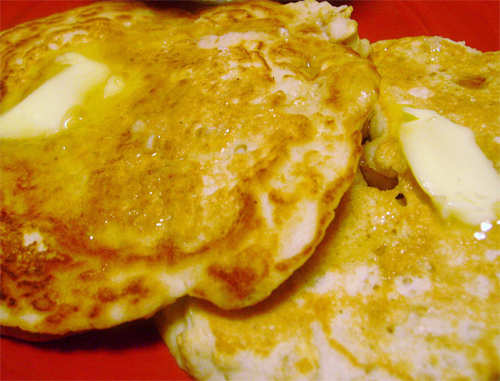
Coconut Flour Oat Pancakes

Coconut Flour Oat Pancakes recipe photo
Coconut Flour Oat Pancakes
Photo by recipe author

Servings: 2
Preparation Time: 20 minutes

In a small bowl, whisk together coconut flour, oatmeal, light coconut milk, egg, and salt.

Over medium heat, heat 1 teaspoon coconut oil in a pan. Add 1/4 of the coconut flour mixture to the pan, and cook until bottom is set. Flip and cook until other side is done as well.

Remove from the pan to a plate and repeat for the rest of the batter. Top with grass-fed butter, organic maple syrup, and shredded coconut.

Recipe submitted by Evan, Marlborough, MA

*Use 1 teaspoon of coconut cream concentrate for every 6-8 oz of water for coconut cream milk. Mix together and use as directed or make homemade coconut milk.

Submit your recipe here!

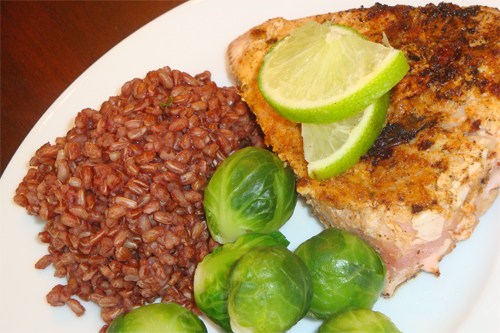
Coconut Lime Tuna Steaks

Coconut Lime Tuna Steaks recipe photo
Coconut Lime Tuna Steaks
Photo by recipe author

This is THE tastiest tuna I have ever tried. The first time I made it I used some “borderline” tuna that had been in my fridge for a week or so and it was still the best tuna I’d ever tasted. Instantly my new go-to recipe. So easy to make and SO delicious!

Servings: 2-20
Preparation Time: 20 min

Rub both sides of thawed tuna steaks with olive oil and seafood seasoning to coat. Mix equal parts softened coconut cream concentrate and fresh squeezed lime juice (pulp is fine) and beat with a fork until smooth and creamy. About 1 1/2 tablespoons of each should cover 2 medium size steaks. Multiply as needed for your desired number of steaks.

Coat both sides of each steak with a thick layer of the coconut lime mixture. Allow to harden for a few seconds before flipping to coat other side. Allow to marinate for 10 minutes for flavors to absorb.

Preheat a cast iron skillet coated with virgin coconut oil over medium heat for 5 minutes. Cook tuna steaks to desired doneness. Exact time will depend on the thickness of the individual steaks, but in general about 2-3 minutes per side produces a medium-rare tuna steak. I prefer to leave them fairly pink on the inside for maximum flavor and tenderness. Flip carefully to retain coating.

Serve immediately with a side of Bhutanese Red or Forbidden Rice and the green veggie of your choice for a super easy, company worthy dinner!

Recipe submitted by Lydia, Salem, VA

Submit your recipe here!

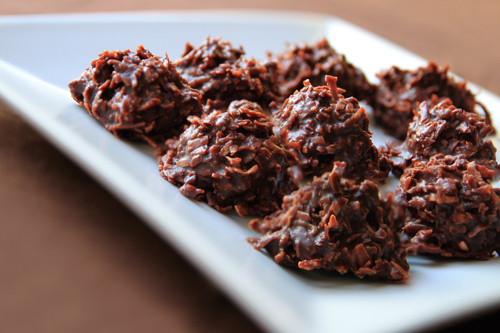
Coconut Chocolate No-bake Macaroons

These macaroons are one of the easiest and most delicious quick sweet treats I’ve made in a while. The ingredient list doesn’t make them look like anything special, but believe me, they are.

The secret to the fudgy texture is the almond flour. The stuff just melts right into all that chocolaty goodness and turns the whole thing into a fudgy batter just begging to be eaten. I ate this stuff before it even made it to the refrigerator. And I ate some more once it came out of the refrigerator!

Feel free to cut back a little on the maple syrup if you don’t like it too sweet. And just a tip for grinding your own almond flour: stop as soon as it turns into a powder. Scrape the corners of the canister down and shake the big bits into the center as well. Too much grinding and you’ll end up with almond butter. Not cool. Not for this recipe anyway.

Enjoy!

Sarah 🙂

Coconut Chocolate No-bake Macaroons

Coconut Chocolate No-bake Macaroons recipe photo
Coconut Chocolate No-bake Macaroons
Prepared by Sarah Shilhavy, photo by Jeremiah Shilhavy

Servings: yields about 40 macaroons
Preparation Time: 15 minutes

Mix all ingredients together well. Form into small balls using a spoon or cookie scoop and refrigerate until firm.

Recipe submitted by Stephanie, Goodyear, AZ

*You can grind your own almond flour by placing whole almonds in a blender/food processor and blending until a fine meal.

Submit your recipe here!

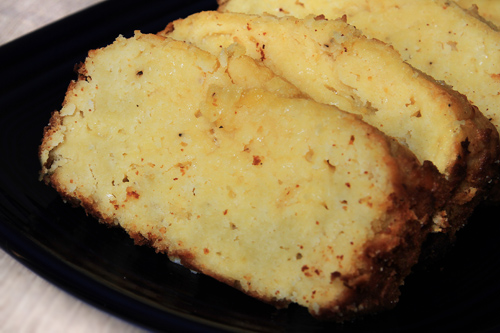
Gluten Free Cheesy Garlic Coconut Quick Bread

Gluten Free Cheesy Garlic Coconut Quick Bread

Gluten Free Cheesy Garlic Coconut Quick Bread recipe photo
Gluten Free Cheesy Garlic Coconut Quick Bread
Prepared by Sarah Shilhavy, photo by Jeremiah Shilhavy

Servings: 6

Preheat the oven to 350 degrees.

Blend all ingredients except cheese in a food processor (or whisk by hand) until there are no lumps. If the batter is a little dry just add a tablespoon of water as needed. It should be a pretty moist, almost pourable batter. Stir in cheese. Pour into greased bread pan.

Bake in preheated oven for 40 minutes or until done (toothpick inserted in center comes out clean).

Recipe submitted Christina, Coquitlam, British Columbia, Canada

Submit your recipe here!

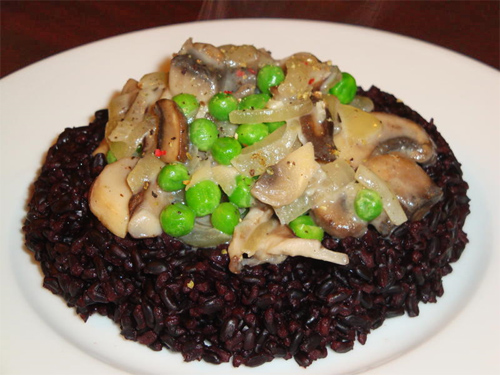
Spring Wild Mushroom & Pea Ragout

Spring Wild Mushroom & Pea Ragout recipe photo
Spring Wild Mushroom & Pea Ragout
Photo by recipe author

Creamy, delicious and comforting without being heavy, this dish is perfect for early spring when you want something fresh and light, yet still comforting and satisfying. The combination of sweet, brightly colored peas, flavorful, hearty mushrooms and onions with the tender, delicate and distinctive Forbidden rice and a hint of sweet coconut is a visually pleasing, heavenly smelling, delicious tasting treat for all the senses!

Servings: 4-8
Preparation Time: 30 min

1/2 lb sautéed ground beef or bison may be added if desired to make this meal even more hearty and nourishing, although it is wonderful the way it is.

In a preheated cast iron skillet, sauté onion with coconut oil and salt until softened and translucent. Add wine and stir until absorbed. Stir in coconut cream. Add garlic and mushrooms, season with salt, pepper and thyme, sautéing until mushrooms are mostly cooked through. Slowly add milk a bit at a time while stirring. Stir in peas, heat through, season with salt and plenty of pepper to taste.

Serve over rice for a visually pleasing and satisfying main dish or combine with the rice for a wonderful side dish.

Recipe submitted by Lydia, Salem, VA

*Use 1 teaspoon of coconut cream concentrate for every 6-8 oz of water for coconut cream milk. Mix together and use as directed or make homemade coconut milk.

Submit your recipe here!

Mushroom & Red Pepper Mozzarella Omelet

Have you checked out Tropical Traditions’ newest product? It’s eggs, soy free eggs at that! Head on over to Grass Fed Traditions and check them out, just click here.

I know what you’re thinking.

Eggs? Seriously? But…won’t they all break during the shipping process?

Nope! We’ve tested (and then tested some more) and the eggs don’t break. The shells are thick and the eggs are very well packaged. But if some do break, Tropical Traditions will gladly refund or reship.

Have I mentioned how amazing these eggs taste?

I think “yum” and “delicious” don’t even begin to describe them.

When you cook them up into scrambled eggs or into an omelet for breakfast, you just can’t help but notice how rich the orange color of the yolks are, and what a bright, cheerful yellow they remain even when cooked. They won’t turn into a tired, pale white-ish yellow when cooked.

Honestly, I think the word that describes them best is flavorful. They’re not bland and on the tasteless side, making you want to load them with something like ketchup to give them some contrasting pizzazz.

With these you appreciate the subtle yet rich, almost delicate creamy flavor. All they really need is some salt and pepper and butter with a bit of coconut oil to bring out and accent the buttery flavor. But if you really like ketchup on your eggs, then be my guest. Drown them all you like. The tang will accent the creaminess even more.

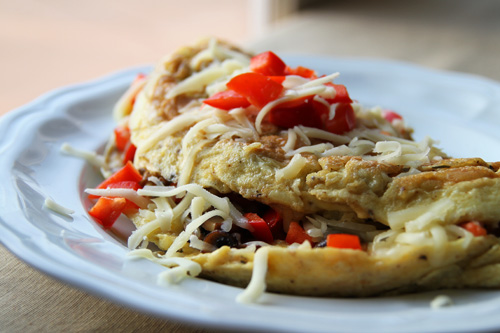
To showcase these high quality eggs make the Mushroom & Red Pepper Mozzarella Omelet recipe below. It’s delicious, cheesy, fluffy and buttery. Enough said.

Mushroom & Red Pepper Mozzarella Omelet
Mushroom and Red Pepper Mozzarella Omelet photo recipe
Mushroom and Red Pepper Mozzarella Omelet
Prepared by Sarah Shilhavy, Photo by Jeremiah Shilhavy

Serves: 4-5
Preparation Time: 10 minutes

Heat the butter and 2 tablespoons of coconut oil over medium heat in a large skillet until butter begins to bubble. Sauté the mushrooms with a sprinkle of Italian seasoning and garlic powder until caramelized and browned. Remove to a bowl and set aside.

Meanwhile, whisk the eggs and egg yolks together and season to taste with salt and pepper. Add another tablespoon of oil to the pan if needed and heat to a high heat.

Pour egg mixture into the pan. Lift the edges up as it’s cooking and allow the uncooked egg mixture to flow underneath. Flip omelet over to cook on other side.

Spread the mushrooms, red pepper and cheese on half of the omelet, reserving a little bit of the pepper and cheese to garnish the top. Fold over in half and transfer to a serving plate. Garnish and eat.

Enjoy!

Sarah:)

Submit your recipe here!