Brian - Admin

About Brian - Admin

Editor - Health Impact News

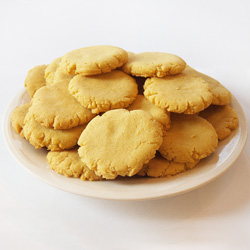
Coconut Cream Cookies

Preheat oven to 300 degrees F.

Beat the coconut cream, sugar eggs and vanilla together until combined. Stir in baking soda, cream of tarter and salt. Beat in the flour.

Shape dough into balls using one tablespoon of dough per cookie.

Place on ungreased cookie sheet, about 2 inches apart. Bake in preheated oven for about 15 minutes. The sides should be set but not browned.

Remove from oven and let set on pan for 1-2 minutes before putting on racks to cool completely.

Makes 40 cookies.

Recipe submitted by Vickie, Modesto, CA

Coconut Cream Cookies

Prepared by Sarah
Shilhavy
Photo by Jeremiah Shilhavy

Submit your recipe here!

Creamy, Dreamy, Coconut Cream Ice Cream

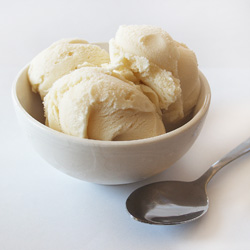
Coconut Ice Cream made from Coconut Cream Concentrate

Actual photo of this
recipe made by Sarah Shilhavy – Photo by Jeremiah Shilhavy

One of my favorite summer desserts is ice cream, and what’s better then a bowl of freshly churned homemade ice cream?

I recently made a recipe originally posted on our blog for coconut ice cream. When I first saw the recipe I quickly scanned over the ingredients. No eggs, no sugar and no coconut milk. Instead it had Coconut Cream Concentrate. I was intrigued; it sounded like something I would like!

The recipe was incredibly simple, and within minutes my brother and I had whipped up the batter. A few hours later we had a wonderful batch of creamy and irresistible looking ice cream. I couldn’t wait to taste it, and greedily scooped up a spoonful of it and stuck it in my mouth before anyone else had a chance to even know it was done.

Oh my goodness…! It had to be one of the best homemade ice creams I have ever tasted, and definitely the best egg-less ice cream ever. In fact, it was hardly an ice cream; frozen custard was more like it. (Coming from Wisconsin frozen custard is a favorite with us!) The ice cream was airy, creamy, and rich. It had the perfect amount of Coconut Cream Concentrate and vanilla. It reminded me of the vanilla frozen custard that I miss so much, only this had coconut.

Anyone can make homemade ice cream, even if you don’t have an ice cream maker. I made this recipe without an ice cream maker and needless to say, it turned out perfect. Here’s what you do to make ice cream without the use of an ice cream maker:

Prepare ice cream batter as the recipe below states in a large metal mixing bowl. Place bowl in a very cold freezer and pack frozen things around it. Every 30-40 minutes, whisk the ice cream and break up the clumps and incorporate it back into the mixture. Continue until ice cream has reached desired consistency. When the ice cream becomes too thick to whisk by hand, use a hand held mixer or a standing mixer fitted with a balloon whisk. Do this quickly though since it melts fast!

This is my slightly edited version of the original recipe. Enjoy!

Coconut Cream Ice Cream

Warm Coconut Cream Concentrate gently over low heat until soft.

Blend all ingredients together until smooth. Place mixture in your ice cream maker, following manufacturer instructions. Let run until it has reached the desired consistency.

There you have it! I didn’t use nutmeg, nuts, or almond extract, but I’m sure it would be delicious with those additions. As always, please feel free to drop me a comment or question.

Posted by Sarah Shilhavy

Submit your recipe here!

Coconut Date Shake

  • 14 oz coconut milk*
  • 2 tablespoons Coconut Cream Concentrate (or more to taste)
  • Small handful of dates – pits removed (more or less to taste)
  • 2 cups ice (more or less depending on thickness desired)
  • 2 teaspoons coconut oil, melted
  • Optional: 1/2 cup soaked almonds or Brazil nuts for extra protein. Soak for at least an hour and rinse off water.

Place all ingredients in blender. While blending, pour the coconut oil into the shake in a slowly. Blend all really well for a great, healthy, non-dairy desert or breakfast drink.

*Use 1 teaspoon of coconut cream concentrate for every 6-8 oz of water for coconut cream milk. Mix together and use as directed or make homemade coconut milk.

Recipe submitted by Lara, Indio, CA

Submit your recipe here!

Making a Gluten-Free Cheesecake

Just the other day I made a gluten-free cheesecake with a coconut macaroon/meringue type crust. It turned out great…except for a few cracks around the edges. Ugh.

Cracks in cheesecakes are a result of too much air being whipped into the batter. To avoid it, all the filling ingredients should be at room temperature. That includes the eggs and sour cream (if using). The most important part though is the cream cheese; it has to be soft, very soft. If it’s not, you’ll end up with a lumpy batter, and you will spend way too much time beating it to get it all incorporated and smooth. Mix as little as possible, and use a paddle attachment instead of a whisk if possible. Over-whipped cheesecake batter usually will not affect the taste of the finished product. All it will do is ruin the presentation, which can easily be solved with frosting or pie filling.

Almost all cheesecake recipes will call for a springform pan but using one is not totally necessary. A regular 9 inch round cake pan will work just as well. Simply grease and dust the pan with flour (or in this case, coconut flour) and line the bottom with parchment paper. Once the cheesecake has chilled, invert it unto a sheet of waxed paper and then flip it (carefully) unto the serving plate. This method is especially helpful when making cheesecakes that require a water bath since there is no way for the water to seep in and ruin the cake.

This cheesecake was really delicious and once decorated with a fluffy vanilla frosting and fresh sliced strawberries it made a pretty presentation. The crust was great; I loved the taste and texture of the coconut. It was not very sweet at all, so the frosting was a nice accompaniment. The sugar used in this recipe is a whole brown sugar, which is the “real” brown sugar. This sugar is not separated from the molasses during the squeeze-drying process. The common “packy” brown sugar is simply granulated white sugar with molasses added to make it brown.

So there’s our little “lesson” in cheesecake making for today. 🙂 I could go on and on, but I think this is long enough for now. Now I just need to learn to follow my own advice more closely…

Tropical New York Style Cheesecake

Macaroon Crust (plus cookies):

  • 4 egg whites
  • 1/2 teaspoon vanilla extract
  • 1/4 teaspoon almond extract
  • 1/8 teaspoon cream of tartar
  • 1 1/4 cups organic whole sugar
  • 1/4 cup coconut flour
  • 1/4 teaspoon salt
  • 2 1/2 cup flaked, unsweetened dried coconutPreheat oven to 300 degrees F. Grease spring-form pan with coconut oil and dust with coconut flour or line with wax paper or parchment.

    In a medium bowl, beat egg whites, vanilla extract, almond extract, and cream of tartar until soft peaks form. Gradually beat in sugar and whip until stiff. Toss together coconut flour, salt, and coconut in a separate bowl; fold into egg whites. Use only enough to make a 1/2 inch crust in the bottom and sides of a 9-inch spring-form pan for cheesecake and make cookies (by heaping tablespoons) with the rest.

    Bake 12-20 minutes, or until lightly browned. (Allow cookies to cool on the baking sheet before removing.) Makes enough for 1 crust and 20 cookies.

    Cheesecake filling:

    Preheat oven to 325 degrees F.

    Beat cream cheese, sugar, coconut flour and vanilla in large bowl with electric mixer on medium speed until well blended. Add pineapple juice concentrate and sour cream; mix well. Add eggs, one at a time, mixing on low speed after each addition just until blended. Pour over crust.

    Bake for 1 hour and 10 minutes or until center is almost set. Carefully run knife or metal spatula around rim of pan to loosen cake; cool before removing rim of pan. Refrigerate 4 hours or overnight. Top with fresh sliced strawberries or canned cherry or blueberry pie filling. Store in the refrigerator.

    *Honey can be using in replace of the juice.

    Enjoy everyone! Please feel free to comment or ask me any question you may have. 🙂

    Posted by Sarah Shilhavy

How To Use Coconut Flour

Have you ever heard of coconut flour? I have been working with it for a couple of years now since it was introduced into the market, and I have learned a lot about it!

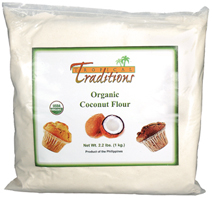
Tropical Traditions’ coconut flour, (which is the only coconut flour I use) is the fiber from the coconut meat after almost all the oil has been extracted to make Coconut Oil. It is certified organic, unsweetened, and contains no sulfites. It’s gluten free, making it a suitable wheat flour substitute for those with gluten and wheat allergies. It also high in protein and fiber, containing more fiber then gluten based grains. The coconut flour tastes very coconutty, and has a mildly pleasant sweet taste.For baking or cooking, you can substitute anywhere from 10 – 30% of regular flour for coconut flour to add extra fiber. Some recipes however, can be made with 100% coconut flour and be totally gluten free (and foolproof, no one would ever know!). The easiest ones to do this with are muffins, bars, pancakes, cakes and quick breads. (See recipe below).

Since coconut flour has no gluten, plenty of eggs must be used to make up for it. On average, for every 1 cup of coconut flour, 4-5 eggs must be used. To help with binding, sticky sweeteners can also be used, like brown rice syrup, maple syrup, etc. 1 tablespoon of ground flax seeds soaked in 3 tablespoons of water can also replace 1 egg in recipes, and this can be very helpful in coconut flour recipes. Keep in mind too that coconut flour is a very “thirsty” flour, and soaks up amazing amounts of liquid. So it’s very likely that you’ll have to increase the liquid amount in your recipe depending on what you are making.

A lot of recipes containing wheat flour can be converted to 100% coconut flour, but this will take time and patience. Coconut flour behaves differently from recipe to recipe, so a lot of tweaking and adjusting will have to be done. All my coconut flour recipes have been made with Tropical Traditions’ coconut flour; therefore I cannot assure you that they will work with different coconut flours, which might be higher in fiber and lower in protein content.

Ways to use coconut flour are endless. You can use them to make a roux for gravy, add a tablespoon or so to smoothies and drinks for extra fiber, sprinkle on different dishes for a garnish and a coconut taste…use your imagination! Be creative!

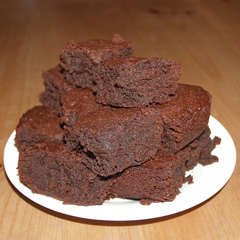
And now a recipe using all coconut flour! This is a recipe I developed myself, and every time I’ve served it it’s been a hit. The brownies are dense and fudgy; packed full of dark chocolate goodness. No one will ever know they’re gluten free, unless you decide to tell them. 😀 If you love dark chocolate, you’ll love these.

Chocolate Fudge Brownies

YIELD: 24 bars

Preheat oven to 350 degrees F. Grease and dust an 11×8 pan with coconut oil and cocoa powder.

Place butter, sugar, chocolate, and brown rice syrup in a medium sized pot and melt on low heat, stirring until everything is well blended (mixture does not have to be smooth). Sift in the cocoa powder. Remove from heat and set aside to cool. Beat the eggs and vanilla extract together with an electric mixer until frothy. Then on low speed, mix in cooled chocolate mixture. Alternatively add in the flour, baking powder and heavy cream, beating mixture after each addition.

Pour mixture into the prepared pan and bake the brownies in the preheated oven for 30 minutes or until the top of the brownies is crisp and slightly cracked. (The inside of the brownies will be dense and soft to the touch.) Cool the brownies in the pan on a wire rack until cool. Cut into bars and serve. Frost with chocolate or vanilla frosting if desired. Enjoy!!

There you go! If you have any questions please feel free to ask me in a comment.

Posted by Sarah Shilhavy


Organic Coconut Flour used in Coconut Recipes

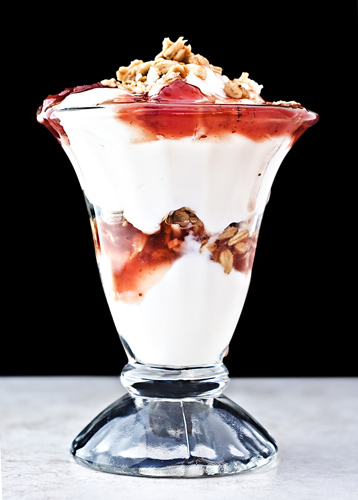
Strawberry Coconut Parfait

Strawberry Coconut Parfait
stock photo

Dairy-free 2 servings Strawberry syrup:

  • 1 cup fresh strawberries
  • 1/4 cup honey

Cream:

Garnish:

  • 1/2 cup sliced strawberries
  • 1/2 cup toasted coconut

Blend syrup ingredients in a blender until smooth. Pour into a bowl and set aside. Wash blender pitcher. Place all cream ingredients except water into blender. Add water as needed, blending until a smooth pudding texture is reached. To assemble: Spoon cream into 2 parfait glasses. Top with sliced strawberries and toasted coconut. Dizzle strawberry syrup over the top.

Recipe submitted by Janet, La Crosse, WI

Submit your recipe here!

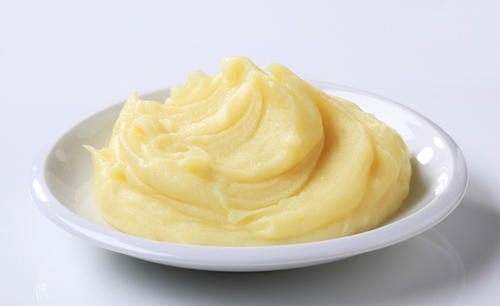
Coconut Mashed Potatoes

Coconut Mashed Potatoes
stock photo

Rich and ooooooooo sooooooo yummy!!!! And healthy too!!

  • Approximately 2 pounds of your favorite mashing potatoes, do not peel
  • 1/4 cup coconut oil
  • 2 tablespoons butter or ghee
  • 1 cup coconut milk*, room temperature
  • Salt and pepper to taste

Steam the potatoes until very soft. Mash the potatoes (peel and all) and the oil and butter with a mixer or a potato masher until smooth. Add the coconut milk and salt and pepper and continue to mash until all is mixed.

*Use 1 teaspoon of coconut cream concentrate for every 6-8 oz of water for coconut cream milk. Mix together and use as directed or make homemade coconut milk.

Recipe submitted by Tammy, Cape Girardeau, MO

Submit your recipe here!

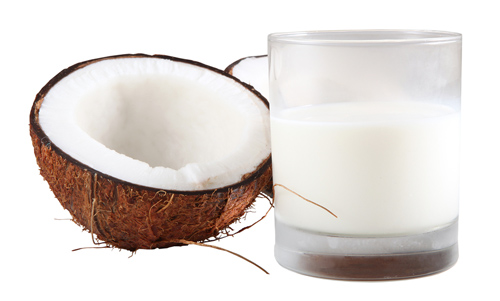
Homemade Coconut Milk

Homemade Coconut Milk

A lot of our recipes call for coconut milk, and we prefer to make our own. Store-bought coconut milk in cans are NOT natural. When we lived in the Philippines we made our own coconut milk from fresh coconuts. Fresh-squeezed coconut milk has a very short shelf life, and whatever is not used immediately will only last a couple of days in the refrigerator. This natural coconut milk will separate very quickly, with the heavier water falling to the bottom and the coconut cream remaining on top.

Coconut milks sold in cans, however, all have some kind of additives and stabilizers in them to stop them from separating like the natural coconut milk does. This could include ingredients like soy lecithin, which some people could have allergies to. Because the amount in the product is so small, the manufacturers may not be required to list it on the can. Since we try to make our recipes as natural and healthy as possible, we prefer this homemade coconut milk recipe which has no additives or stabilizers. It is made with dried coconut (unsweetned) because unless you live in the tropics where coconuts grow, I don’t recommend purchasing fresh coconuts in the stores as they have a very short shelf life, and they are either moldy or have been irradiated to keep them shelf stable.

Homemade Coconut Milk

  • 1 1/2 cups water
  • 7/8 cup dry unsweetened coconut

In a medium-size kettle, heat the water, but do not bring it to a boil.

Place the coconut in a blender and add 1 cup of the hot water.

Blend for 2-3 minutes.

Place a colander in a bowl and line the colander with 4 thicknesses of cheesecloth.

Pour the blended coconut mixture into the cheesecloth and twist to extract the milk, letting the milk go into the bowl.

Return the coconut pulp to the blender and add the remaining 1/2 cup of hot water. Blend for 1-2 minutes, strain and press through the cheesecloth into the bowl.

Makes about 1 cup

Posted by Sarah Shilhavy

Submit your recipe here!