Coconut Oil

Chocolate Balsamic Truffles

Vinegar in chocolate?? I scratched my head at the idea, but this is a fantastic combination. The unique, tart-ish flavor with the silky smooth and creamy chocolate was just meant to be. You’ll love it.

Truffles are pretty simple and easy to make. It’s all in the ingredients. Use high quality everything in this recipe as every single ingredient stands out. Use a nice tasting, high quality dark chocolate and a rich, dark, high quality balsamic vinegar especially. This is one recipe that you really don’t want to skimp on.

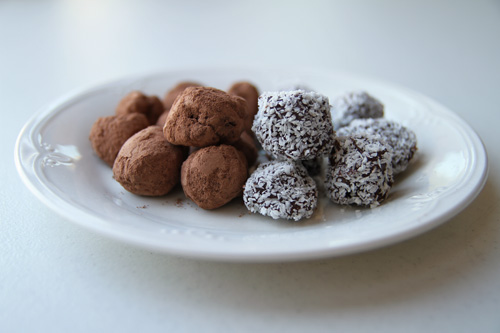
Another fun thing about truffles is that you can coat/dip them in so many different things! Nuts, chocolate shavings, dip in different melted chocolates, etc. Let the imagination run wild.

The next important thing is the chilling. The mixture has to be at the perfect temperature to roll into balls as well as for eating. You don’t want to eat a truffle straight out of the refrigerator when it’s all hard. Let them come to room temperature first. Then enjoy the tiny little melt-in-your-mouth candies all you like.

Enjoy!

Sarah

Chocolate Balsamic Truffles
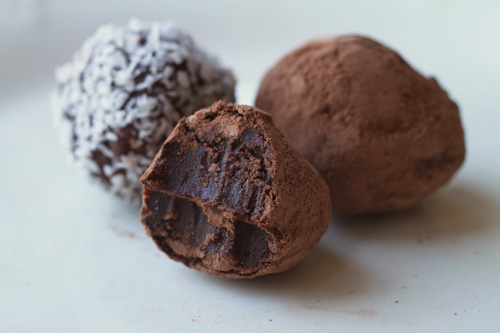
Chocolate Balsamic Truffles with middle shown recipe photo
Chocolate Balsamic Truffles recipe photo
Chocolate Balsamic Truffles
Prepared by Sarah Shilhavy, Photo by Jeremiah Shilhavy

Servings: approx. 45 truffles
Preparation Time: 10 minutes

Pour the heavy cream into a glass bowl set over a pot of simmering water. Turn heat off as soon as you place the bowl on top. Stir in the chocolate and coconut oil in with a rubber spatula.

Once the chocolate has melted, remove bowl from the pot and stir in the balsamic vinegar. Refrigerate the chocolate for 1 hour. Remove from the refrigerator and let sit at room temperature for 1-2 hours, until firm but moldable.

Place coatings of choice into shallow bowls, starting out with about 1/4 cup. Using a teaspoon scoop out measuring teaspoon sized balls of the chocolate. Use your hands to form into tiny balls. Drop the balls into the coatings of choice and roll until coated.

If the truffles are too soft after forming refrigerate for about 15 minutes, or until a littler firmer.

To store, refrigerate overnight and store at room temperature. The truffles will keep for about 1 day at room temp.

Submitted by Sarah Shilhavy

Submit your recipe here!

Soft Pretzels

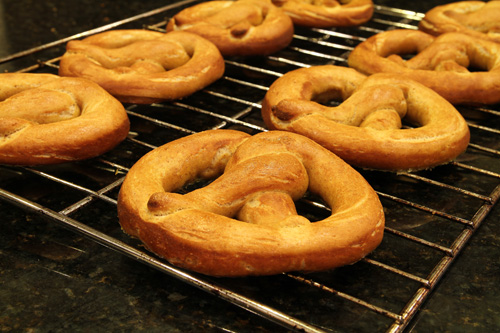
Soft Pretzels recipe photo
Soft Pretzels
Prepared by Sarah Shilhavy, Photo by Jeremiah Shilhavy

Servings: 10 large pretzels
Preparation Time: 1 hour

  • 1 1/2 cups very warm water
  • 1 tablespoon sugar
  • 2 teaspoons salt
  • 1 (.25 oz) package active dry yeast
  • 22 ounces flour, about 4 1/2 cups (use about half whole wheat flour)
  • 2 ounces coconut oil, melted (about 1/4 cup)
  • 2 quarts water
  • 1/2 cup baking soda
  • 1 large egg yolk beaten with 1 tablespoon water, optional
  • salt

Pour water into the bowl of a standing mixer and stir in sugar and salt until dissolved. Sprinkle the yeast on top but do not stir. Allow to proof for 5-10 minutes, until the yeast begins to foam.

Add the flour and coconut oil to the yeast mixture. Using the dough hook attachment, mix on low speed until well combined. Turn the speed up and knead until the dough is smooth and pulls away from the sides of the bowl, around 4 to 5 minutes.

Remove dough from the bowl. Oil the bowl with coconut oil and place ball of dough back in. Lightly grease the top of the dough ball. Cover the top of the bowl with a damp towel and let sit in a warm place for approximately 1-2 hours or until the dough has doubled in size.

Preheat the oven to 450 degrees F. Stir the water and baking soda together and bring to a boil in a large pot.

Turn the dough out onto a work surface lightly oiled with extra coconut oil and divide into 10 equal pieces. Roll out into pretzel shapes and place on cookie sheets lined with parchment paper and greased with coconut oil.

Place 1 pretzel at a time into the boiling water for 30 seconds. Remove with a large, flat spatula and place back unto lined cookie sheets. Brush with optional egg wash if desired.

Bake until dark golden brown in color, 12 to 14 minutes. Transfer to a cooling rack and serve with melted butter, salt, cinnamon sugar and other toppings/dips of choice.

Recipe courtesy Sarah Shilhavy

Submit your recipe here!

Raw Chocolate Coconut Snowball Cookies

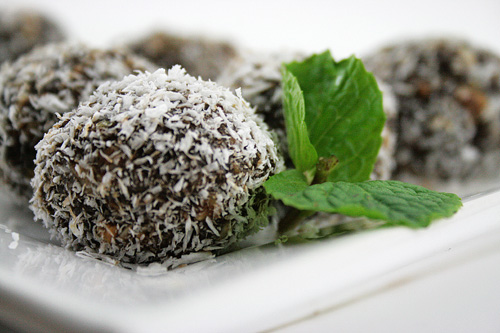
Raw Chocolate Coconut Snowball Cookies recipe photo
Raw Chocolate Coconut Snowball Cookies
Photo by recipe author

Servings: 20
Preparation Time: about 15 minutes

Combine all ingredients (except for the shredded coconut) in a food processor and process to make a smooth paste.

Roll paste into small balls (the size of Russian Teacakes if you are familiar with those traditional cookies). Roll cookie into dried shredded coconut flakes. Chill slightly before serving.

Recipe submitted by Julie, Colorado Springs, CO

Submit your recipe here!

Gluten Free Bison Sausage Casserole

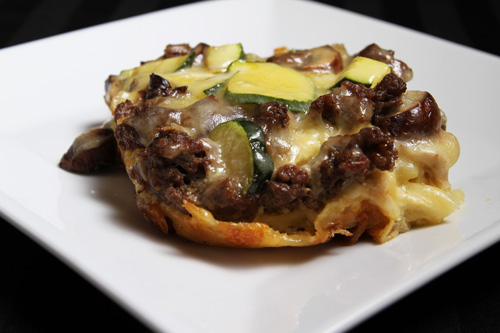
Gluten Free Bison Sausage Casserole
Prepared by Marianita Shilhavy, Photo by Jeremiah Shilhavy
  • 1 tablespoon coconut oil, as needed
  • 1 medium size yellow onion- chopped
  • 1 lb. ground grass-fed bison sausage
  • 8 oz. mushroom, sliced
  • 2 medium size zucchini (or other vegetable of choice) – chopped
  • 1 lb. potatoes, shredded (“hash brown” type)
  • 6 large eggs
  • 1 cup milk
  • Salt and pepper to taste
  • 8 oz. mozzarella cheese- shredded

Pre-heat oven at 400 degrees.

Heat coconut oil in a large pan and sauté onion until opaque.

Crumble the bison sausage into the pan and sauté until brown. Add mushrooms and zucchini, sauté for 2 minutes. Set aside.

Beat eggs, milk, salt and pepper together.

Grease baking dish with additional coconut oil. Layer shredded potato and sautéed sausage mixture. Pour the egg and milk mixture on top. Bake for 35 minutes.

After baking sprinkle the mozzarella cheese on top. Bake for 5 more minutes or until the cheese has melted.

Serve with your favorite green salad.

Enjoy.

Recipe courtesy Marianita Jader Shilhavy

Submit your recipe here!

Making a Gluten Free Pizza Crust

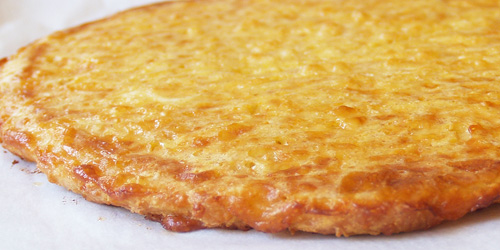
Gluten Free Pizza Crust Recipe Photo
Gluten Free Pizza
Crust – no toppings

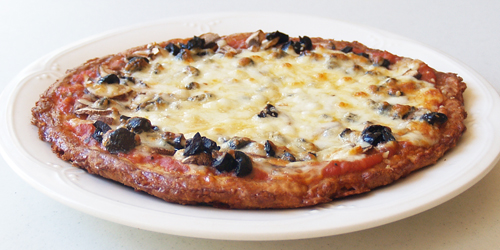
Gluten Free Pizza with Gluten Free Pizza crust
Gluten Free Pizza
using the Gluten Free Crust
Prepared by Sarah
Shilhavy
Photos by Jeremiah Shilhavy

This pizza crust is really, really good. Even if you’re not gluten intolerant but love pizza, you’ll want to try it.

Just let me warn you: you can’t change any of the ingredients. That means every bit of cheese has to stay in as will the rest of the stuff. Why all the cheese? It’s the binder; the “flour” if you will. But don’t let the amount of cheese in the crust take anything away from the toppings. You’ll still need the same amount on top as you would any other pizza.

It’ll be easier if you use parchment paper in the recipe, but if you don’t have any on hand, that’s okay. Just brush or spray on a generous amount of the non-stick spray recipe I have below.

All that’s left is to watch the video below for a step by step tutorial and make this for an easy lunch or dinner today!

Have fun!

Sarah

Gluten Free Pizza Crust

Makes 2-4 servings

  • 2 cups whole milk organic mozzarella cheese, shredded
  • 2 large organic eggs
  • 2 tablespoons flax meal
  • 2 tablespoons coconut flour
  • 1/2 teaspoon baking powder

Preparation:

Preheat oven to 350 degrees F. Cut 2 pieces of parchment paper out for baking sheet.*

Mix cheese, eggs, flax, coconut flour, and baking powder together until a sticky wet dough is formed. Spread with a spatula to 1/4 inch thickness on a baking sheet lined with one piece of parchment paper.

Bake for 30 minutes in preheated oven. Halfway through the baking process, flip crust over by sliding it off the baking sheet with the parchment paper, placing the second piece on the sheet, and turning the crust over unto the new sheet and peeling the old paper off. Return to oven until done baking.

Remove from oven, slide off of parchment paper, and flip over again for cooling. Once crust is cooled, top with sauce, pre-cooked veggies or meats, and cheese. Set crust with toppings under the broiler on high for a minute or two until cheese is melted and bubbly. Slice and serve.

Recipe submitted by Lauren, Fort Myers, FL

*If you don’t have any parchment paper on hand mix together 1 cup minus 2 tablespoons of water and add 2 tablespoons of olive oil. Pour into a spray bottle and shake vigorously. Spray or brush unto baking sheet to coat generously.

Submit your recipe here!

Coconut Banana Ginger Brown Rice Pudding with Raisins

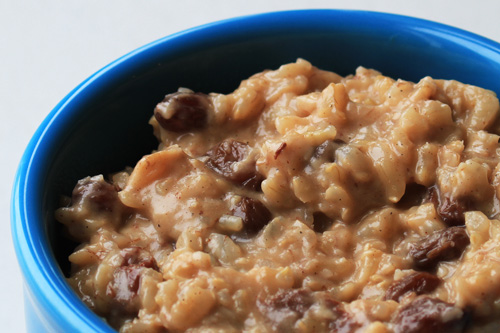
Coconut Banana Ginger Brown Rice Pudding with Raisins recipe photo
Coconut Banana Ginger Brown Rice Pudding with Raisins
Prepared by Sarah Shilhavy, Photo by Jeremiah Shilhavy

Servings: 6
Preparation Time: 10 minutes

This Brown Rice pudding is sweetened with banana, crystallized ginger, and raisins. Perfect for breakfast or dessert!

Place cooked rice in a pot. Add water, cardamom, vanilla, cinnamon, raisins, ginger, and shredded coconut. Turn heat to medium, make sure to stir constantly.

Once the mixture has come to a simmer, add in the bananas and stir so they become liquefied in the mixture. Keep stirring! Add in the coconut oil.

Once the mixture has absorbed all or most of the water, add the milk. Keep stirring! When the rice has become mushy and absorbed a lot of the coconut milk and has a pudding like thickness to it, your rice pudding is done! Add more milk if/as needed to adjust texture and consistency. Delicious!

Recipe submitted by Emily, Philadelphia, PA

*Use 1 teaspoon of coconut cream concentrate for every 6-8 oz of water for coconut cream milk. Mix together and use as directed or make homemade coconut milk.

Submit your recipe here!

Coconut-Tuna Walnut Salad

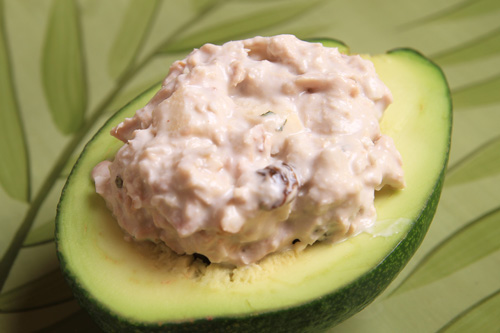
Coconut-Tuna Walnut Salad recipe photo
Coconut-Tuna Walnut Salad
Prepared by Sarah Shilhavy, Photo by Jeremiah Shilhavy

Remember a good cook doesn’t always follow a recipe perfectly. Creativity plays a big part. I was using a traditional recipe for years and decided to TRY something different with ingredients I had available. Hope you enjoy this one and I dare you to try a new spice.

  • 1 – 2 (7 oz) cans tuna
  • 1/2 cup roasted walnuts, chopped (Roast for 10 minutes on cookie sheet at 350. Cool, then chop.)
  • 1/2 cup coconut flakes
  • 1/2 teaspoon fresh peppermint – finely chopped
  • 1 apple – peeled and diced small
  • Salt to taste
  • 1/2 cup raisins
  • 1/2 to 1 cup Plain Yogurt
  • 1/2 cup mayonnaise*

Mix all ingredients. Serve immediately or chill, then serve over spring mix, romaine, or in 1/2 avocado. Delicious, fresh, different.

Recipe submitted by EdieJane, Hurst, TX

*To make your own mayonnaise with coconut oil and olive oil see our video here.

Submit your recipe here!

Gluten Free Coconut Dishpan Cookies

Gluten Free Coconut Dishpan Cookies recipe photo
Gluten Free Coconut Dishpan Cookies
Prepared by Sarah Shilhavy, Photo by Jeremiah Shilhavy

Preheat oven to 375 degrees F.

Beat butter and sugars until light and fluffy with an electric mixer fitted with paddle attachment. Slowly add oil and mix until oil is well incorporated. Beat vanilla extract and eggs in until well incorporated.

Mix flour and baking soda together and stir into butter mixture just until combined. Combine remaining ingredients and add to dough, mixing just until incorporated.

Using a small cookie scoop drop tablespoonful sized cookie dough balls onto an ungreased cookie sheet spacing about 1 inch apart (they won’t spread much). Bake in preheated oven for 7-12 minutes, just until lightly browned.

You can also freeze individual balls of cookie dough and freeze for later baking. To bake simply place frozen cookie dough onto sheet (there’s no need to defrost) and bake as directed (adding a few minutes to cook time).

*Gluten Free Flour Mix

Mix together until very well blended and use as directed.

Submitted by Sarah Shilhavy
Submit your recipe here!