Brian - Admin

About Brian - Admin

Editor - Health Impact News

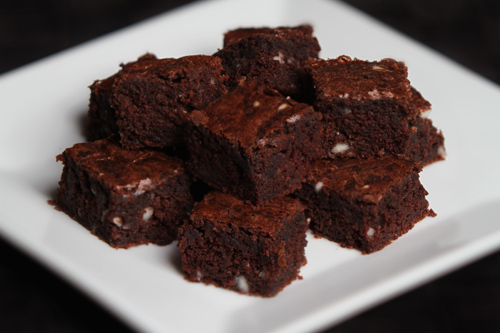
Gluten Free Black Bean Brownies
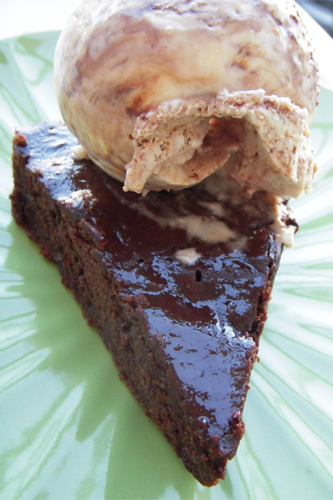
Gluten Free Black Bean Brownies recipe photo
Gluten Free Black Bean Brownies
Photo by recipe author

Servings: 8
Preparation Time: 10 min.

1. Preheat the oven to 350 degrees F. Grease a 8 X 8-inch baking pan with extra coconut oil and set aside.

2. Place the black beans in the bowl of a food processor; process until smooth and creamy. Add the eggs, oil, sugar, cocoa powder, vanilla extract, coffee (optional), baking powder, and salt and process until smooth. Add the chocolate chips and pulse a few times until the chips are broken up a bit.

3. Pour the batter into the prepared baking dish.

4. Bake 30 to 35 minutes, or until the edges start to pull away from the sides and a toothpick inserted in the center comes out clean. Cool in the pan before slicing. They taste even better after sitting in the fridge over night!

Recipe submitted by Mysti, Dallas, TX

Submit your recipe here!

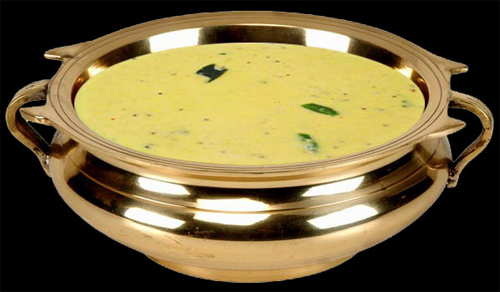
Traditional Coconut Buttermilk Gravy

Traditional Coconut Buttermilk Gravy recipe photo
Traditional Coconut Buttermilk Gravy
Photo by recipe author

This is the traditional recipe from a southern state in India, Kerala, which is named after coconuts. The name of the state Kerala is derived from Kera which means coconuts in the native language Malayalam and is called Land of Coconuts. So, ideally any recipe from Kerala has coconut as one of the main ingredients.

This dish usually goes well with rice and is considered as one of the major unavoidable constituent of any South Indian Lunch. The main ingredients of this dish are buttermilk, coconut and spices.

Servings: 4
Preparation Time: 15 Minutes

Grind coconut, cumin seeds, turmeric powder and red chilies very well in a mixer/grinder by adding little buttermilk to make a smooth paste. Once this mixture is very well ground, add the remaining buttermilk and blend it well. Now, the gravy is ready. Add salt as required.

Heat a cooking pan, add 2 tablespoons of coconut oil. Once the oil gets warmed, add mustard seeds, curry leaves and 1 red chili. Wait until the mustard seed splutters. Pour the gravy into the pan and let it warm for a few seconds (do not allow it to boil). Turn off the heat.

The coconut buttermilk gravy is ready to be served with steamed rice.

Recipe submitted by Aswathy, North Port, FL

Submit your recipe here!

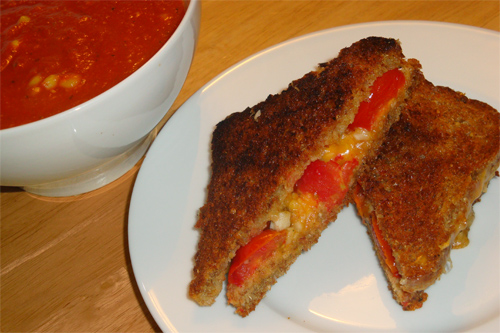
Three-Cheese Tomato Garlic Grilled Cheese Sandwiches

Three-Cheese Tomato Garlic Grilled Cheese Sandwiches recipe photo
Three-Cheese Tomato Garlic Grilled Cheese Sandwiches
Photo by recipe author

Wonderful with tomato soup, this is the perfect cozy, comforting and healthy meal! Coconut oil is a fantastic alternative to the traditional butter and produces perfectly crisp, mouth-watering results. We love all that good for you, delicious garlic in these, but feel free to adjust according to taste!

Servings: 2
Preparation Time: 10 min

  • 4 slices hearty sprouted grain bread
  • 2 large slices (or enough small ones to cover 2 pieces of bread) raw milk sharp cheddar cheese
  • 4 cloves garlic, finely minced (more or less according to taste)
  • fresh cracked pepper
  • seasoning salt and/or steak seasoning of choice
  • 10 organic grape or cherry tomatoes, halved
  • 2 large slices Colby Jack cheese
  • 2 tablespoons coconut oil

Preheat cast iron skillet to medium heat. For each sandwich assemble in this order: bread, cheddar, half the garlic, pepper and seasoning to taste, half the tomatoes face down, colby jack, bread.

Melt the coconut oil in the skillet and cook the sandwiches on one side until the cheese on the bottom half is melted and the bread nicely crisped and golden, then the other side until the same. Serve immediately and enjoy!

Recipe submitted by Lydia, Salem, VA

Submit your recipe here!

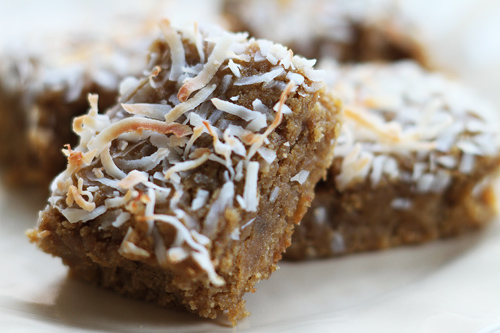
Gluten Free Toasted Coconut Ginger Blondies

Ahhh….the recipe you’ve all been waiting for. Well, maybe not all of you but some of you for sure.

When I posted the first Toasted Coconut Ginger Blondies recipe I promised a gluten free version. So here it is. I was very happy at how they turned out; creamy and moist with a nice chewy texture and toasty crunch from the toasted coconut on top. My mouth is full of said blondies as I type. Seriously.

You can use something else instead of ginger (like chocolate chips or nuts).But that’s up to you. I just wanted to get rid of the rest of our candied ginger, so in they went.

Were you waiting for this recipe? Are you going to make it now? Tell me, I’d love to hear from you!

Sarah:)

Gluten Free Toasted Coconut Ginger Blondies

Gluten Free Toasted Coconut Ginger Blondies recipe photo
Gluten Free Toasted Coconut Ginger Blondies
Prepared by Sarah Shilhavy, Photo by Jeremiah Shilhavy

Servings: 20 bars
Preparation Time: 15 minutes

  • 12 tablespoons (1 1/2 stick) salted butter, melted
  • 1 cup brown sugar
  • 4 teaspoons vanilla extract
  • 2 eggs
  • 2 teaspoons organic raw whole milk or coconut milk*
  • 1/2 teaspoon baking powder
  • 1 1/4 cups flour mix (see below)
  • 1/2 cup chopped crystallized ginger
  • 1/2 – 1 cup flaked coconut

Preheat oven to 350 degrees. Lightly grease an 7×11 inch pan with coconut oil.

Mix melted butter and sugar together in a medium sized bowl. Beat in vanilla, eggs and milk until well blended.

Mix remaining ingredients except for the flaked coconut into the egg mix until well blended. Pour into prepared pan and smooth the top out. Sprinkle with flaked coconut.

Bake blondies until golden brown and coconut is toasted, about 20 minutes.

Gluten Free Flour Mix:

Mix all ingredients together until well blended. Use as directed.

* For the freshest coconut milk make homemade coconut milk. (See video at this link.)

Recipe courtesy Sarah Shilhavy

Submit your recipe here!

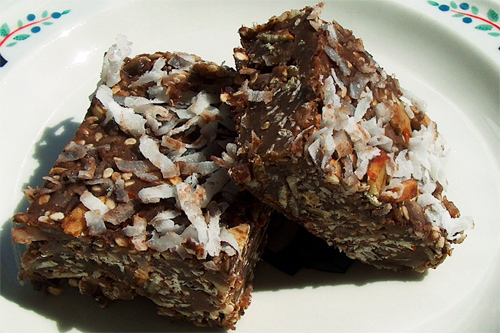
Coconut Cream Health Fudge

Coconut Cream Health Fudge recipe photo
Coconut Cream Health Fudge
Photo by recipe author

Servings: 15 to 24 squares
Preparation Time: 10 minutes

Heat honey, coconut cream concentrate and coconut peanut butter on low until melted and smooth. Add the rest of the ingredients. Mix well and pat into a well greased 9×9 pan.

Sprinkle top with more coconut and press lightly in the bars. Cool in the refrigerator for about 15 minutes to set up. Cut into bars. Store in the refrigerator. Enjoy!

Recipe submitted by Barbara, Pinconning, MI

Submit your recipe here!

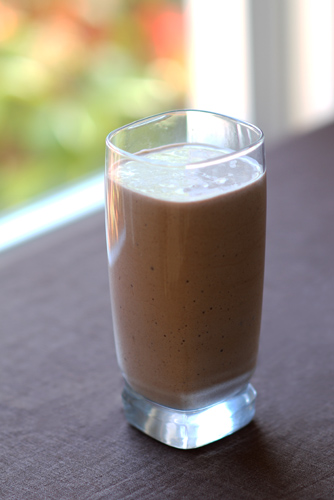
Chocolate Coconut Banana Protein Shake

If you workout then you probably already know the importance of taking protein powder to help “refuel” after a strenuous workout. Taking just the same thing all the time though gets boring, so I’ve come up with some different ways to jazz up a regular old protein shake.

This is one that I really like, using the Double Bonded Chocolate Protein Powder. The frozen banana adds a wonderfully creamy texture and the xanthan and guar gums help thicken the shake almost to a pudding-like thickness. I like to eat it with a spoon sometimes. If you don’t have any of the gums on hand though taking them out won’t hurt too much. And oh, another thing: this isn’t a very icy shake without the ice. So if you like your protein shakes icy be sure to include the ice (go by taste, I like to use anywhere from 5 cubes to a large handful).

If you’re taking this for breakfast or as a post-workout drink I totally recommend adding the coconut oil as it’ll give you that extra energy boost. This protein shake may be a little extra fuss then the normal water/milk + powder but it’s worth it.

Let me know what you think if you try it!

Sarah:)

Chocolate Coconut Banana Protein Shake

Chocolate Coconut Banana Protein Shake recipe photo
Chocolate Coconut Banana Protein Shake
Prepared by Sarah Shilhavy,
Photo by Jeremiah Shilhavy

Servings: 1
Preparation Time: 3 minutes

  • 1-2 heaping scoops double bonded chocolate protein powder
  • 1 teaspoon cocoa
  • 1/4 teaspoon xanthan gum
  • 1/4 teaspoon guar gum
  • 1 frozen banana
  • 3/4 cup water
  • 1/2 cup coconut milk* or organic raw whole milk
  • 5 ice cubes, optional (more or less as desired)
  • 1-3 tablespoons coconut oil, melted

Add all ingredients except coconut oil to blender and blend, pouring the coconut oil in slowly. Continue blending until smooth and enjoy.

* For the freshest coconut milk make homemade coconut milk. (See video at this link.)

Recipe courtesy Sarah Shilhavy

Submit your recipe here!

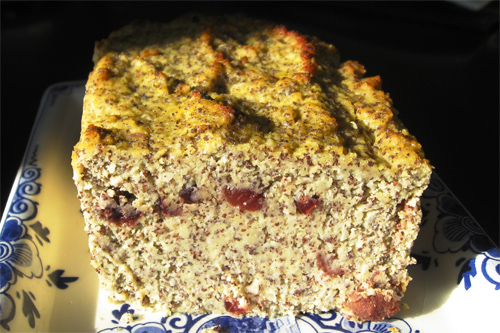
Gluten Free Poppy Seed Apple Coconut Loaf

Gluten Free Poppy Seed Apple Coconut Loaf recipe photo
Gluten Free Poppy Seed Apple Coconut Loaf
Photo by recipe author

Servings: 10
Preparation Time: 10

Pre-heat oven to 350 degrees F.

Beat eggs with a hand mixer until they are very frothy, then add all other ingredients. Mix well and simply pour into your greased and coconut dusted 4 1/2 by 8 1/2 inch loaf pan.

Bake for 30 minutes and let cool for 10 to 15 minutes prior to serving.

If you don’t like the dried fruit, you can substitute it by adding the juice of half a lemon.

Recipe submitted by Josephine, Scottsdale, AZ

Submit your recipe here!

Gluten Free Coconut Brownies

I honestly don’t know what exactly I was expecting when I baked these, but they weren’t what I thought they’d be. They totally surprised me.

The texture is light, almost creamy, very coconutty, and moist. The “bite” and overall texture is like a wheat brownie. The appearance even, is just like a wheat brownie. Even the top baked up shiny and flakey. What’s more, they popped right out of the glass pan without any fuss. I like that.

The batter will mix and come together easily if you soften the Coconut Cream Concentrate to peanut butter consistency first. It also helps to bring the eggs to room temperature as well. Depending on how warm your CCC is, you may or may not end up with stubborn little lumps that will refuse to totally mix in. Don’t let it get to you. They’ll still be delicious.

Mine have little lumps. And they’re delicious.

I haven’t tried the blondie version yet but I can assure you it’s just as delicious as the brownies.

Which one will you make?

Sarah:)

Gluten Free Coconut Brownies (or Blondies)

 Gluten Free Coconut Brownies recipe photo
Gluten Free Coconut Brownies
Prepared by Sarah Shilhavy, Photo by Jeremiah Shilhavy

Servings: 18 squares
Preparation Time: 10 minutes

1. Pre-heat oven to 325 degrees (300 for convection oven). Grease a 9×9 or 12×8 pan.

2. In a large bowl measure out all ingredients and mix until combined. Pour into prepared pan and bake 20-25 minutes. Try not to over bake; the top will be slightly crispy and the middle is fudgey.

* I usually use 2 eggs to achieve a silky, ribbon-y look, but sometimes I have to use 3 eggs to completely emulsify the batter.

** I prefer a less sweet brownie, especially since I always put chocolate chips into my brownies, so I actually only use 1/3 cup of honey, but I find that when I bake for others they are used to a sweeter baked good.

***For Blondies, omit cocoa. This will have a stronger coconut flavor than the brownies.

Recipe submitted by Marisa, San Jose, CA

Submit your recipe here!