Dessert Gluten Free Coconut Flour Recipes

Healthier Peanut Butter Balls
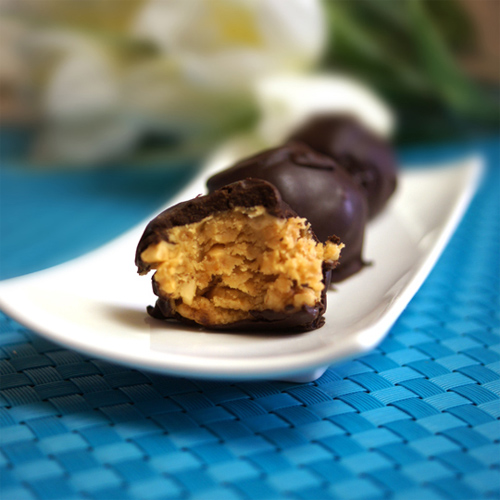
Healthier Peanut Butter Balls photo
Healthier Peanut Butter Balls
photo by recipe author

Servings: 20 pieces
Preparation Time: 1 hour total

For peanut butter filling:

For chocolate coating:

In a medium bowl, mix together the peanut butter, honey and a pinch of sea salt. Add in the coconut flour gradually– starting first with a 1/4 cup, then adding it in a tablespoon at a time until a “dough” forms. I ended up using a 1/2 cup of coconut flour, but it may vary depending on the texture of your peanut butter.

Using a cookie scoop, drop the dough by rounded tablespoons onto a pan lined with parchment paper. (Roll with your hands to make them smooth, if you like.) Place them in the freezer to set for 30 minutes.

After 30 minutes, melt the chocolate together with the coconut oil. (I used an oven-safe bowl– 5 minutes at 400F– but any method works!)

Remove the peanut butter balls from the freezer, and dip each one into the melted chocolate mixture, coating each one thoroughly. Return the chocolate-covered balls to the parchment paper to set. There will inevitably be some areas that won’t get covered (where your fingers touched), so feel free to spoon some extra chocolate over the tops when they’ve all been dipped!

Return the balls to the freezer to set for another 30 minutes, then serve. They are delicious when served cold, or at room temperature!

I recommend storing them in the fridge or freezer for longer shelf-life.

Recipe submitted by Megan, Glendale, CA

Submit your recipe here!

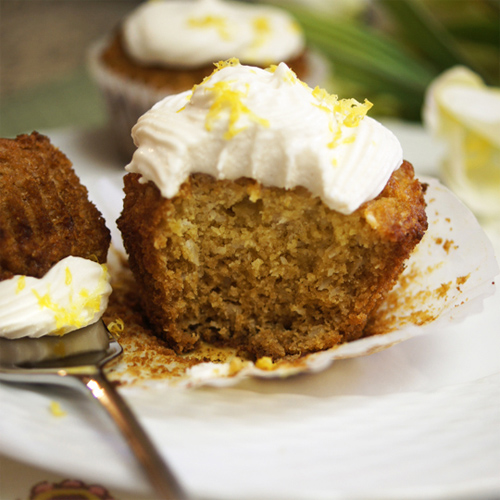
Lemon Coconut Frosting

Lemon Coconut Frosting photo
Lemon Coconut Frosting
photo by recipe author

Servings: 1 cup
Preparation Time: 10 minutes + 6 hrs chill

Combine all ingredients in a blender and blend until thick and creamy, about 1-2 minutes. Transfer to a bowl, and allow to set in the fridge for 6 hours. It will thicken up with chilling!

Note: Measure your coconut flour by scooping the measuring spoon into the bag, then leveling off each tablespoon using a knife. Coconut flour is very absorbent, so you want to make sure you measure it correctly!

Also, don’t be tempted to skip the blender. I’ve tried whisking this mixture together by hand, and it will NOT work.

Spread onto your favorite cakes, or cookies, and enjoy!

Recipe submitted by Megan, Glendale, CA

Submit your recipe here!

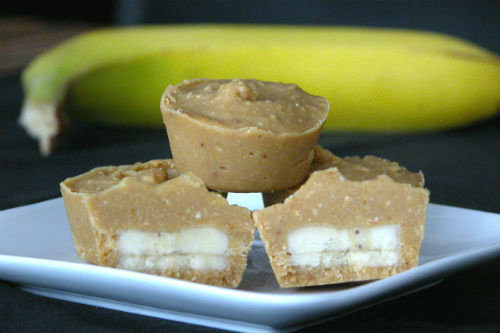
Peanut Butter Banana Cups

Peanut Butter Banana Cups photo
Peanut Butter Banana Cups
photo by recipe author

Servings: about 12 cups
Preparation time: 10 minutes

  • 1 ripe banana
  • 3/4 cup unsweetened peanut butter (I prefer the fresh grind)
  • 2 tablespoons – 1/4 cup honey
  • 3/4 teaspoon vanilla extract
  • 2 1/4 teaspoon coconut oil, melted (refined for no taste, virgin for coconut taste)
  • 1/4 plus 1/8 teaspoon salt (omit if using jarred peanut butter with added salt)

1. Cut the banana into slices between 1/4 and 1/2 inch thick.

2. Mix all remaining ingredients in a separate bowl.

3. Place a bit of the peanut butter mixture to cover the bottom of each cup in a mini muffin tray.

4. Place a banana slice on top of the peanut butter.

5. With a spoon, scoop the peanut mixture unto each banana slice and cover completely.

6. Place in the freezer to set.

7. Store in the fridge or freezer.

Recipe submitted by Kate, Highlands Ranch, CO

Submit your recipe here!

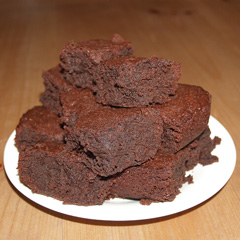
Chocolate Fudge Brownies


Coconut Flour Chocolate Fudge Brownies

Gluten Free

YIELD: 24 bars

Preheat oven to 350 degrees. Grease and dust an 11×8 pan with coconut oil and coco powder.

Place butter, sugar, chocolate, and brown rice syrup in a medium sized pot and melt on low heat, stirring until everything is well blended and smooth. Sift in the coco powder. Remove from heat and set aside to cool. Beat the eggs and vanilla extract together with an electric mixer until frothy. Then on low speed, mix in cooled chocolate mixture and sugar. Alternatively add in the flour, heavy cream, baking powder, beating mixture after each addition.

Pour mixture into the prepared pan and bake the brownies in the preheated oven for 30 minutes or until the top of the brownies is crisp and the edges begin to pull away from the pan. (The inside of the brownies will be dense and soft to the touch.) Cool the brownies in the pan on a wire rack until cool. Dump the brownie out of the pan and cut into bars and serve. Frost with chocolate or vanilla frosting if desired. Enjoy!!

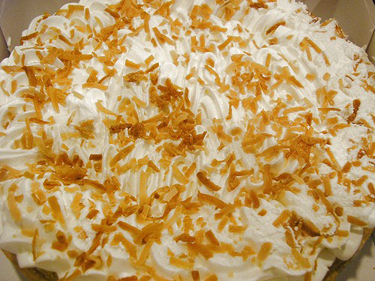
Coconut Cream Pie – Gluten Free

Comments: This is a healthy and delicious coconut cream pie recipe, made with a non-gluten crust using organic coconut flour!

Coconut Cream Pie with gluten free crust photo

Crust:

Preheat oven to 350 degrees. In a large bowl with a wooden spoon, mix together the eggs, coconut flour, shredded coconut, honey and salt. Once well blended, add the butter, coconut oil, and water. Mix dough together with your hands until everything has blended together. Pat dough into a round pie pan. Press the dough firmly into the pan. When you are done forming the crust, take the egg white and beat it with a fork until frothy. With a pastry brush, brush the crust with the egg white and bake at 350 for 14 minutes. Cool completely on wire rack.

Filling:

Combine sugar, cornstarch, and shredded coconut together in a pot and slowly pour the heavy cream into the pot over medium heat. Add vanilla, butter and coconut cream concentrate while stirring with a wire whisk constantly. Bring mixture to a simmer and then reduce heat to medium low. Continue stirring until mixture becomes very thick and then turn the heat down to low. Cool the mixture in the pot with a cover for about 5 minutes. Pour mixture into cooled pie crust and place wax paper on the top of the pie to prevent skin formation on the filling. Place pie in a pan of cool water until the filling is completely cool. Top pie with whipped cream and garnish with toasted coconut flakes (optional.) Refrigerate until ready to serve and enjoy!!


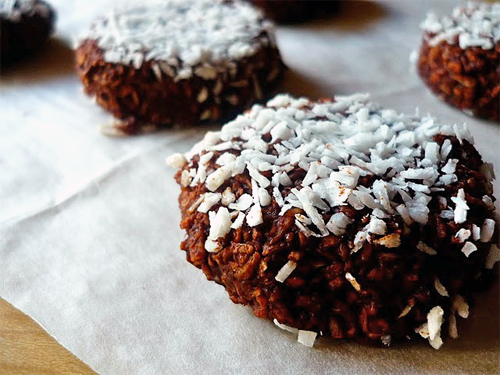
Chocolate and Vanilla Macaroons

Chocolate and Vanilla Macaroons photo
Chocolate and Vanilla Macaroons
photo by recipe author

Servings: 12 large cookies

Vanilla version:

Choose which version you want to make and combine ingredients for chocolate or vanilla macaroons in a bowl.

Spoon dough and shape into small round discs or spoon “mounds” like traditional macaroons on parchment on a baking sheet sprinkle or press in coconut.

Let firm up in freezer. Makes 12 large macaroon cookies.

Recipe submitted by Jaclyn, Guelph, ON

Submit your recipe here!

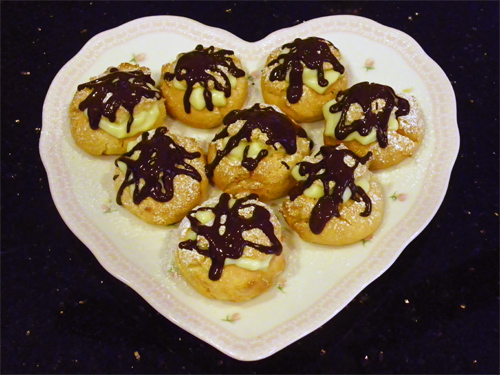
Gluten Free Coconut Cream Puffs

Gluten Free Coconut Cream Puffs photo
Gluten Free Coconut Cream Puffs
photo by recipe author

Servings: 12-24 servings
Preparation Time: 1 hour

Basic Puff Shell:

  • 1 cup water
  • 1/2 cup organic salted butter
  • 3/4 cup sweet rice flour
  • 1/2 cup organic brown rice flour
  • 1/2 cup coconut flour
  • 3 large organic eggs (OR 4 medium eggs)
  • Homemade custard (see recipe below)
  • 1 1/2 cups organic semi-sweet chocolate pieces, melted
  • Organic powdered sugar, to garnish

Homemade Coconut Custard:

Puff Shells:

Preheat oven to 400 degrees F. Prepare baking sheet with parchment paper or baking mat.

In a medium saucepan, heat water and butter to rolling boil. Stir in flour – beating well until it pulls away from the pan and forms a ball, about 1-2 minutes; then add eggs, one at a time beating well after each addition. Fully incorporate mixture until batter is smooth.

Drop by heaping tablespoon onto greased baking sheet or silicone baking mat lined pan. Batter should be fairly stiff, so that when you scoop it onto the baking sheet, it stays firm and doesn’t spread out. If it is too runny, add additional sweet rice flour in small amounts until batter holds its shape on the baking pan.

Bake 30-40 minutes at 400 degrees F. or until golden and dry.

Remove from oven and cool until you are able to handle them. Then cut off top of each puff and scoop out any excess soft dough from inside, if necessary, to form a shell for the cream filling. Replace top with each puff and allow to cool completely.

Coconut Custard:

In a heavy saucepan over medium-low heat, bring sugar, cornstarch, egg yolks, and coconut milk (or Coconut Cream Concentrate plus 2-3/4 cups water) to a boil, whisking constantly until thickened (approx. 15-20 minutes), careful not to scorch mixture on bottom of pan. Remove from heat. Stir in butter and vanilla. Place in a container with a tight sealing lid in refrigerator to cool. Chill 2 hours until set.

Assembly: Fill puffs using a pastry bag or spoon carefully into cream puff shells, then replace top of puff. Sprinkle with powdered sugar to garnish and drizzle with melted chocolate, if desired.

Melt chocolate pieces in a glass/stainless steel boil set over a small saucepan with simmering (not boiling) water. Drizzle puffs with melted chocolate. Serve or store in an airtight container in the refrigerator for up to 3 days.

Recipe submitted by Deanne, Glendale, AZ

* For the freshest coconut milk make homemade coconut milk. (See video at this link.)

Submit your recipe here!

Gluten Free Chocolate Crinkles

It’s that time of the year again. Well seasoned and not-so-well seasoned cooks are pulling out (maybe even dusting) their cookie sheets and getting ready to bake up a storm of cookies.

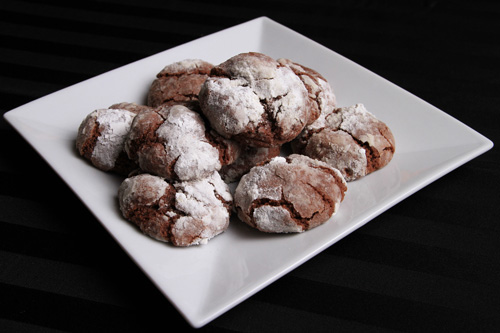
If you’re one of them, Chocolate Crinkles must be on your list of to-bakes. Seriously. Their soft, fudgy, chocolate-y, rolled-in-powdered-sugar goodness is just too hard to pass up.

Watch the video here:

Now that wasn’t too hard was it? And aren’t they pretty? It looks like snow.

These cookies are both gluten and dairy free, but they are not limited to those who are gluten and dairy intolerant. They’re really yummy, anyone will enjoy them.

Remember to adjust the bake time on these cookies depending on how large you roll the dough. If they’re smaller then 1 inch, start out at 8 minutes. You want them to be slightly under-baked when you take them out so they can finish cooking all the way while sitting on the cookie sheet. So keep your greedy little fingers to yourself and let them cool (if that’s even possible).

Enjoy everyone!

Sarah:)

Gluten Free Chocolate Crinkles

Gluten Free Chocolate Crinkles Cookies recipe photo
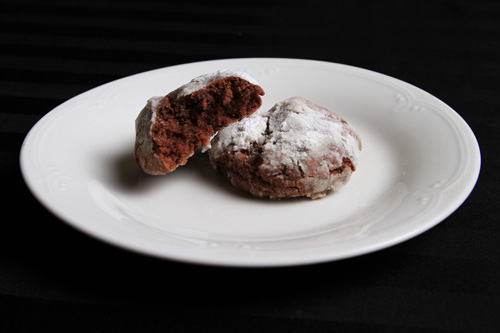
Gluten Free Chocolate Crinkles recipe photo with round plate
Gluten Free Chocolate Crinkles Cookies
Prepared by Sarah Shilhavy, Photo by Jeremiah Shilhavy

Servings: yields 3 dozen cookies
Preparation Time: 10 minutes plus chilling time

  • 4 oz bittersweet chocolate, melted
  • 1/2 cup melted coconut oil
  • 1 cup sugar
  • 3 eggs, at room temperature
  • 2 teaspoons vanilla extract
  • 2 cups gluten free flour mix*
  • 1/2 teaspoon xanthan gum
  • 1/4 teaspoon salt
  • 1 teaspoon baking powder
  • Powdered sugar

Transfer melted chocolate to a medium sized bowl. Whisk in oil and sugar. Mix in eggs, one at a time. Whisk the vanilla in. Mixture should be thick.

Add the flour mix, xanthan gum, salt and baking powder. Mix everything together (should be the consistency of brownie batter). Refrigerate for an hour or more, until the mixture has firmed up.

Preheat oven to 350 degrees F.

Place powdered sugar into a small bowl. Roll dough into small balls (dough should be stiff) and roll in powdered sugar. Place 2 inches apart on a cookie sheet greased with palm shortening, and bake for 10-12 minutes (just until tops feel slightly firm). Let cool on sheet for 3 minutes before removing to wire rack.

*Gluten Free Flour Mix:

Makes 3 cups

Mix all ingredients together and use as directed.

Recipe by Sarah Shilhavy

Submit your recipe here!