Chunky-Monkey Pumpkin Muffins
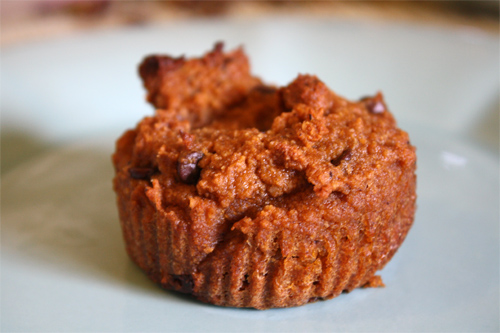
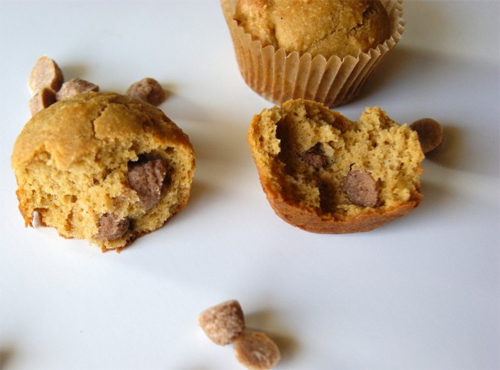
Chunky-Monkey Pumpkin Muffins Recipe photo
Chunky-Monkey Pumpkin Muffins
photo by recipe author

Servings: 48-60 Muffins
Preparation Time: 20 minutes

You may say, “Whoa! That’s a lot of muffins!” but I say, “Who wants to store ½ a can of pumpkin? These high protein, GF, dairy-free, DELICIOUS, moist, kid-approved muffins are GREAT for breakfast, snacks, dessert, or dinner rolls. They store well in the fridge for days, and reheat well in the toaster oven. You can also store them on the counter for a couple of days! I’m sure they’d freeze well, though I haven’t tried that- they don’t last long enough! Lastly, you can keep the prepared batter for up to two days in the fridge and make a smaller amount of muffins fresh daily- pumpkin muffins one day, and chocolatey chunky-monkey delights the next!

Optional Chunky-Monkey Indulgences:

Preheat oven to 350 degrees ºF.

Place all of the dry ingredients into a standing mixer and blend thoroughly.

Place bananas, pumpkin and eggs into a blender and blend thoroughly. Melt coconut oil and honey together in a small pan. Add to the blender and blend thoroughly. Add the wet ingredients from the blender to the mixer and mix all ingredients together thoroughly.

These muffins taste like Fall muffins as is, but they taste like chocolate delights when you add some of the Optional Chunky-Monkey goodies!! Once whatever you want is mixed all up, use a large eating spoon and place heaping spoonfuls into large muffin baking cups.

Bake in preheated oven for 30 minutes. Remove and place on cooling rack to cool and store, or eat right away with some grass-fed butter!

Tips:

*If you want to lower the sugar, sub more bananas for the amount of honey you want to replace.

The best bananas to use are those that have really gotten spotted! When they get to that point and you’re not ready to use them YET, you can peel them, place them into a baggie and put them into either the freezer or fridge. In the fridge, they can last up to 4 or 5 days! The sugary liquid will separate, but they are still fine to bake with! In the freezer, they can be used for awesome banana ice cream!

Tamara from Spring, TX just won $50 for this recipe and photo!
Submit yours here.

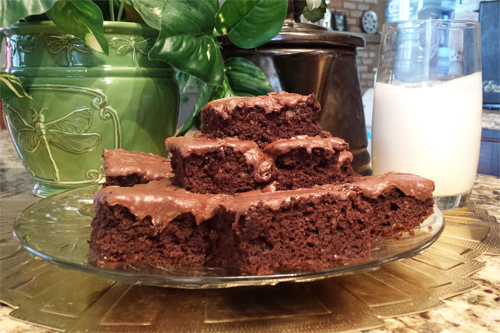
Gluten Free Coconut Cake Brownies

Gluten Free Coconut Cake Brownies Recipe photo
Gluten Free Coconut Cake Brownies
photo by recipe author

Servings: 8
Preparation Time: 15 minutes

Preheat oven to 375 degrees ºF.

In small mixing bowl mix together the first six ingredients.

In larger separate mixing bowl, blend together the next six ingredients.

Pour first mixture into second mixture and blend together. Spread into 8×11 glass cake dish oiled with coconut oil.

Bake in preheated oven for 35-40 minutes or until toothpick comes out clean. When cooled frost with a simple frosting of powdered sugar, cocoa, and coconut milk, if desired.

* For the freshest coconut milk make
homemade coconut milk. (See video at this
link.)

Crystal from Las Vegas, NV just won $50 for this recipe and photo!
Submit yours here.

Chocolate Dipped Raw Honey-Almond Chews

Chocolate Dipped Raw Honey Almond Chews photo
Chocolate Dipped Raw Honey-Almond Chews
photo by recipe author

Servings: 8-12
Preparation Time: 10 minutes

Melt 2 teaspoons coconut oil, in medium sized pan. Add honey, coconut flakes, almond slices, salt and extract, heat over medium heat for about two minutes.

Drop by teaspoonfuls (for 12) or tablespoonfuls (for 8) on a cookie sheet lined with parchment paper (I added a small amount of palm shortening to insure that the candies would not stick). Cool completely (I put mine in the fridge to speed up the process).

Meanwhile, melt the chocolate chips low heat just until melted. Add coconut oil and continue heating just until everything is melted.

Dip cooled candies into the chocolate and place back onto parchment-lined cookie sheet. Cool completely (works well to place them in fridge), and enjoy!

Rachel from Ontario, CA just won $50 for this recipe and photo!
Submit yours here.
Maple Whipped Sweet Potatoes

Maple Whipped Sweet Potatoes Recipe photo
Maple Whipped Sweet Potatoes
photo by recipe author

Servings: 8
Preparation Time: 15 minutes

Preheat oven to 400 degrees ºF.

Prick sweet potatoes all over with a fork. Place on a rimmed baking sheet.

Bake until very tender, approximately an hour.

When cool enough to handle, halve sweet potatoes. With a spoon, scoop out flesh (discard skins); transfer to a food processor or whip by hand. Add virgin coconut oil and pure syrup; process until smooth. Season with salt and freshly ground pepper.

Serve warm and enjoy!

Emily from Ottawa just won $50 for this recipe and photo!
Submit yours here.
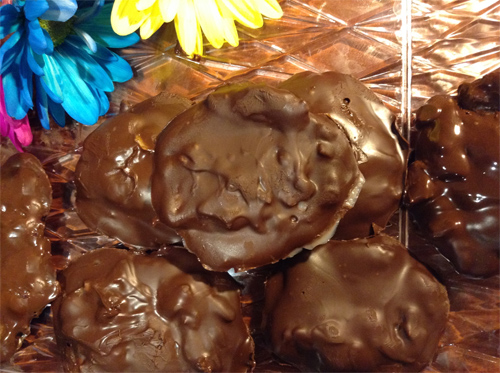
Dairy Free Cinnamon Baking Chips with Coconut Cream Concentrate

Dairy Free Cinnamon Baking Chips with Coconut Cream Concentrate Recipe photo
Dairy Free Cinnamon Baking Chips Recipe with Coconut Cream Concentrate
photo by recipe author

Servings: approx. 2 cups
Preparation Time: 10 minutes

Stir all of the ingredients together. Continue stirring until the mixture starts to cool down enough to thicken. At this point, spoon it into a pasty bag fitted with a round tip or a plastic bag with a small hole cut into one corner. Twist down the top until the mixture starts to come out, and then press it out in small dots onto aluminum foil or waxed paper. Let the chips cool completely before use.

Angela from Longmont, CO just won $50 for this recipe and photo!
Submit yours here.
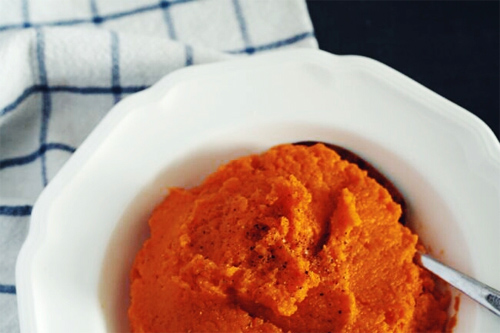
Grain Free Seed Crackers

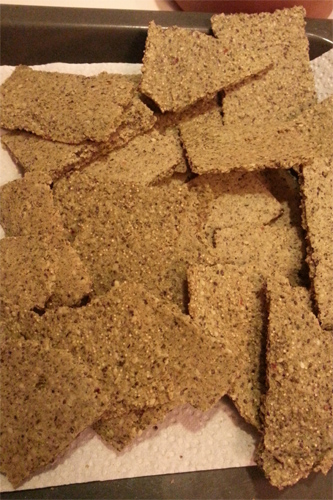
 Grain Free Seed Crackers Recipe photo
Grain Free Seed Crackers Recipe
photo by recipe author

Servings: about 20 pieces
Preparation Time: 15 minutes

Preheat oven to 300 degrees ºF.

Process everything in a food processor, adding water until you have a thick batter (thicker than pancake batter). When you have the consistency you want spread it on a silicon sheet or parchment paper and bake.

Bake in preheated oven for about 30 minutes per side, but watch it closely! Use common sense and don’t burn them. Or use a lower oven temp/longer duration than 300 ºF, i.e. 200 ºF.

Recipe submitted by Stella, Crete, Greece

Submit your recipe here!

Better Than Candy Nut Crunchies

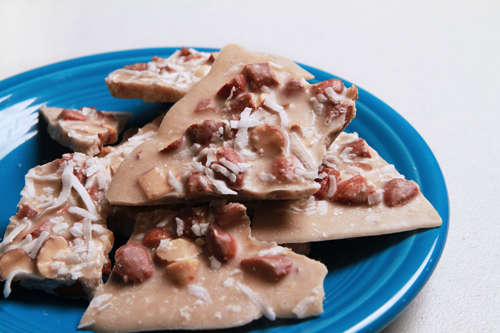
Better Than Candy Nut Crunchies Coconut recipe photo

Prepared by Sarah Shilhavy, Photo by Jeremiah Shilhavy

It’s true! These creamy little bark-like “crunchies” are seriously better than candy. No lie.

When this recipe was first published over 2 years ago it became an instant hit. Readers raved about the stuff. When I made it myself, I did too.

It is very simple and easy to make. The only really long part is waiting for the Coconut Cream Concentrate to warm up to a liquidy-ish state (see our video on how to do this) for proper measuring and mixing. After that, it’s just a throw-it-all-together-and-refrigerate process. How much simpler can it get?

The first time I made this 2 years ago, the whole batch was gobbled up and then (it being Christmas and everything, with various other sweets lying around) was promptly forgotten. Now, at around the same time this recipe was first posted two years ago, we’ve finally gotten around to making another batch. At the first bite the taste of the salt turned me off, but on the second piece, I remembered why I liked this recipe so much. It’s creamy, rich, versatile, easy, crunchy and low on sugar without sacrificing any taste. That is a nice thought considering how much one can overload on sugar this time of the year.

I like to cut down on the salt (not a big fan of the sweet and salty mix) and add a bit of vanilla extract. Chocolate is a great addition to this as well. Just melt and spread over the bark before chilling or drizzle. Use your imagination (this recipe will actually let you, it’s next to impossible to mess it up), watch the video below for a step by step tutorial and mix up a batch to add to your Christmas cookie and candy plate. You won’t regret it. I’m sure of it.

Better-Than-Candy Nut Crunchies

Process sugar in a food processor until very fine.

Spread nuts in a cookie sheet and toast very lightly in a low heated oven. Place Coconut Cream Concentrate jar in hot water to soften. In a medium sized bowl, beat desired amount of Coconut Cream, your choice of sweetener (see below), coconut oil, and salt with a mixer until creamy. Make sure the sugar and salt are mixed in well.

Fold the toasted nuts into the mixture and mix well with a large spoon until all nuts are well coated. Spread mixture evenly on a cookie sheet covered with parchment paper.

Sprinkle the coconut shreds or flakes toasted lightly if desired over the Nut Crunchies and place cookie sheet in the refrigerator.

When cold, break apart the Nut Crunchies into bite-sized pieces and store in covered containers in the refrigerator.

Note: all measurements are approximate and can be varied to suit your taste. It is pretty hard to mess these up.

Variations:

  • Use any nuts you prefer, and/or use stevia instead of sugar to taste.
  • Stir dried coconut toasted into the mixture before spreading out.
  • Add flavoring such as a tablespoon or two of lemon juice and some lemon zest for Lemon Nut Crunchies.
  • Melt some organic dark chocolate, and spread over the mixture before or instead of sprinkling on the coconut and refrigerating.
  • Stir bits of dried pineapple into the mixture for Pina Colada Nut Crunchies

Use your imagination!

Beware: They are addictive! But sooo healthy too. Enjoy!

Submitted by Carol, Palm Bay, FL

Thanks for stopping by!

Sarah

Submit your recipe here!

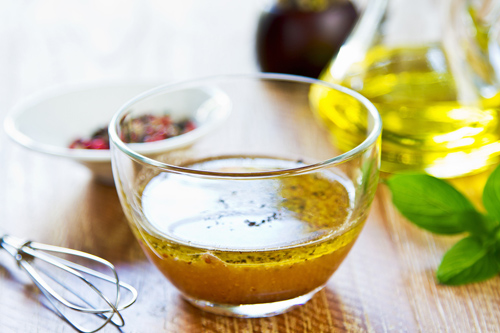
Garlic Vinaigrette

Garlic Vinaigrette
stock photo

Finely mince garlic cloves and whisk together with the rest of the ingredients. Store in a glass jar and shake or whisk well before each serving. Keep at room temperature and do not refrigerate. Enjoy over your favorite salad!

Note: The longer this dressing sits the stronger the garlic flavor will be. You may want to strain the garlic out after two to three days, or just let it “pickle” in the dressing.

Recipe submitted by Sarah, Milwaukee, WI

Submit your recipe here!