Coconut Mayonnaise

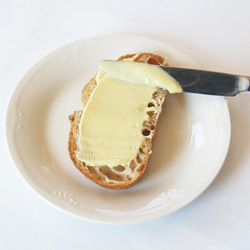
Coconut Mayonnaise Coconut Mayonnaise spread on bread
Prepared by Sarah Shilhavy, Photos by Jeremiah Shilhavy

Mayonnaise is very easy to make once you know what you’re supposed to be doing. If you don’t, then most likely you’ll just end up with an oily mess. If you’ve never made mayonnaise before but want to, then read on. Even if you don’t want to you should still read on. Homemade mayo tastes so much better than store bought, and it is much healthier because there are no trans-fats. In our video we use organic Virgin Coconut Oil, and organic Extra Virgin Olive Oil. Try finding a mayo like that in the stores!

The key to a successful batch of mayo is the oils. Actually, patience is the real key here. The adding-the-oils process can take up to five minutes, so be prepared. Your arm may get tired. Don’t say I didn’t warn you.

After placing the first six ingredients in the blender, blend it very briefly. All you want to do is mix the stuff together, so don’t overdo it. Next, pour the two oils together into a liquid measuring cup with a spout and with the blender running on a low speed, start adding the oils into the blender in drops. Shall I emphasize that? Seriously, it needs to be drops. Tiny drops.

After about a minute or so, gradually start working the oils up to a stream. Again, a TINY stream. Like the size of a needle. And it needs to be steady. Not a stop-and-go type of stream. Just a tiny, steady, stream. Once you’ve worked up to a stream you can increase the blender speed to about medium. You be the judge.

When you’ve got only about 1/4 of a cup left you can increase the stream just a bit, but never, ever just dump the oil in. If you add the oils too quickly the mayo will turn into a curdled, oily mixture instead of whipping up into a thick, creamy spread. And it’ll stay that way. You won’t be able to save it.

You can use any type of mustard you like for this recipe. The classic is Dijon. Same thing for the pepper. Any type you like. White pepper is the one to go to if you don’t want black specks in your mayo but go ahead with the black if you don’t mind the looks so much.

So that’s that! Making your own mayonnaise is really very easy. Just be patient with adding the oils and it’ll turn out perfect. Be sure to watch the video for a step by step tutorial.

Have fun and fee free to drop me a line if you have any questions. 🙂

Sarah

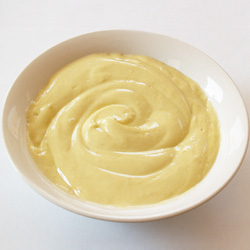
Coconut Mayonnaise

Servings: 1 1/2 cups
Preparation Time: 5 minutes

Place the eggs, mustard, lemon juice, salt, and pepper into a food processor or blender. Blend briefly for a few seconds.

With the processor or blender running on low speed, start adding your oils very slowly. Start out with drops and then work up to about a 1/16-inch stream. This will take a few minutes.

Continue blending until all the oil is used up and there is no free standing oil.

Coconut Granola II

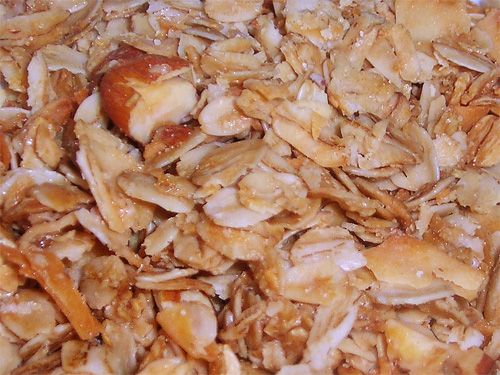
Coconut Granola recipe photo
Coconut Granola
Photo by recipe author

Servings: 12
Preparation Time: 10 minutes
Cook time: 1 hour 15 minutes

Preheat oven to 250.

In a large bowl, combine oats, nuts, and shredded coconut.

In a separate bowl, combine maple syrup, oil and salt. Combine both mixtures and pour onto 3 sheet pans. Cook for 1 hour and 15 minutes, stirring every 15 minutes for even coloring.

Remove from oven and add raisins if desired.

Recipe submitted by Chanelle, Beaumont, CA

Submit your recipe here!

Herbed Gluten Free Coconut Flour Pizza Crust

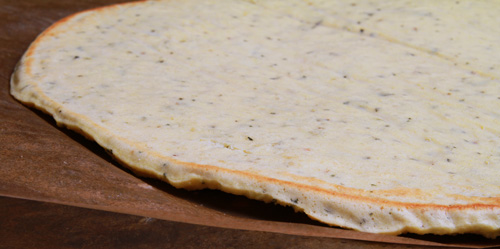
Herbed Gluten Free Coconut Flour Pizza Crust recipe photo
Herbed Gluten Free Coconut Flour Pizza Crust with no toppings
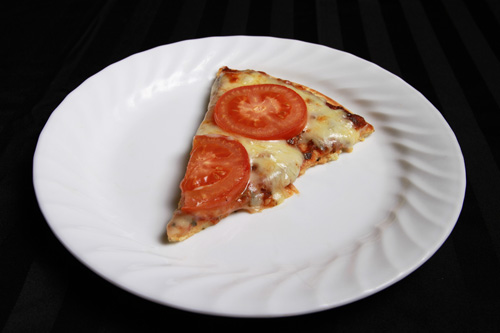
Herbed Gluten Free Coconut Flour Pizza Crust pizza slice with toppings recipe photo
Herbed Gluten Free Coconut Flour Pizza Crust slice with toppings
Prepared by Sarah Shilhavy, Photos by Jeremiah Shilhavy

Servings: 1 small pizza
Preparation Time: 20 minutes

Preheat oven to 375 degrees F.

Beat eggs in a medium sized bowl. Mix in milk and garlic.

Add remaining ingredients and beat into the milk mixture. The dough will be thinner in consistency then regular dough (more like a batter). Add just a bit more coconut flour if needed. The dough needs to be spreadable and thin but not extremely liquid-y like pancake batter.

Spread thinly and evenly on a pizza pan or cookie sheet lined with greased parchment paper (parchment paper is a must require!! This sticks terribly!).

Bake for 12-20 minutes in preheated oven. Crust is done when fully cooked through and bottom edges begin to brown.

Remove crust from oven and turn over. Carefully peel parchment paper from the bottom of the crust and place crust back on parchment paper with the bottom side up.

Top your pizza with sauce and whatever else you would like. Bake for another 5-10 minutes, depending on the toppings.

Recipe submitted by Jennifer, Bellingham, WA

Submit your recipe here!

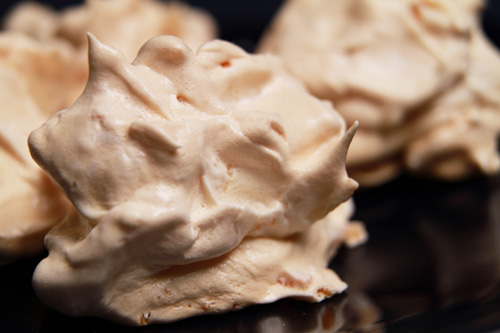
Coconut Meringues

I don’t like making meringues. It worries me. I’m always afraid I’m going to do something to deflate the beautiful, fluffy, marshmallowy mixture in one way or another. But I love eating them, so I still willingly make them when I can. Meringues are a nice way to get rid of those leftover egg whites.

For a long time I did flop at making meringue, but over time I finally, finally found out what was going wrong and got it to work for me. Meringue making actually isn’t as simple and easy as it looks. Once you get it down, it is one of the easiest cookies to make. Let’s go over a few things.

First, the weather must NOT be humid. You have to have dry weather to make meringues. No kidding. If the weather is humid, don’t even think about making meringues. They’ll flop and become soggy. Believe me, I speak from experience. This was the one thing that kept me from making a successful batch of meringues for a long time.

Second, make sure your bowl and beaters are spotlessly clean. I don’t care if that means you have to wipe every single wire on your whisk beater; you need to do it! Even just the tiniest amount of water or fat will kill the meringue.

Third, bring the egg whites to room temp, or almost room temp. It’ll make the whipping process a whole lot quicker.

Fourth, use a light hand. Never, ever scrape meringue down. You can scrape the powdered sugar off the sides of the bowl, but don’t touch the meringue.

Following those guidelines and the recipe below, you’ll have light, airy, fluffy, marshmallowy, Coconut Meringues with a delicate crisp exterior and chewy inside. It can’t get much better then that.

If you have any questions, feel free to ask! Don’t be shy.

Enjoy!

Sarah

Coconut Meringues

Coconut Meringues recipe photo
Coconut Meringues
Prepared by Sarah Shilhavy, Photo by Jeremiah Shilhavy

Servings: 24 meringues Preparation Time: 20 minutes

Preheat oven to 250 degrees F. Line two cookie sheets with parchment paper.

In large bowl with mixer at high speed, beat egg whites and cream of tartar until soft peaks form.

Gradually sprinkle in sugar 2 tablespoons at a time at high speed. After all the sugar has been added you may beat in the vanilla extract (or fold in with the coconut). Beat until meringue stands in stiff, glossy peaks.

Using a rubber spatula, very, very gently fold in flaked coconut and vanilla extract (if you didn’t add it in the above step). Do not fold until well mixed, this should take only about 2-3 turns of the spatula.

Drop meringue by rounded spoonfuls onto prepared cookie sheets about 1 inch apart.

Bake for 70 minutes or until dry to the touch. Remove to rack to cool.

Submit your recipe here!

Coconut Flour Oatmeal Raisin Cookie Balls

I like oatmeal cookies. Do you?

This recipe was delicious. Very different, yes, but still delicious.

The strangest thing about them is that they go into the oven and come out of the oven looking pretty much the same way as they did when they went in. I was already expecting that after looking the recipe over, but it was still strange to see the un-melted toasting cookie balls grinning at me every time I walked by the oven.

When mixing the dough, don’t worry about the texture not being “right”. It’ll form itself into a sticky-ish almost crumbly looking mixture, but that’s normal. Don’t panic and throw it out, ’cause you’ll just end up with the same results when you start over.

The nice thing about this dough is that you can mix for as much as you need to. Coconut flour (unlike wheat flour) will not become glutinous after a lot of mixing. So there’s no worry about tough cookies.

After you’ve mixed the dough, you can shape it into tablespoon sized balls using a measuring tablespoon as a guide or a small cookie scoop. Your choice. I liked using my hands.

I liked the idea of keeping the cookies in a ball, but if you want the traditional flat round just press each ball down flat with your hand (but not too flat) and bake for about 6 minutes. Just keep an eye on them, they’ll bake pretty quickly.

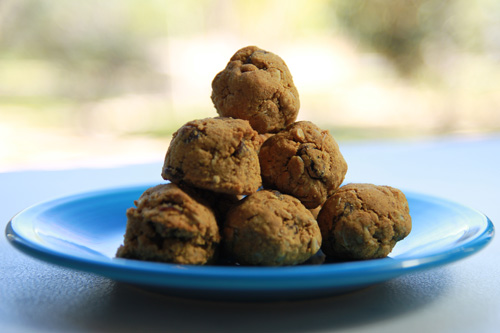
The texture of the cookies was a little different too. They have a buttery, soft inside with a slightly crisp, almost flaky outside. Sounds good, doesn’t it?

Enjoying cookies,

Sarah

Coconut Flour Oatmeal Raisin Cookie Balls recipe photo
Coconut Flour Oatmeal Raisin Cookie Balls
Prepared by Sarah Shilhavy, Photo by Jeremiah Shilhavy

Coconut Flour Oatmeal Raisin Cookie Balls

Servings: approximately 25-27 cookies
Preparation Time: 20 minutes

Heat oven to 350 degrees F. In large bowl, beat butter and sugar on medium speed with an electric mixer until creamy. Add eggs and vanilla; mix well.

In a separate bowl combine coconut flour, baking soda, garam masala or cinnamon and salt. Add oats and raisins; mix until thoroughly combined. Then combine dry ingredients with the creamed sugar/egg.

Beat on low speed until well incorporated. (The mixture will have an oddly loose consistency due to the lack of liquid in this recipe, but fear not.)

Roll cookie dough into balls, using approximately 1 tablespoon of dough per ball. Place each dough ball on an ungreased cookie sheet.

Bake 10-12 min. (depending on your oven) until the cookies are golden brown on top. Remove from over, break one open and check the center. If the test cookie seems undercooked in the middle, return the baking sheet to the oven for 2 more minutes, being careful not to let the bottoms burn.

Remove the cookies from the oven, let cool for 1 minute on the cookie sheet. Transfer cookies to a plate or wire rack and cool completely.

Store in a zipper bag or tightly-covered container. These will keep for 7-10 days but mine never last that long!

Recipe submitted by DH, Baltimore, MD

Submit your recipe here!

Gluten-Free Coconut Flour Dutch Babies

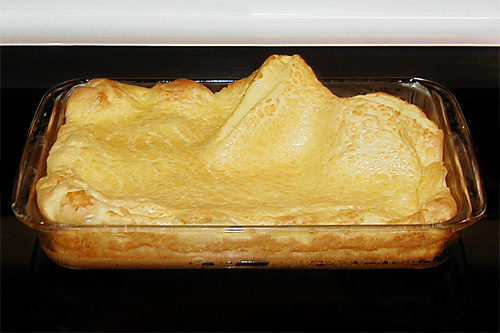
Gluten-Free Coconut Flour Dutch Babies recipe photo
Gluten-Free Coconut Flour Dutch Babies
Photo by recipe author

Servings: 6-8
Preparation Time: 10 minutes

Preheat oven to 425 degrees.

Very generously completely slather bottom and sides of a 9 x 13 glass baking pan with butter, coconut oil or palm shortening.

Whisk all the dry ingredients together and quickly add and whisk in the eggs and coconut milk until batter is well mixed. Pour all directly into greased pan.

Bake for about 20-25 minutes until puffed and cooked all the way through. Serve immediately.

*For the freshest coconut milk make homemade coconut milk. (See video at this link)

Recipe submitted by Karen, Camby, IN

Submit your recipe here!

Vanilla-Flecked Coconut Macaroons

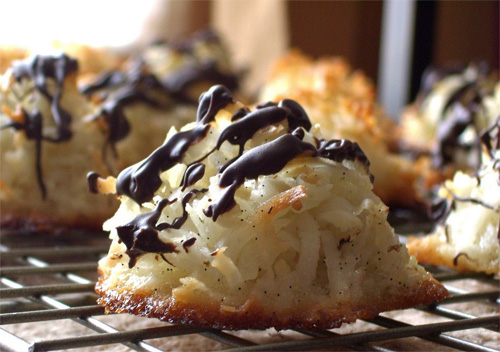
Vanilla-Flecked Coconut Macaroons recipe photo
Vanilla-Flecked Coconut Macaroons
Photo by recipe author

These cookies are incredible easy to make – no need to whip the egg whites beforehand. Just mix everything and bake. Parchment paper is the key to keeping these cookies from sticking (and easy clean-up).

1. Mix the egg whites, sugar, and coconut in a large bowl.

2. Split the vanilla bean lengthwise down the middle and scrape all the seeds into the bowl. Mix again making sure to evenly distribute the vanilla seeds. You should see tiny specks of black throughout the batter.

3. Using a tablespoon or ice cream scoop, place 12 scoops of batter at a time (evenly spaced) on a baking pan lined with parchment paper; each scoop should be about the size of a golf ball. The batter will be thick and lumpy with little peaks of coconut.

4. Bake at 350 for about 12 minutes or until the tips of the coconut turn golden brown. Let cool completely on the pans, then separate the batch in half.

5. Melt the chocolate.

6. Dip a spatula into the melted chocolate and wave over the macaroons about 4 or 5 inches above the tray. Let the chocolate drizzle down in zig-zag patterns and let cool. (You can also dip the cookies one at a time by hand.)

Enjoy!

Recipe submitted by Alejandra, New York, NY

Submit your recipe here!

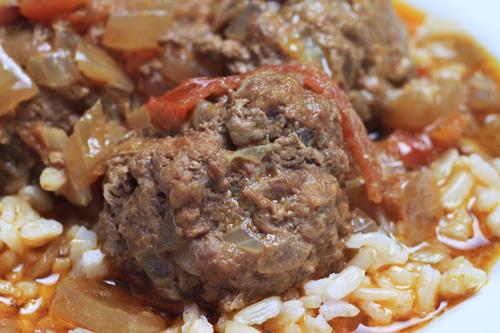
Curried Lamb Meatballs

Curried Lamb Meatballs recipe photo
Curried Lamb Meatballs
Prepared by Sarah Shilhavy using grass-fed ground lamb.
Photo by Jeremiah Shilhavy

Servings: 4
Preparation Time: 20 minutes

Finely chop one yellow onion and mix it into the lamb. Add the ground cumin, egg and salt to taste (about 2 teaspoons). Mix together well. Set aside.

Prepare the sauce:

Chop the second onion. Heat some oil in a large soup pot. Cook the chopped onion for a few minutes until it turns golden – do not let it brown.

Add curry powder, lower heat and add half the wine and the tomatoes. Let the sauce bubble on low heat until the oil rises to the surface.

While the sauce is simmering, form the meat into 1 ½” meatballs. Handle the meat as little as possible.

Carefully add the meatballs to the pot. Add remaining wine and the whole garlic cloves. Cover and simmer. Add a bit of salt to the sauce if needed.

When the meatballs are half cooked, add the ground coriander.

When finished cooking, turn off heat and sprinkle a half tablespoon of garram masalla over the top of the stew. Cover and let sit for a while, at least 15 minutes.

Serve with basmati rice and mango chutney.

Recipe submitted by Simi, Los Angeles, CA

Submit your recipe here!