Gluten Free Chocolate Peppermint Cookie Bars
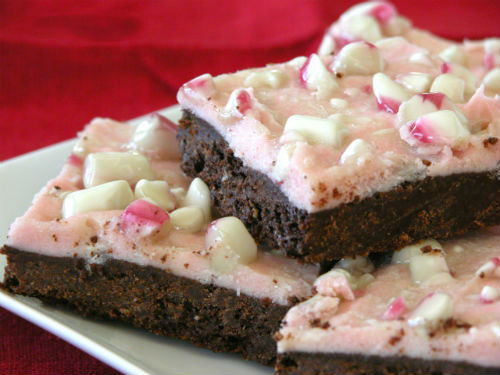
Gluten Free Chocolate Peppermint Cookie Bars Recipe photo
Gluten Free Chocolate Peppermint Cookie Bars Recipe
photo by recipe author

Servings: 8
Preparation Time: 15 minutes

Cookie:

Frosting:

  • 2 tablespoons grass-fed butter*
  • 1 cup powdered sugar
  • 2 tablespoons coconut cream (the cream that rises to the top of full fat coconut milk when it is refrigerated)
  • 2 tablespoons full fat coconut milk**
  • 1/2 teaspoons peppermint flavor
  • 1 small beet root
  • 4 natural candy canes, crushed (optional)

Cookie:

Preheat oven to 350 degrees F.

Mix the melted butter/oil with the vanilla. Combine the flour, cocoa, salt and sugar. Add the dry ingredients to the wet and stir until combined. Press the batter into an 8×8 greased pan. Bake at 350 for 25 minutes. Let cool completely.

Frosting:

Place the butter and sugar in a pan on medium heat until butter starts to melt. Remove from heat and stir well. Pour the mixture into a Vitamix or blender with the coconut cream, coconut milk and peppermint flavoring. Blend until smooth.

Peel the small beet root and place in a saucepan with about 2 tablespoons water and cook over medium heat until the water is red. Pour some of the red water into your frosting and stir until desired color is reached. Place the frosting in the refrigerator to set if it’s runny.

Once the cookie has cooled, spread the frosting evenly and sprinkle the crushed candy over the wet frosting. Place in the fridge to let the frosting set. Store in the refrigerator (I think these taste best straight out of the refrigerator!)

Quick notes

*You may be able to used 2 additional tablespoons of coconut cream instead of butter in the frosting. I haven’t tried it but it should work. It may just make it more coconuty and more peppermint extract may be needed.

** For the freshest coconut milk make homemade coconut milk. (See video at this link.)

Variations

For those that do not like peppermint try any other flavor extract or simply use vanilla. Add 1/4 teaspoon to start in case it’s a stronger extract.

Recipe submitted by Kate, Highlands Ranch, CO

Submit your recipe here!

Chocolate Salty Balls

Chocolate Salty Balls Recipe photo
Chocolate Salty Balls Recipe
photo by recipe author

Servings: 12
Preparation Time: 20-30 minutes

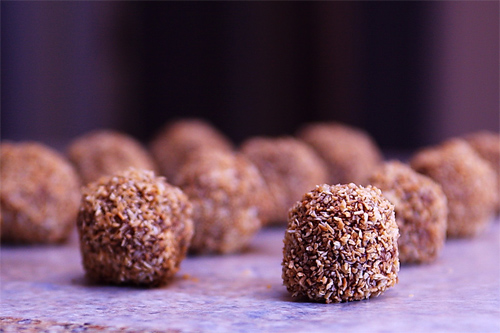
Melt coconut oil with the chocolate. Add the coconut cream concentrate and stir until well incorporated. Add 1/2 cup shredded coconut and (chili too if using), mix well and place in the freezer to cool and firm up.

Meanwhile combine toasted coconut and salt and pour onto a plate. Roll mixture into small balls and roll in toasted coconut.

Recipe submitted by Keith, Fairfield, CA

Submit your recipe here!

Quick Gluten Free Peppermint Crunch Candy

Quick Gluten Free Peppermint Crunch Candy Recipe photo
Quick Gluten Free Peppermint Crunch Candy Recipe
photo by recipe author

Servings: 2-3
Preparation Time: 10 minutes

  • 3 tablespoons cocoa powder
  • 3 tablespoons coconut oil
  • 1/2 cup gluten free all natural cocoa or plain crisp cereal
  • 10 drops liquid stevia (or 2-3 teaspoons honey)
  • 1/8 teaspoons peppermint extract
  • pinch of salt

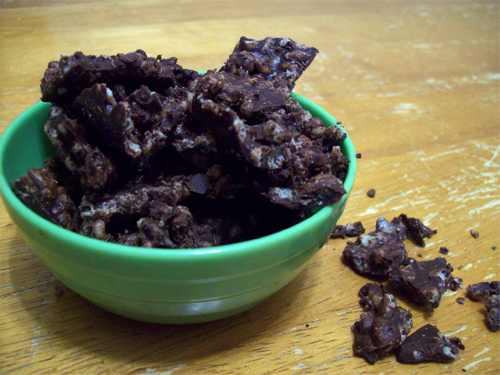
On low, heat cocoa and coconut oil in saucepan until just melted. Remove from heat and add crispy cereal, stevia or honey, peppermint and salt and mix well. Place in loaf pan or other small glass baking pan.

Place in freezer until frozen (5-10 min) and cut up into pieces. Serves great with raw yogurt or over ice cream!

Recipe submitted by Rebecca, Nashville, TN

Submit your recipe here!

Coconut Peanut Butter Balls

Coconut Peanut Butter Balls Recipe photo
Coconut Peanut Butter Balls Recipe
photo by recipe author

Servings: 50+
Preparation Time: 1 hour

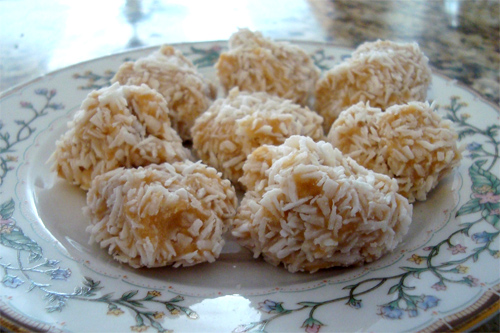
Line cookie sheet with wax paper. Soften coconut oil. When soft, add the peanut butter, ricotta cheese, vanilla, honey and salt and mix well with a mixer. Place in the refrigerator for about 10 minutes.

Pour 1 cup of shredded coconut (might need more) into a small bowl. Remove mixture from refrigerator. Scoop a small spoonful of mixture and drop into shredded coconut. Using fingers or a clean spoon roll dough around in coconut to cover. Set on cookie sheet. Continue until all are formed/covered. The amount you wind up with will be determined by the size of your spoonfuls.

Place the cookie sheet in the freezer for approximately 30 minutes to set. Transfer to container and store in the freezer or the refrigerator. If you keep them in the freezer, they are like little bites of coconut/peanut butter ice cream which is how I like to eat them. This is my favorite snack and I always have them in my freezer!

Recipe submitted by Vicki, Pleasantville, TN

Submit your recipe here!

Gluten Free Coconut Cream Pumpkin Cheesecake

Gluten Free Coconut Cream Pumpkin Cheesecake Recipe photo
Gluten Free Coconut Cream Pumpkin Cheesecake Recipe
photo by recipe author

Servings: 12
Preparation Time: 30- 40 minutes

Crust:,

  • 1 tablespoon coconut oil
  • 2 tablespoons coconut flour
  • 1 cup almonds or Brazil nuts (for a thinner crust you may wish to use only 1/2 cup of nuts)
  • 1 cup organic coconut shreds, flakes or chips
  • 1 1/2 – 2 cups crumbled ginger snap cookies or graham crackers (I used gluten free ginger snaps for this recipe)
  • 8 large dates (pitted)

Filling:

Crust:

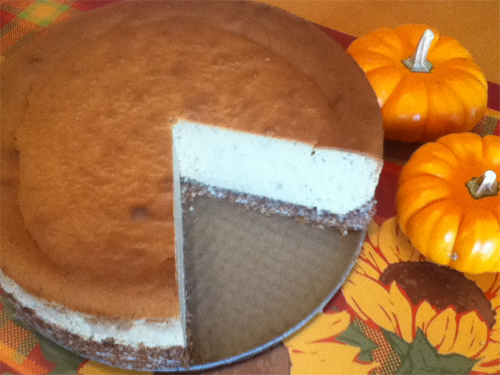
Taking a 9 inch springform pan, line the bottom with parchment paper. Then very lightly grease the sides with the coconut oil; and then lightly dust the sides with the coconut flour. Add all of the crust ingredients into a blender or food processor and blend until you get a nice sticky mixture. Place all of this mixture into the bottom of the Springform pan; press into the bottom of the pan and 1 inch up the sides of the pan. Set aside until filling is ready.

Filling:

Preheat oven to 350 degrees F.

In a large mixing bowl, add the cream cheese and sugar or honey and beat together with an electric mixer for 3 minutes or until fluffy. Pour the coconut cream concentrate into a large saucepan on a low temp setting and then immediately add the pumpkin and mix together until it is all one color. Be sure to stir regularly while this is warming for about 3-4 minutes and then add to the cream cheese mixture. Beat in the eggs one at a time, then add the cinnamon, ginger, nutmeg, cloves, salt and vanilla and beat until it is all one color again. Add the flour and mix well for 1-2 more minutes.

Take the springform pan and wrap the sides with foil about 2 inches up each side, then set the pan into a small roasting pan or cookie sheet with high edges. Pour your filling into the pan with the crust and place in the preheated oven. Pour hot water from the teakettle about 1 inch up the sides of the springform pan. Bake until the center moves just slightly when shaken, about 70-80 minutes. Remove the cake from oven and let cool on a wire rack. After it has cooled for at least 2 hours, place it in the refrigerator for 3-4 hours before carefully removing the outer ring; serve and enjoy.

Recipe submitted by Donny, San Diego, CA

Submit your recipe here!

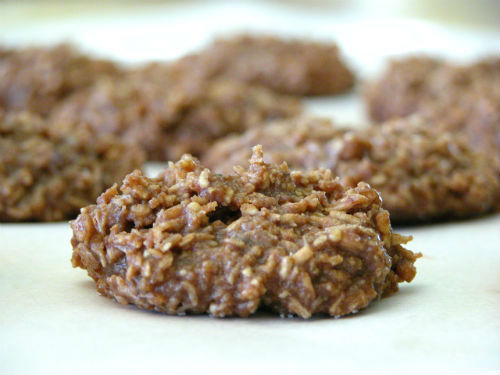
No Bake Chocolate Coconut Drop Cookies

No Bake Chocolate Coconut Drop Cookies Recipe photo
No Bake Chocolate Coconut Drop Cookies Recipe
photo by recipe author

Servings: 10
Preparation Time: 15 minutes

In a medium size saucepan, combine the butter/oil, cocoa, sugar and milk. Bring to a boil, let boil for 1-2 minutes. Remove from heat and add in the almond butter, coconut, vanilla and salt. Stir until combined.

Place spoonfuls of the mixture on parchment lined cookie sheet or plates. Place in the freezer to for 30 minutes to set.

Store in an airtight container in the refrigerator.

* For the freshest coconut milk make homemade coconut milk. (See video at this link.)

Variations

**Any nut or seed butter would work here. You could also try coconut cream concentrate, but I am not sure I would do 3/4 cup, so start with less, the cookies will still turn out. The original recipe calls for peanut butter. Feel free to use it, but I would start with 1/2 cup. Almond butter isn’t as pronounced as peanut butter in taste, therefore I used more of it than the original recipe called for (original called for peanut butter).

Recipe submitted by Kate, Highlands Ranch, CO

Submit your recipe here!

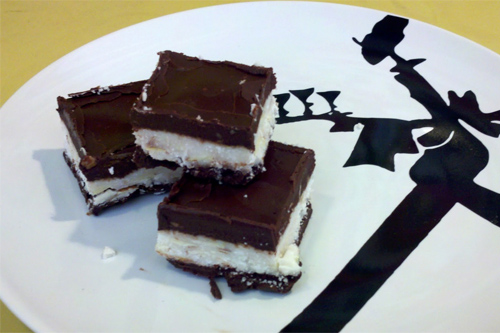
Coconut Almond Bliss Bars

Coconut Almond Bliss Bars Recipe photo
Coconut Almond Bliss Bars Recipe
photo by recipe author

Servings: 20
Preparation Time: 1 hour

Line a standard baking dish with wax or parchment paper.

In a double boiler melt 1 bar (3.5 ounces) of dark chocolate and 1/4 cup coconut oil, stirring continuously. Pour it into your lined baking dish, give it a tap on the counter to make sure it’s all settled and there are no air bubbles, then put it in the refrigerator to harden.

In a bowl, combine coconut cream concentrate, shredded coconut and slivered almonds. Pour this over the hardened chocolate. Again tap the dish gently on the counter to get everything to settle evenly. Place the dish back into the refrigerator and again let it harden.

Grab your favorite spoon and clean out the bowl while you wait.

Again, in a double boiler melt the other 3.5 ounces of chocolate and 1/4 cup coconut oil. Once melted, pour the chocolate over the top of the hardened coconut cream. Again, refrigerate.

Remove the dish from the refrigerator and gently give the paper a tug. The candy will easily pop free. With a large knife cut it up into squares. It works best if you lie the knife level and give even pressure straight down. A slight rocking motion can help.

One thing to note is that these can be very melty, especially in the summer or a warm house, so you’ll want to keep them refrigerated or frozen, which is all the better. You won’t want them setting on the counter, tempting you.

Recipe submitted by Deanna, Painted Post, NY

Submit your recipe here!

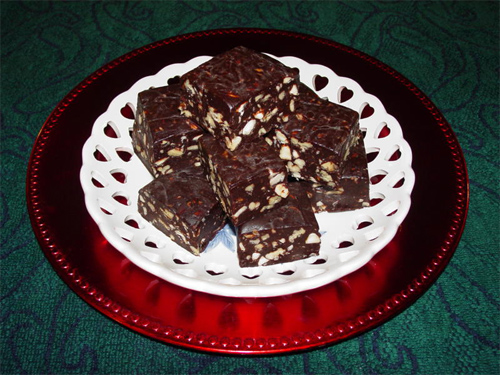
Holiday Date Fudge

Holiday Date Fudge Recipe photo
Holiday Date Fudge Recipe
photo by recipe author

Servings: 12
Preparation Time: 40 minutes

Soak pitted dates in hot water for 10 minutes then drain well & dry on paper towel. Blend the dates & coconut oil in a large food processor until smooth. Add cocoa, vanilla extract & honey, continue to blend until mixed well. Recipe can be made in 2 half batches for easier blending.

Put fudge mixture into 1 gallon heavy duty freezer zip lock bag. Add nuts & seal bag with most of the air out then massage by hand until the nuts are mixed well into the fudge. Press all the air out of the bag, seal & place on flat surface & press down firmly to shape the fudge. Refrigerate for 1 day.

Compress fudge again on the 2nd day to get a firmer fudge consistency. On the 3 day it can be cut into 12 pieces. Keep refrigerated until served.

For holiday meals, freeze separated fudge pieces for 1 hour then stack fudge on a chilled serving plate immediately before table presentation.

Recipe submitted by Kathleen, Anaheim, CA

Submit your recipe here!