Coconut Desserts & Sweets Recipes

Creamy Pumpkin Cheesecake Bars
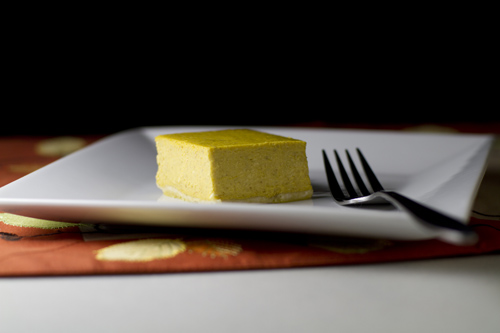
 Creamy Pumpkin Cheesecake Bars Recipe photo
Creamy Pumpkin Cheesecake Bars Recipe
Prepared by Sarah Shilhavy Photo by Jeremiah Shilhavy

We have a new recipe and video for you all today, and it’s perfect for this time of the year, being pumpkin and all.

It’s pretty easy too, if you know what you’re doing. Cheesecakes can be tricky. They’ll crack if too much air is whipped into the batter, won’t mix well if the ingredients are too cold, refuse to be creamy if a certain ratio is off, and just be generally irritating among other things. But all that can be avoided, if you:

1. Follow the recipe as written. If you decide to substitute this for that and use that thing instead of the original thing and it explodes, you alone will be responsible for that. Just saying…

2. Have all filling ingredients at room temperature. Especially the cream cheese, sour cream, eggs and pumpkin. The warmer those ingredients are, the easier the batter will mix and become silky smooth.

3. Use a paddle attachment. If you have one. It won’t whip air into the batter as much and thus avoid over mixing.

4. Mix just until combined. Don’t let the mixer keep running if everything is already well blended, and try to keep it on a low setting because high speed = air and air = tiny little bubbles that will cause the cake to crack during baking. Basically, air + cheesecake = not good.

This dessert should be a hit with both those who like and dislike pumpkin. It has just enough pumpkin to keep the fans happy but not enough for it to be overwhelmingly pumpkin-y. When you bite into it, you get just a hint of spice and subtle pumpkin laced throughout the silky, creamy, dense cheesecake.

If you’re still a little lost or uncertain about making this, the video will take you through it in a step by step process, and you’ll also get to see all the guidelines in use.

Have fun!

Creamy Pumpkin Cheesecake Bars

Servings: 20
Preparation Time: 10 minutes

Filling:

Gluten Free Shortbread Crust:

Preheat oven to 350° F. Lightly grease a 9×13 pan with coconut oil.

For the shortbread, cream the butter and sugar until well blended. Add flours and mix well. Dust fingers with cornstarch and press into prepared pan evenly.

Beat cream cheese, sugar, cinnamon and nutmeg in the bowl of an electric mixer just until well blended and creamy. Add sour cream and vanilla, blend well. Mix in eggs and add pumpkin. Do not overbeat and try not to whip air into the batter.

Pour filling into pan and bake for 40-45 minutes. Top should still jiggle slightly when you shake the pan.

Note – For a non gluten free crust, use:

Proceed with crust instructions.

Recipe courtesy Sarah Shilhavy

Submit your recipe here!

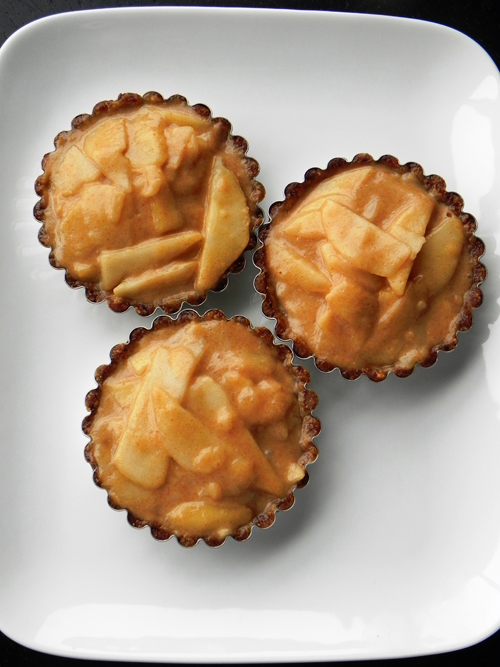
Almond Pear Tartlets with Cinnamon-Caramel Cream

 Almond Pear Tartlets with Cinnamon-Caramel Cream Recipe photo
Almond Pear Tartlets with Cinnamon-Caramel Cream Recipe
photo by recipe author

Servings: 6 (3 tartlets)
Preparation Time: 20 minutes

For the crusts:

  • 3/4 cup almond flour (or ground almonds)
  • 1/2 cup pitted dates
  • Big pinch of salt

For the filling:

  • 2/3 cup almond milk (or any other nondairy milk)
  • 1/3 cup pitted dates
  • 1/2 teaspoon lemon juice
  • 1/2 teaspoon vanilla extract
  • 1/4 teaspoon ground cinnamon
  • 1/8 teaspoon ground ginger (optional)
  • Pinch of sea salt
  • 1 tablespoon melted coconut oil
  • 2 large, ripe pears, peeled, cored, and thinly sliced

To make the crusts, combine the almond flour, dates, and salt in a food processor and pulse until well combined. (If the mixture doesn’t quite come together, add 1/2 tablespoon of water and process again.) Divide the mixture between three 4-inch mini tart pans, pressing it firmly and evenly onto the bottoms and sides of each pan. Place the crusts in the refrigerator while you make the filling.

To make the filling, combine the milk, dates, lemon juice, vanilla, cinnamon, ginger, and salt in a high-speed blender and blend until completely smooth. With the machine running on low speed, stream in the coconut oil; blend again until smooth.

Place the thinly sliced pears in a medium bowl, add the caramel sauce from the blender, and toss/stir to coat. Remove the crusts from the fridge and divide the pear-caramel mixture among them, heaping the pears into each crust until almost overflowing. (If there is any remaining caramel sauce, enjoy it with a spoon or save it for another use.) Place the filled tartlets in the fridge and let chill for 2 to 4 hours, or until the filling is set.

Recipe submitted by Amber, Kansas City, MO

Submit your recipe here!

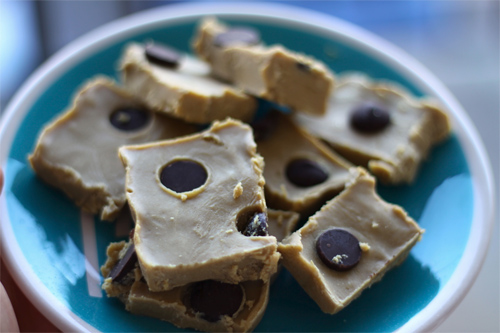
“Caramel” Fudge

Caramel_Fudge Recipe photo
Caramel_Fudge Recipe
photo by recipe author

Servings: 12
Preparation Time: 15 minutes

Grease a small pan. Place all ingredients (except chocolate chips) in the food processor (or if you don’t have one you could combine it all on low on the stove) and combine until smooth. Pour your mixture into the pan and stick it in the fridge for about 5 minutes. Pull it out, add some chocolate chips, and then throw it back in until it’s set!

Cut up into 12-16 squares. These should be kept in the fridge, they get a little melty.

Recipe submitted by Sarah, Abilene, TX

Submit your recipe here!

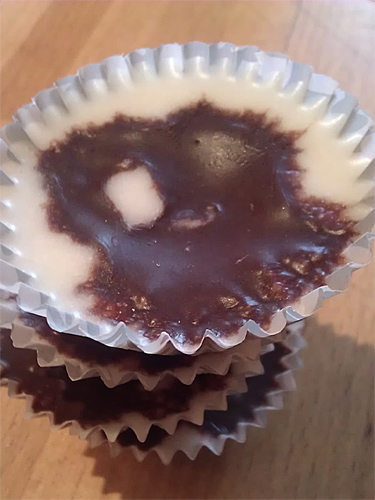
Coco Coconut Cups

Coco Coconut Cups Recipe photo
Coco Coconut Cups Recipe
photo by recipe author

Servings: approx. 24 candy cups
Preparation Time: 15 minutes

For the coconut cups:

For the chocolate:

1. Line mini-muffin pan with paper muffin cups

2. Process all ingredients for coconut cups in food processor just until well mixed.

3. Fill paper cups halfway with coconut mixture.

4. In a small bowl, whisk together ingredients for chocolate.

5. Drizzle a little chocolate onto each candy cup.

6. Chill in refrigerator until set, about 20 minutes.

7. Store in covered container in refrigerator if your kitchen is warm, as the chocolate will be melty.

Recipe submitted by Chrissie, Pittsburgh, PA

Submit your recipe here!

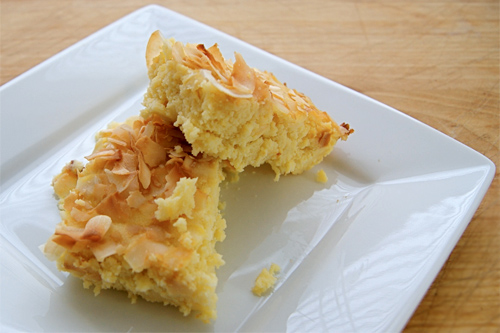
Gluten Free Lemon-Coconut Blondies

Gluten Free Lemon-Coconut Blondies Recipe photo
Gluten Free Lemon-Coconut Blondies Recipe
photo by recipe author

Servings: 12-16
Preparation Time: 10 minutes

Preheat the oven to 350 degrees. Over very low heat, heat honey and coconut oil just until oil is melted. Stir in the lemon juice and vanilla, and then whisk in the eggs and lemon zest.

In a small bowl, stir together the coconut flour, sea salt, stevia, and baking powder until well combined. Stir this into the coconut oil mixture. After a couple of minutes this is going to get very thick, as the coconut flour absorbs the moisture. At this point, stir in enough of the coconut milk to have the consistency of thick pancake batter (start with a 1/4 cup and see if you need to add more).

Grease an 8 by 8 inch baking pan, and spoon in the batter. Top with the toasted coconut, and bake for 35-45 minutes, or until the center feels “set” when you lightly press down with your finger. Remove and cool completely before cutting (if they are still warm, they will fall apart).

Note: I made these in a 6 by 10 inch pan, as well an 8 by 8–since the latter is more common, that is the size I called for, but the other pan worked well.

* For the freshest coconut milk make homemade coconut milk. (See video at this link.)

Recipe submitted by Angela, Longmont, CO

Submit your recipe here!

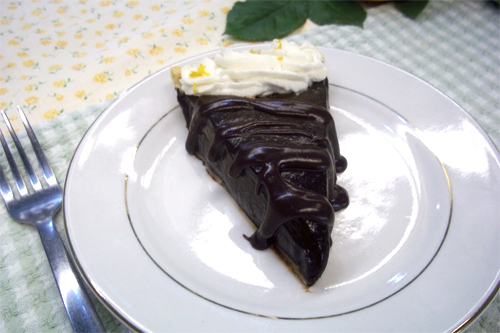
Chocolate Orange Truffle Pie

Chocolate Orange Truffle Pie Recipe photo
Chocolate Orange Truffle Pie Recipe
photo by recipe author

Servings: 12
Preparation Time: 15 prep, 3 hours chill

Measure orange juice; add a little water or more juice to equal 1/2 cup. Put the orange juice, zest (should be about 1 tablespoon), honey, coconut oil, cocoa, avocados, vanilla, and salt in a blender or food processor. Run on high for 1-2 minutes, until smooth.

Pour into prepared crust. Cover and refrigerate 2-3 hours until set. Let stand at room temperature 20-30 minutes before serving for softer texture.

Serve with a drizzle of fudge sauce and some whipped cream.

This pie can be frozen and thawed without messing up the texture.

Recipe submitted by Rhonda, South Jordan, UT

Submit your recipe here!

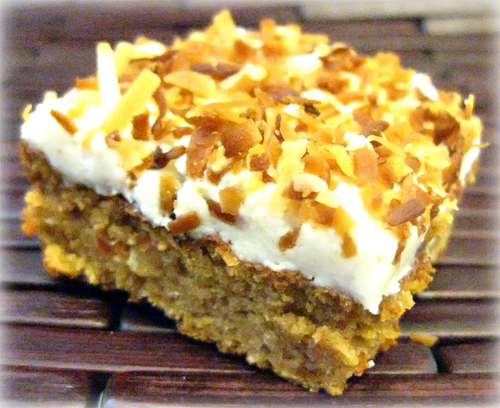
Gluten Free Coconut Cake

 Gluten Free Coconut Cake Recipe photo
Gluten Free Coconut Cake Recipe
photo by recipe author

Servings: 12
Preparation Time: 15-20 minutes

  • 5 large egg whites, at room temperature
  • 3/4 cup of coconut cream (this is the thick cream on top of coconut milk)*
  • 1 large egg, at room temperature
  • 1 teaspoon coconut extract
  • 1 teaspoon vanilla extract
  • 3/4 cup + 2 tablespoons coconut flour
  • 1 1/2 cup whole sugar
  • 2 tablespoons baking powder
  • 3/4 teaspoon salt
  • 10 tablespoons butter (1 1/4 sticks) or coconut oil, cut into 10 pieces and softened
  • 1/2 cup shredded coconut

1. Preheat oven to 325 degrees. Whisk egg whites, coconut cream, whole egg, and extracts together in a large bowl until combined. Set aside.

2. In a separate bowl mix coconut flour, whole cane sugar, baking powder and salt together.

3. Using an electric mixer, combing flour mixture with butter pieces or coconut oil, one tablespoon at a time. Add 1 cup of egg mixture, increase the speed to medium-high, and beat until light and semi fluffy. Add the remaining egg mixture in a steady stream and continue to beat until the batter is combined. Mix in shredded coconut.

4. Pour batter into a 9×13 pan. Bake for 35-40 minutes or until a toothpick inserted into the center of the cake comes out with a few crumbs attached. The cake will be very golden brown. Let cool before frosting.

5. Frost cooled cake. Top with toasted coconut and serve.

* For the freshest coconut milk make homemade coconut milk. (See video at this link.)

Recipe submitted by Philip, Eugene, OR

Submit your recipe here!

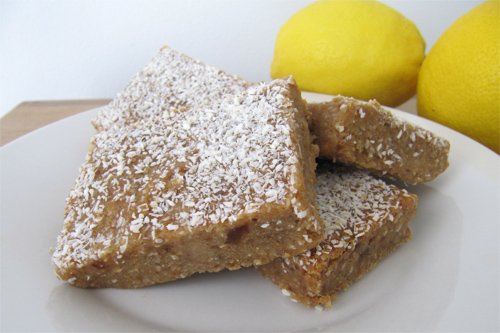
Coconut Lemon Bars

Coconut Lemon Bars Recipe photo
Coconut Lemon Bars Recipe
photo by recipe author

Servings: 12 bars
Preparation Time: 5 min

1. Preheat oven to 400 degrees. Grease 8 x 8 glass dish with coconut oil and set aide. Combine all ingredients in food processor and pulse until very fine and sticky (about 1-2 minutes).

2. Pour cashew coconut lemon mixture into pan and press down firmly and evenly. Sprinkle 1 tbsp. shredded coconut on top.

3. Bake at 400 for 18-20. Let cool completely before cutting into squares.

Recipe submitted by Kristen, Mattapoisett, MA

Submit your recipe here!