Gluten Free Desserts and Sweets

Coconut-Raisin Bars

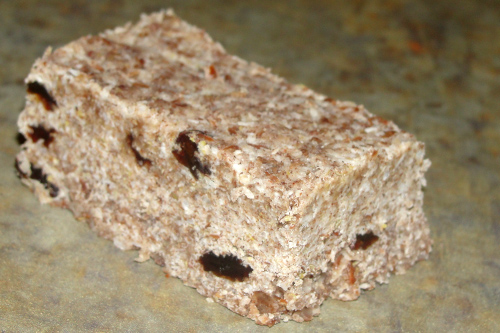
Coconut Raisin Bars photo
Coconut Raisin Bars
photo by recipe author

Servings: 12
Preparation Time: 15 minutes

Combine dry ingredients in a large bowl. In a small saucepan heat coconut oil and honey and allow them to melt. You don’t need it to boil, just warm enough to melt. Pour melted oil/honey into dry mixture and stir to combine. You want a wet sand like consistency. Taste at this point to determine if you want more cinnamon, more honey, etc.

Pour mixture into a parchment paper lined 8X8 pan. Cover with more parchment paper and press the mixture down. Really make sure this is packed solid. Place mixture in the freezer for a couple hours. Once frozen, remove and cut with a heavy knife. Store in the refrigerator. Enjoy!

*You can grind your own almond flour by placing whole almonds in a blender/food processor and blending until you get a fine meal.

Recipe submitted by Esther, Bremerton, WA

Submit your recipe here!

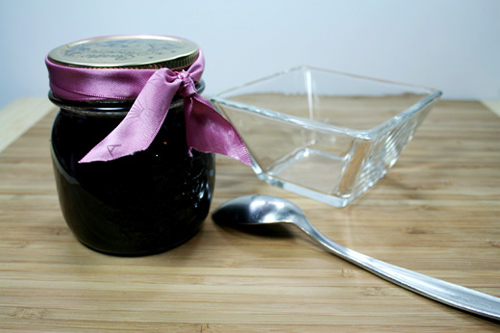
Homemade Magic Shell Ice Cream Topping

Homemade Magic Shell Ice Cream Topping photo
Homemade Magic Shell Ice Cream Topping
photo by recipe author

Servings: 6-10
Preparation Time: 15 minutes

In a double boiler (or sauce pan over low heat), melt all of the ingredients together and stir until combined. Serve over your favorite ice cream.

Recipe submitted by Jessica, Denver, CO

Submit your recipe here!

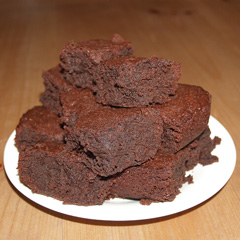
Chocolate Fudge Brownies


Coconut Flour Chocolate Fudge Brownies

Gluten Free

YIELD: 24 bars

Preheat oven to 350 degrees. Grease and dust an 11×8 pan with coconut oil and coco powder.

Place butter, sugar, chocolate, and brown rice syrup in a medium sized pot and melt on low heat, stirring until everything is well blended and smooth. Sift in the coco powder. Remove from heat and set aside to cool. Beat the eggs and vanilla extract together with an electric mixer until frothy. Then on low speed, mix in cooled chocolate mixture and sugar. Alternatively add in the flour, heavy cream, baking powder, beating mixture after each addition.

Pour mixture into the prepared pan and bake the brownies in the preheated oven for 30 minutes or until the top of the brownies is crisp and the edges begin to pull away from the pan. (The inside of the brownies will be dense and soft to the touch.) Cool the brownies in the pan on a wire rack until cool. Dump the brownie out of the pan and cut into bars and serve. Frost with chocolate or vanilla frosting if desired. Enjoy!!

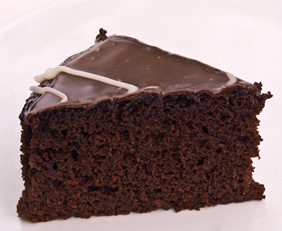
Coconut Flour Chocolate Cake


Coconut Flour Chocolate Cake

Pre-heat oven to 350 degrees. Grease two 9 inch or 8 inch layer pans with coconut oil and dust with cocoa powder.

In an electric mixer fitted with the paddle attachment, combine butter and sugar, and beat together for about 2 minutes. Add eggs in one at a time and beat high speed for about 3 minutes. Add in the vanilla while beating the eggs and butter mixture. In a separate bowl, combine the dry ingredients together and add alternately with the milk to the butter mixture. Beat batter for about five minutes on high speed. Spoon batter into the two prepared cake pans and smoothen out tops. Bake at 350 for 30-35 minutes, or until toothpick inserted into the center of cake comes out clean. Place pans on wire rack and cool for 10 minutes before removing from pans. Cool cakes completely before frosting. Use your favorite frosting to frost the cake.

Peppermint Chocolate cake variation: add 1 teaspoon peppermint extract to batter before pouring into pans and mix well. Frost cake with peppermint frosting or frosting of your choice.

Cupcakes: Make recipe as directed but spoon batter into muffin cups and bake for about 26-30 minutes. Frost after cupcakes have cooled completely. Makes about 24 cupcakes.


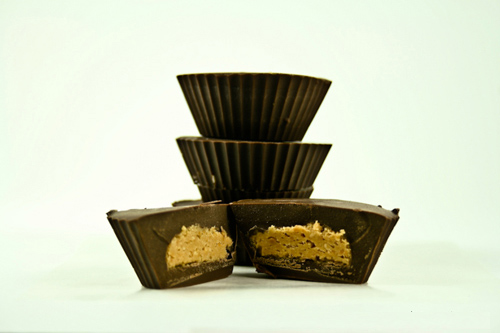
Healthy Homemade Peanut Butter Cups

Healthy Homemade Peanut Butter Cups photo
Healthy Homemade Peanut Butter Cups
photo by recipe author

Servings: 10
Preparation Time: 30 minutes

In a double boiler or a saucepan over very low heat, melt the coconut oil and sweetener of choice. Add the cocoa powder and salt and whisk vigorously until well combined. Add the stevia and remove from the heat.

Note: You can use pretty much anything to make these – ice cube trays, muffin tins, mini muffin tins, mini silicone baking cups, etc. The mini silicone baking cups work the best and give you the most “realistic” Reese’s Peanut Butter cup look.

Either pour or use a spoon to fill the cups 1/4 full. Stick the cups in the freezer for about 10 minutes or until the chocolate is hard. Remove from the freezer and using a 1/2 teaspoon measuring spoon, scoop the chilled peanut butter out and place in the cups. You can use the back of the spoon to press them down just a tad, but leave room for the chocolate to get all the way around the peanut butter. Next, pour or spoon the chocolate over the peanut butter until the cup is almost full and the peanut butter is covered. Place back in the freezer for 30-60 minutes. Now, they are ready to eat!

Don’t forget to store in the fridge or the freezer to keep them from melting!

Recipe submitted by Jessica, Denver, CO

Submit your recipe here!

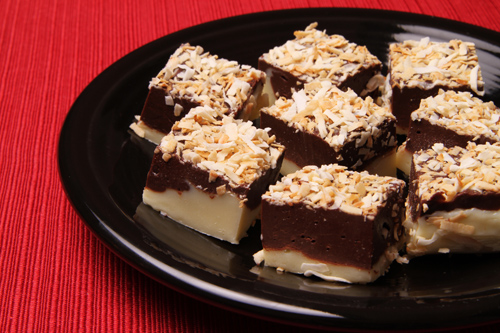
Black and White Toasted Coconut Fudge

You need to make this.

For one thing, it’s pretty. And tasty. They’re delightfully creamy little squares of black and white chocolaty candy topped with toasty golden coconut. It’s all about contrast. Black and white, dark and light, vanilla and chocolate, chewy and crunchy. How can you resist that?

And while you’re at it, you might as well find out how easy it is to make your own sweetened condensed milk. Just follow the link. All you do is throw everything in a blender and blend. Told you it was easy.

Some may argue this isn’t “real” fudge. Real fudge is made by making a real candy mixture, boiling that candy mixture to a softball stage (with a real candy thermometer) and then keeping your fingers out of it till it cools. Just because it’s bubbly and shiny doesn’t mean it’s friendly.

But that doesn’t matter. This candy is just as good as the “real” stuff, as well as being easier (and quicker) to make. The video will walk you through the process step by step, and if you look closely, you’ll see how you can put the white chocolate layer on top (the picture has it on the bottom). Bet you didn’t notice that till I told you.

Enjoy!

Sarah

Black and White Toasted Coconut Fudge

Black and White Toasted Coconut Fudge recipe photo
Black and White Toasted Coconut Fudge
Prepared by Sarah Shilhavy, Photo by Jeremiah Shilhavy

Servings: 16
Preparation Time: 10 minutes

Place white chocolate, condensed milk, 1 tablespoon butter and 1 tablespoon coconut oil into a medium sized saucepan over low heat. Stir until chocolate has melted. Spread unto bottom of parchment or wax paper lined 8×8 glass pan.

Repeat for dark chocolate layer, using the last tablespoons of butter and coconut oil. Spread onto white chocolate layer. The layers will not be even but that’s part of the fun!

Press toasted coconut onto top of fudge and refrigerate or freeze until firm. Cut into small pieces and enjoy!

Note: If you want even layers instead of the marbled look place the dark chocolate layer on the bottom.

* You can make your own sweetened condensed milk with our
recipe here.

Recipe courtesy Sarah Shilhavy

Submit your recipe here!

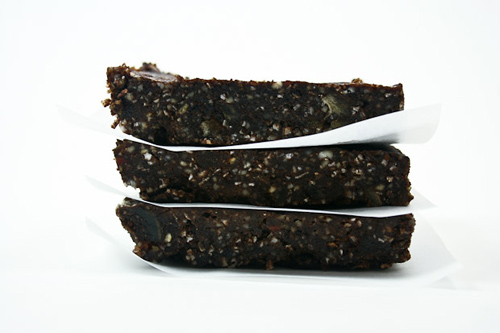
Gluten Free Chocolate Energy Bars

Gluten Free Chocolate Energy Bars photo
Gluten Free Chocolate Energy Bars
photo by recipe author

Servings: 1 9×9 pan
Preparation Time: 1 hour 5 minutes (soaking time included)

Soak the nuts and dates in warm water for about an hour. Remove the pits from the dates.

In a food processor, blend the nuts, coconut, cocoa, and coffee together. Add the pitted dates, coconut oil, vanilla, sweetener, and water and pulse until combined. The dough will be sticky.

Grease a 9×9 glass dish with coconut oil and then dump the mixture in there. Using a spatula (or your fingers), press the dough into the dish until it is packed firmly. Chill in the fridge or freezer for a couple hours before cutting.

Recipe submitted by Jessica, Denver, CO

Submit your recipe here!

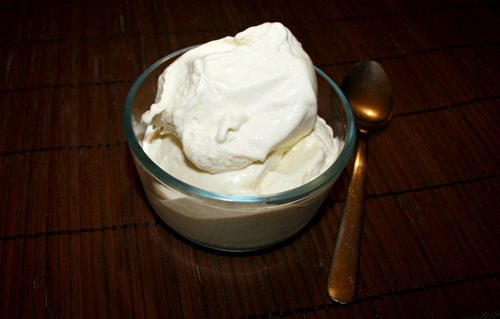
Dairy Free Coconut Milk Ice Cream

Dairy Free Coconut Milk Ice Cream photo.jpg
Dairy Free Coconut Milk Ice Cream
photo by recipe author

Servings: 6-10
Preparation Time: 5 minutes

  • 4 pastured egg yolks
  • 4 cups coconut milk*
  • 3 tablespoons fine organic cane sugar (you can whiz it up in a food processor to make it extra fine)
  • 16 drops stevia (vanilla cream tastes great)
  • 2 teaspoons pure vanilla extract

Mix all the ingredients together in a blender, mixer or food processor, until thoroughly combined. Chill completely in the fridge, at least 4 hours or overnight. Prepare according to your ice cream maker’s instructions.

* For the freshest coconut milk make homemade coconut milk. (See video at this link.)

Recipe submitted by Jessica, Denver, CO

Submit your recipe here!